NOTE: I recently moved the contents of my old blog (ToadMama’s Web Abode) to this new and improved blog. If the images or text look weird, it is because of the import. Posts going forward should look better.
I created this Blog for the sole purpose of sharing my progression from someone that takes decent pictures because their camera has all the right automatic settings to someone that takes good pictures because they understand how to compose shots and capture just the right amount of light. That’s a big distinction. And it is a leap I have yet to make. Because having a camera with all of the right automatic settings can make for a lazy photographer.
So, if you are a person who just likes to look at good pictures, you might find this blog tiresome. I mean, I will be posting lots of pictures, but I’ll be analyzing them, too.
This first post is a good example. As promised, I took some shots this morning with my camera set to manual. That means I have to determine what shutter speed, aperture and ISO settings are right for the amount of light available.
I tried some shots yesterday, but was using a zoom lens with a teleconverter and no tripod, which means it was almost impossible to get a clear image. So I slapped my 50 mm prime lens onto the camera body and stepped outside.
When I say “prime lens,” I mean fixed focus. So, you know how a lot of SLRs have lenses that you turn with your hand to move subjects closer/farther? That’s a standard zoom lens. With a prime lens, to get closer to a subject, you need to move closer. To fit more of a subject in your frame, you need to move back. Folks that are used to having the zoom on think you have some weird, retarded camera when they try to use your camera to take a picture. That’s because zoom lenses have pretty much become the standard lens on consumer-grade SLR cameras.
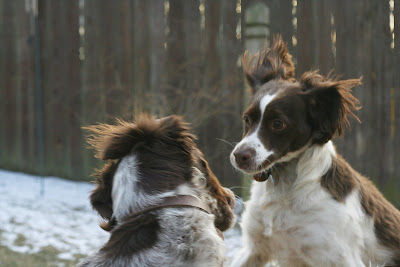
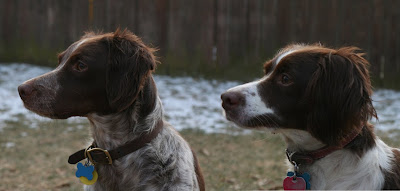
This is the straight-out-of-camera (SOOC) version of the above image. There’s technically enough light and the shutter speed was sufficient to freeze the action without much blur, but the image is a bit dark. You can’t see the detail in Belle’s face.
That’s where post-processing (i.e., Photoshopping) comes in handy. You can use your post-processing software to make all kinds of adjustments.
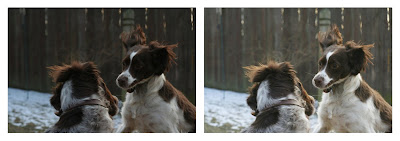
Here’s a side-by-side look at the image before and after processing.
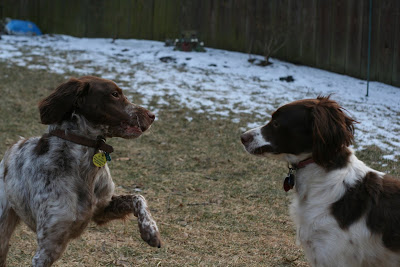
Next time, I’ll have to make some adjustments to the camera settings to see if I can get a better SOOC image. Here’s another before and after look at another image where the same settings were used…
This is the SOOC version.
And here’s the image after processing.
Speaking of processing, you can do some very cool stuff with processing software. One of which is combining images. This is a simple example where I took a picture of K and a picture of Belle within about a second of each other when they were standing pretty close together. Both images shown below are SOOC.
And here’s the merged image…
The images did need to be lightened a bit, but I did that after merging to make sure the light was applied evenly to both. Cool, eh?
I’ll get more into processing at some point. I just thought you’d like to see the results of my manual experiment. I should same “some of” the results, because there were a whole bunch of images I deleted, too.
