# 12 – What event are you currently looking most forward to?
This prompt is like the “trip” prompt. There are several events coming up, and I am looking forward to all of them. But I guess it’s fair to saying I am currently looking most forward to my annual girlfriend getaway.
I’ll be in Pennsylvania in two weeks. With these ladies.
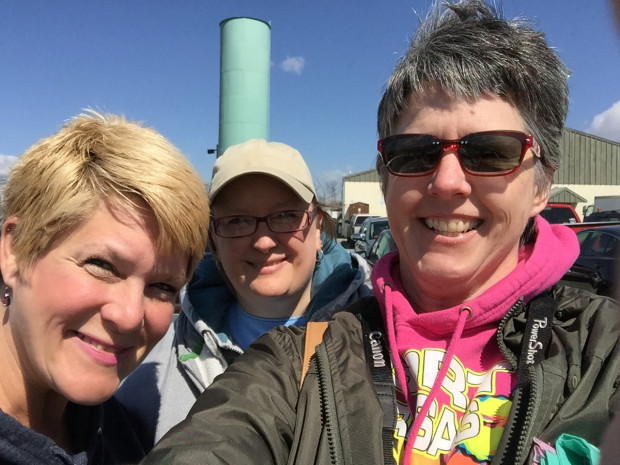
I’ve known them both since I was a kid. Around 40 years? Hard to remember, exactly. I just know it’s been a LONG time. I think this year will be the 22nd year we’ve done an annual getaway.
Four days of fun, food, fun, shopping, and no one to answer to but ourselves. I am really looking forward to it. Really.
# 11 – What are you thankful for today?
Hmmm. I’m thankful for my girlfriends. As evidenced by my response to Prompt #12. I’m thankful for all of my friends, actually.
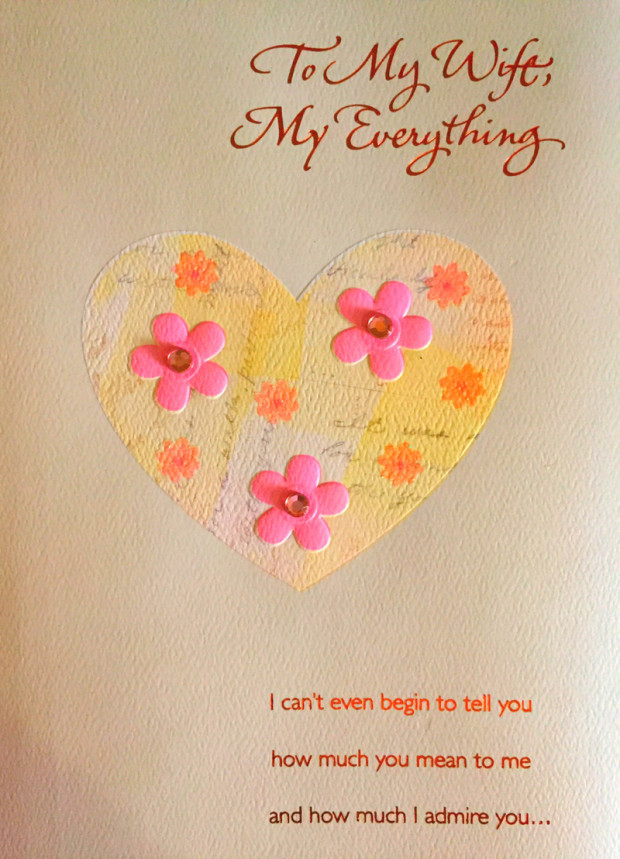
I’m also thankful for my Hubby. I sure lucked out with that selection. He’s the kind of guy who doesn’t just pick any old birthday card because he is simply meeting an obligation. He spends a long time reading a bunch of cards until he picks just the right one. You know, the one that lets me know how much he really loves me. And I love him right back.
I’m thanful for my kids, too. Furkids included.
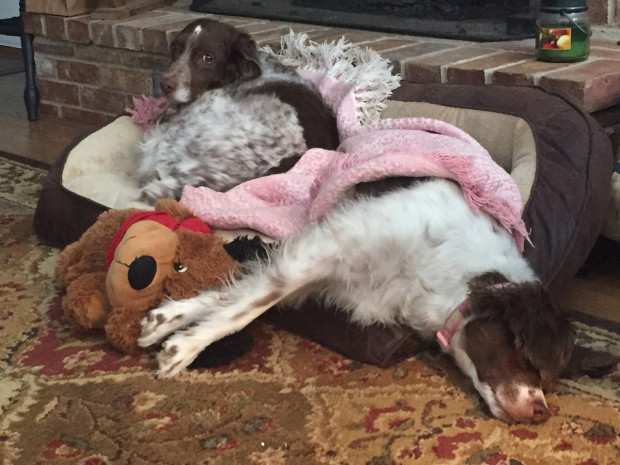
Yes, I know I share a lot of dog pictures. But they make me laugh.
Which brings me to the final thing I’m thankful for… LAUGHTER. It really is the best medicine. It’s also something the girlfriends, Hubby, kids, and furkids keep my life filled with.
# 10 – A story you love to tell.
I thought long and hard about this one. I have lots of fun stories. But I wanted to share something moto-related. There are actually two funny stories with a motorcycle theme.
The first involves the motorcycle safety training class that Hubby and I took together back in late 2000. It was held at the Department of Motor Vehicles in Glen Burnie, Maryland, a suburb of Baltimore. I think about half of our classmates were African American.
Our instructor was this cute little white guy from Minnesota. Or maybe it was Wisconsin? I don’t remember exactly, but I do know it was one of those Midwestern states where the people have an unusual accent. So the way he said some of his words was interesting and definitely different.
We were in the classroom, doing this exercise where he asked the class to name normal, everyday things that posed road hazards. When someone gave an answer, he’d write in on a chalkboard. Or whiteboard. The list got pretty long. He kept saying we were forgetting something, and kept giving clues like, “There’s a lot of it around Baltimore. It’s all over the place. It can be dangerous. Really important to watch out for. Sometimes it can jump out at you if you’re not paying attention.” Etcetera.
Finally, he gave up on us and said it himself. He said what everyone in the class thought was… BLACK GUYS.
There was quite an uproar. He looked confused, but wrote his words on the board anyway.
BLACK ICE
The uproar turned to laughter. He was definitely perplexed, so we had to explain to him what we thought he’d said. We all got quite a chuckle out of THAT one.
The second story is much shorter. It’s a snippet of conversation I overheard one day while in a visitors’ center gift shop along Skyline Drive. The nice volunteer manning the cash register — an older lady (close to elderly, but not quite) — was chatting with another visitor about speeding along the Drive. She told him most people obey the 35 mph speed limit, which is strictly enforced. Most people except the young kids riding those CROCK ROTCHETS.
I can’t unhear that one. From that day forward, I’ve thought of sportbikes as crock rotchets.
This Year’s Brave, Bold Bloggers…
Be sure to visit their blogs to see how each interpreted this challenge.