Coolest Shabby-chic Kitchen Table in Lancaster County

Earlier this year — February, to be exact — Aunt Bertha paid Hubby and I a visit. She’d never been to Warrenton, so I got to show her around town, introduce her to some of my friends, show off all of my projects, and take her to a number of my local thrift store haunts.

Aunt Bertha and Me

She told me she’d been looking for some new kitchen chairs. The ones she had were too tall and cut into the back of her legs when she sat on one for any extended period of time. We didn’t find any while she was here, but I told her I’d keep my eyes open for her.

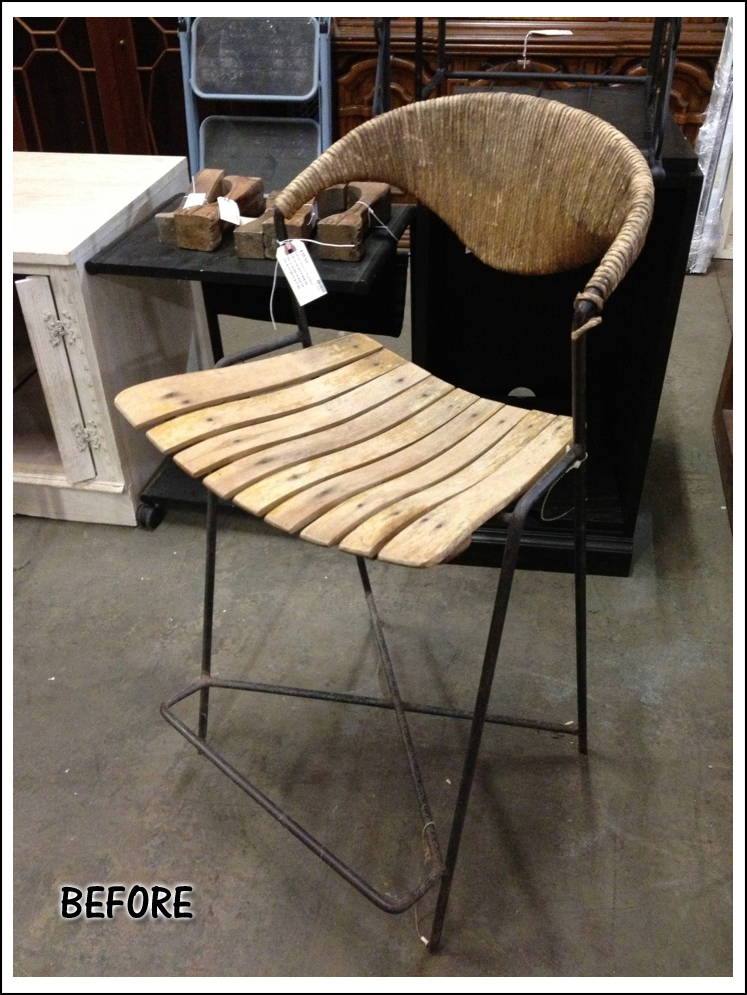
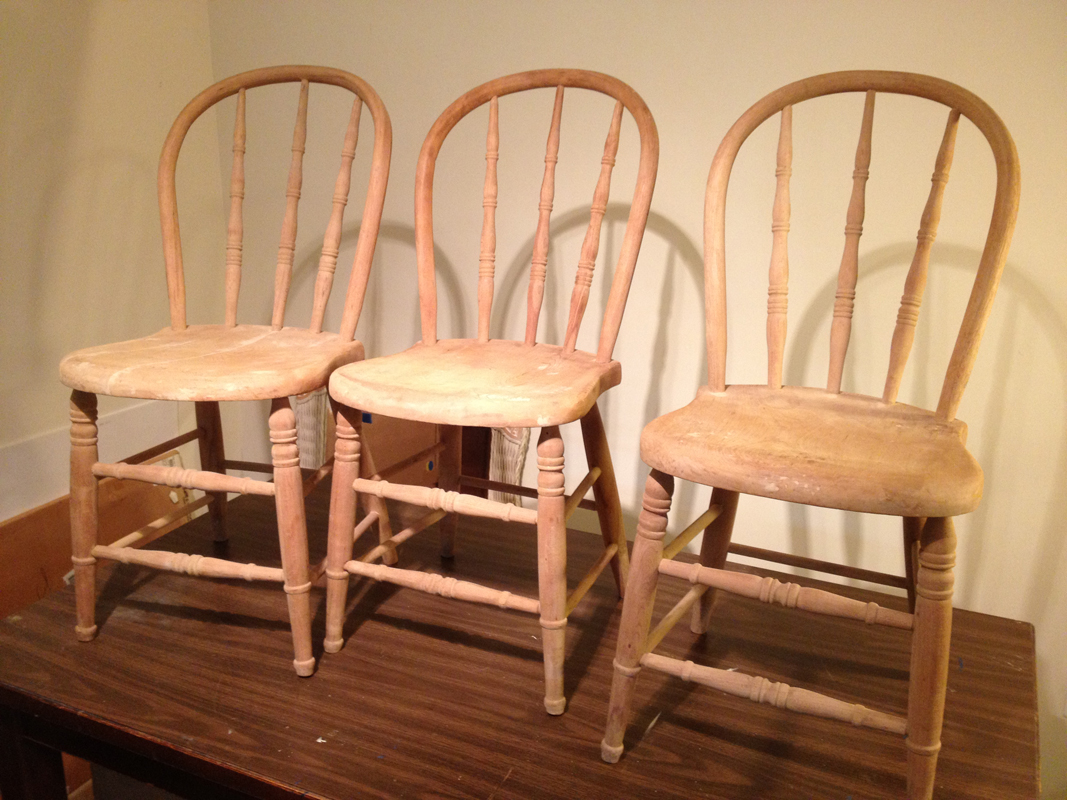
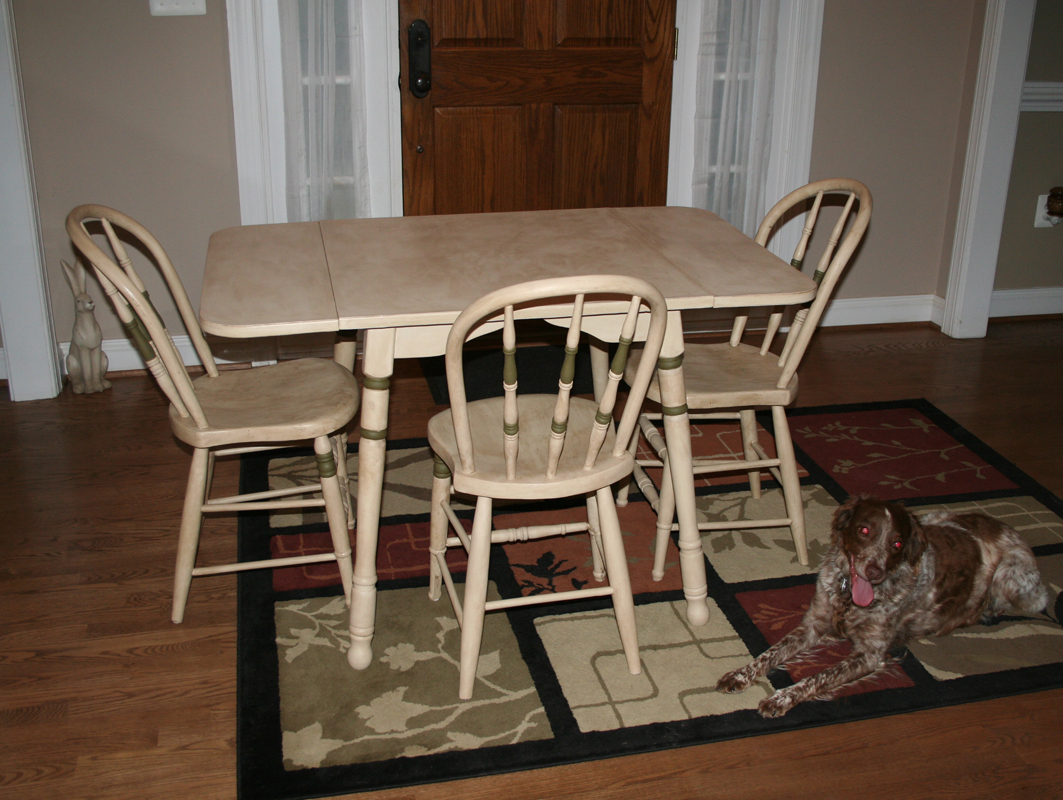
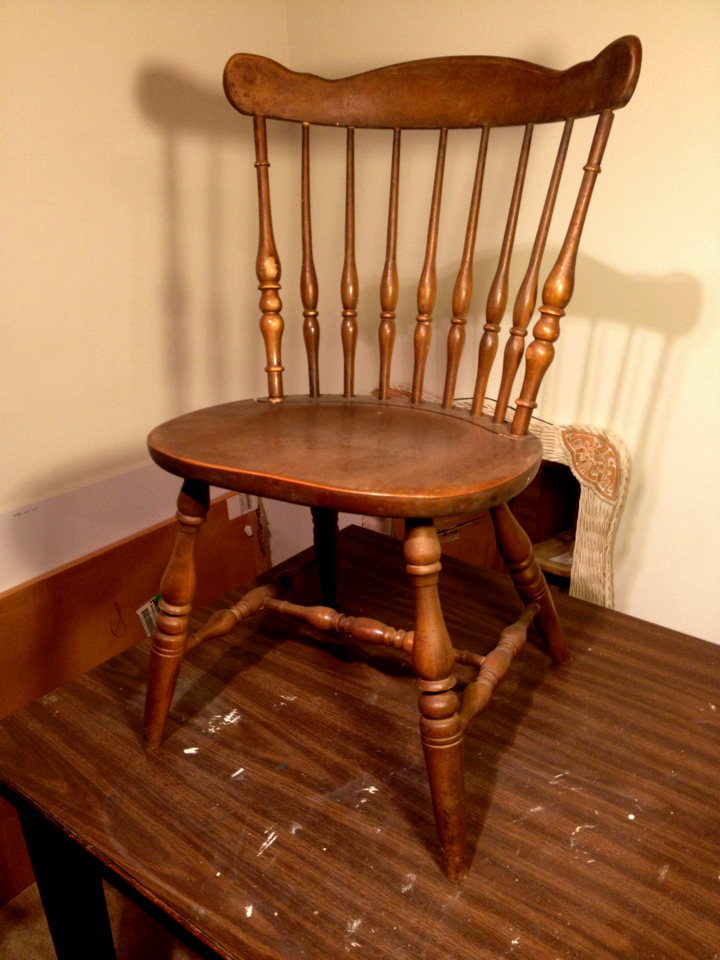
A few months later, I went to the Fauquier Habitat for Humanity’s ReStore and saw what looked to be the perfect size chairs. They were old (I’m guessing late-60s or early 70s), dirty, and ugly. But they were comfortable, were made of solid wood, and they only cost $20 each. Only three were available, but Aunt Bertha had another chair already that she said she could use.

First, I told her I couldn’t paint them. Then I decided I could, but it would be a while before I got to them. I have far too many projects in the queue!

2_Photo 3
One of the chairs, after being cleaned.

When I told her I’d paint the chairs for her, she asked if I would paint her table to match. And that fourth chair.

I told her yes, and said I’d paint a couple of the chairs here at home then take them up to her house, which is just outside of Lancaster, PA, and spend a long weekend there painting the other stuff. She lives very close to Dad, so that would give me an opportunity to visit, too.

1_IMG_4347
The table and her old chairs, before.

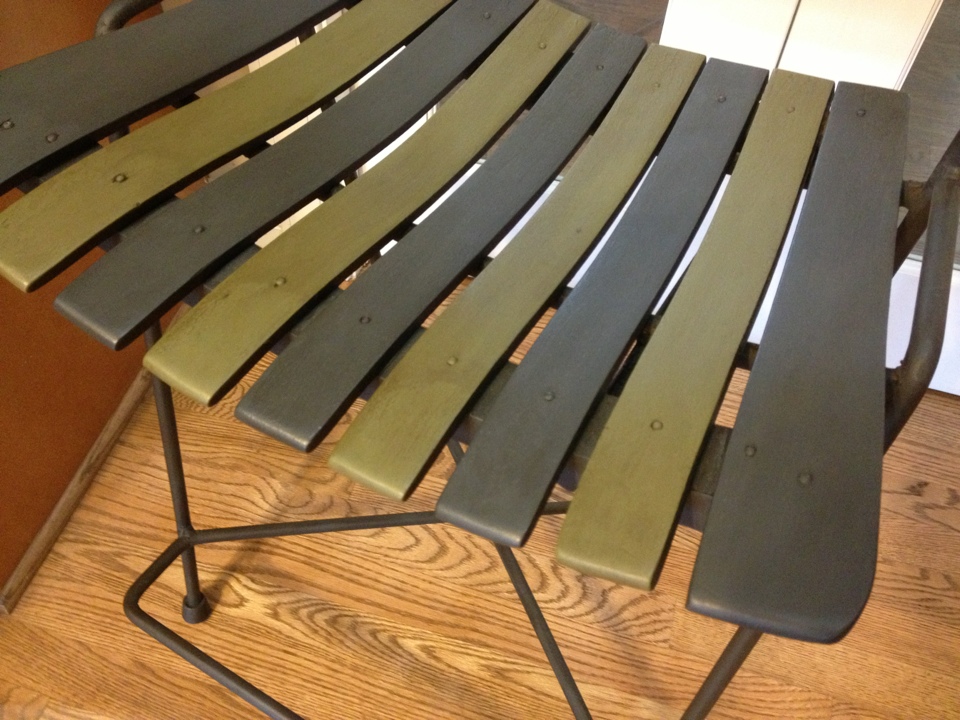
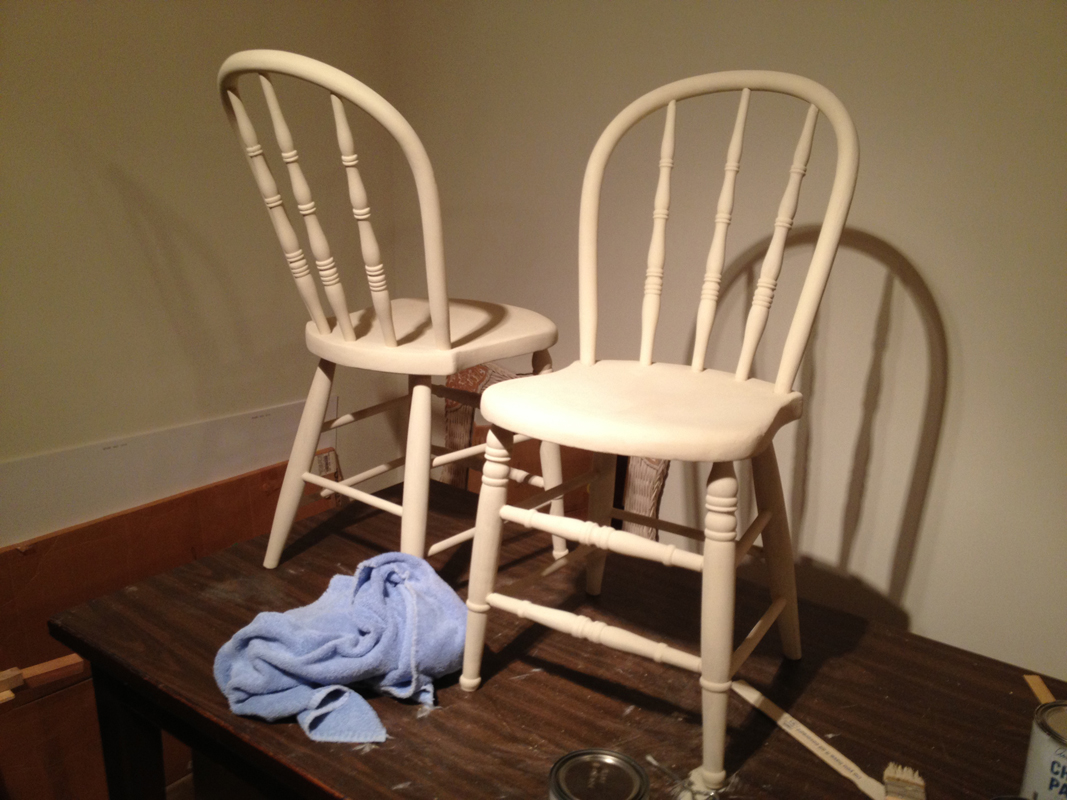
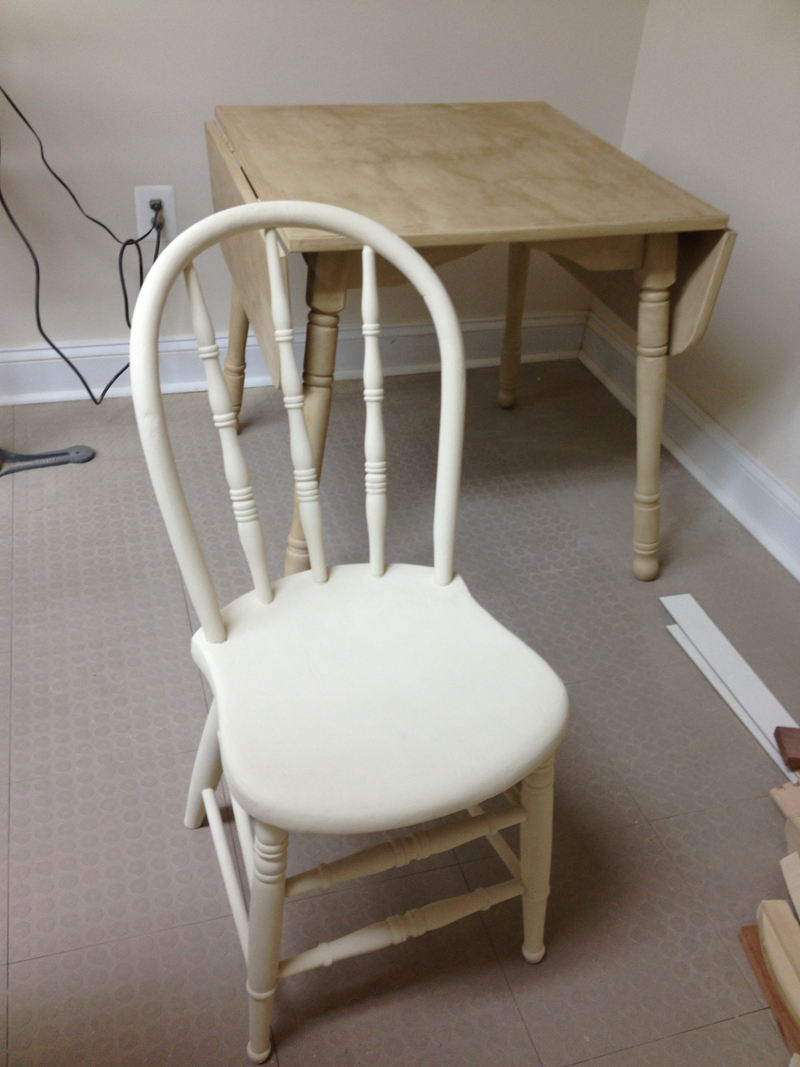
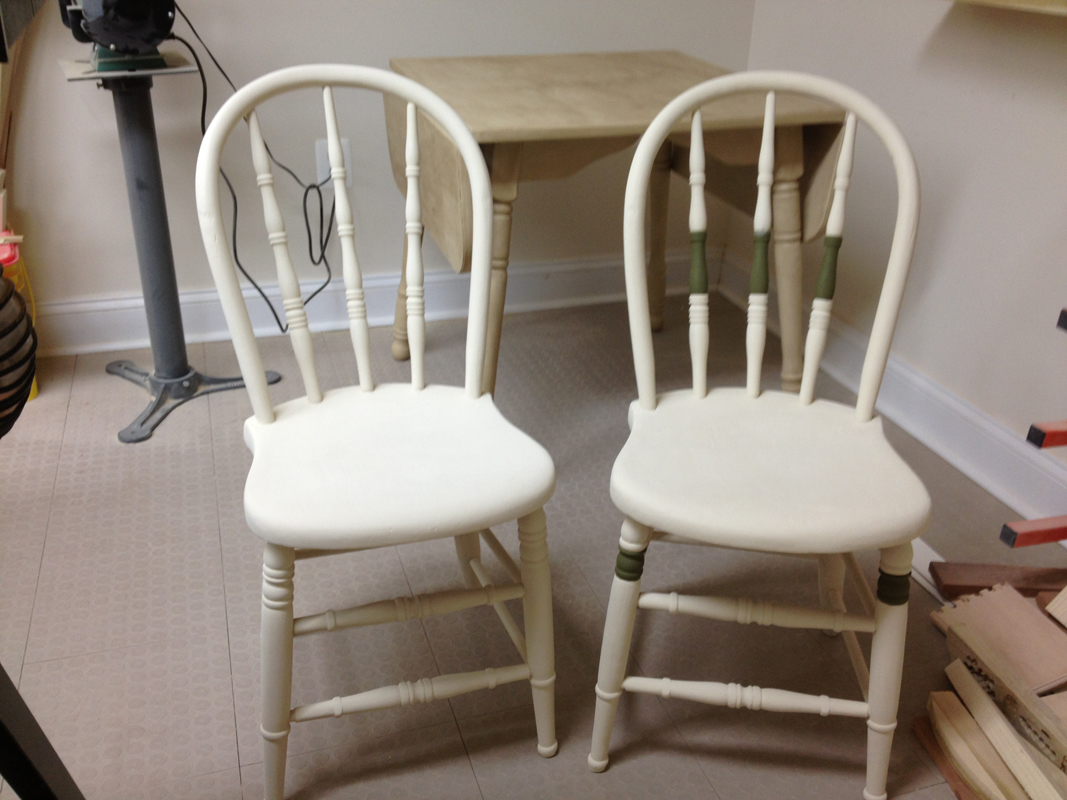
The difference in the chair after a couple coats of Old White Annie Sloan Chalk Paint (ASCP) was quite dramatic.

3_Photo 1
Old White Annie Sloan Chalk Paint

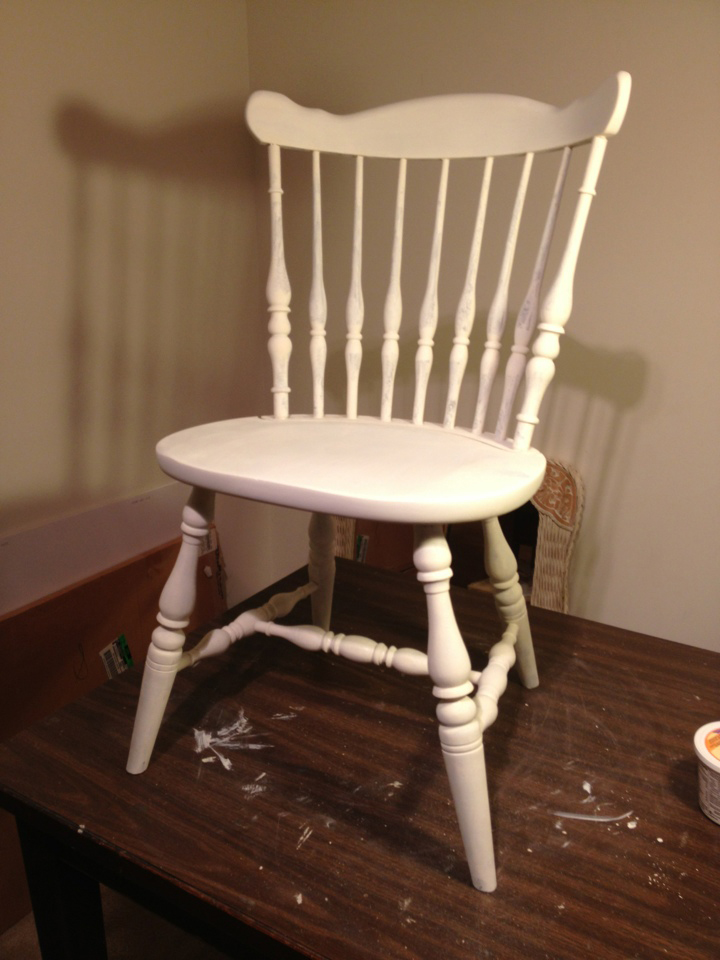
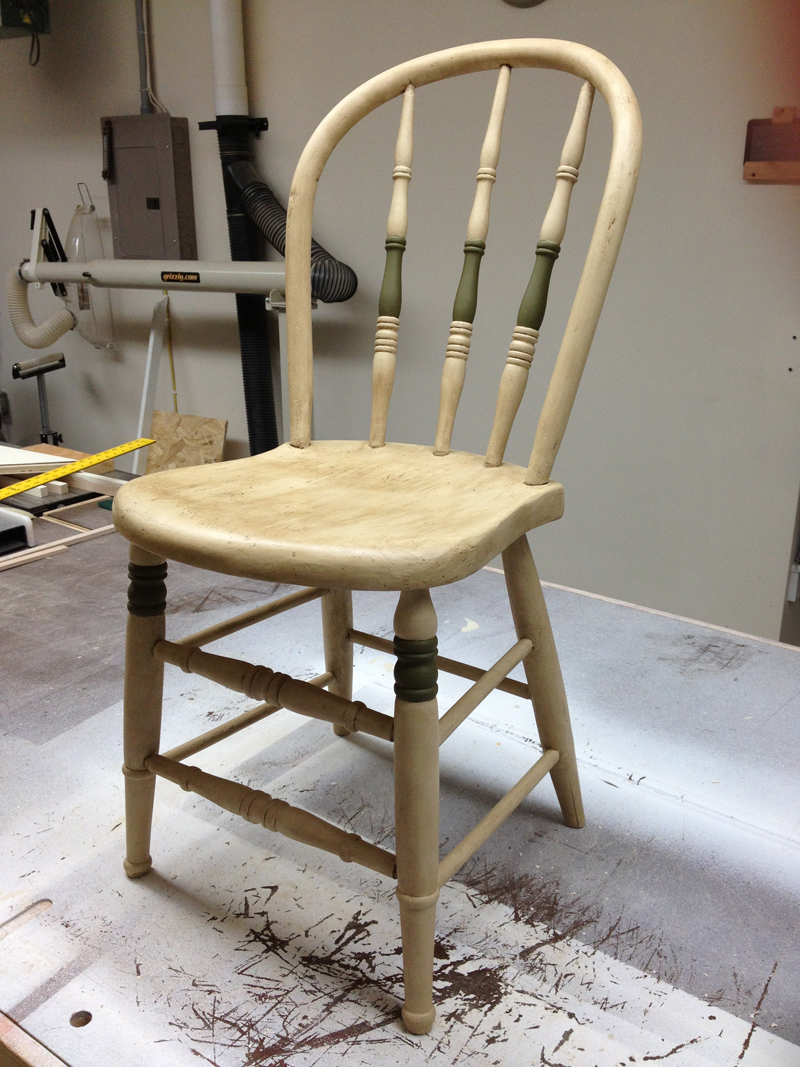
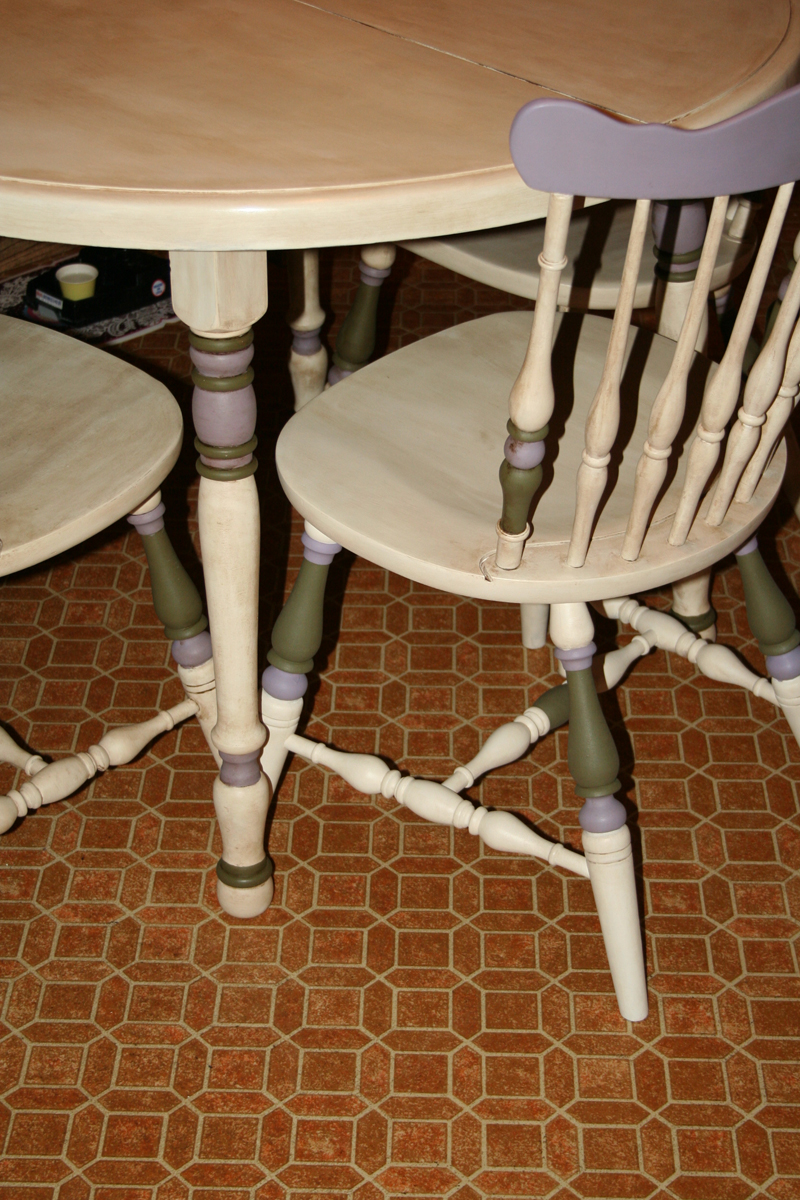
It looked so much better, I could have easily stopped there. But to me, the real fun is in the details.

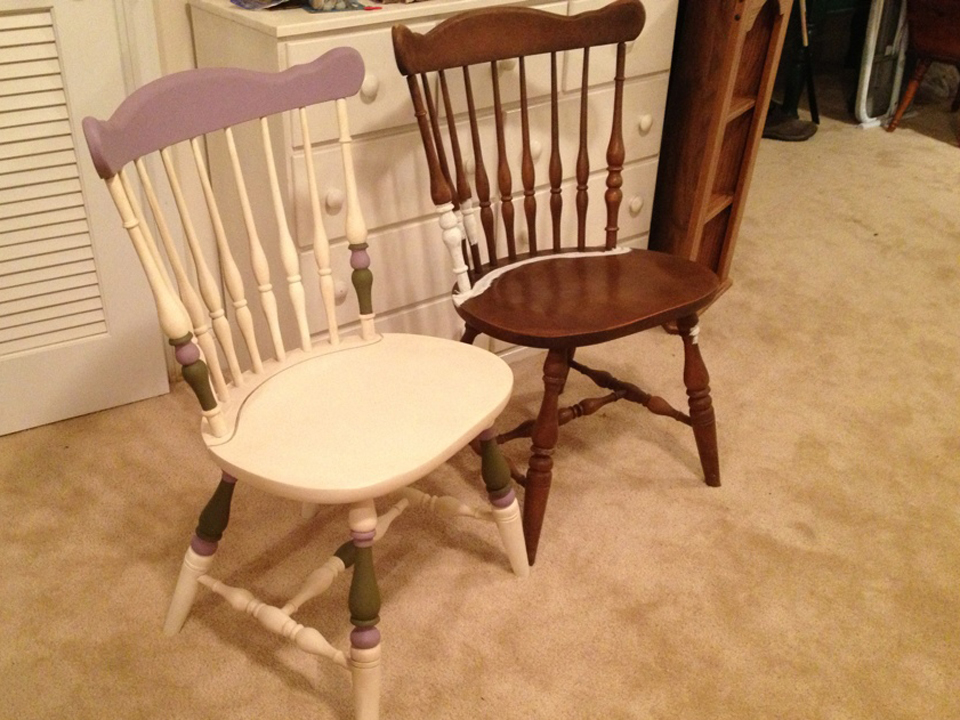
Yes, the details made the project take much, MUCH longer, but I wanted to do it right. I wanted Aunt Bertha to have a kitchen set she could really be proud of.

4_Photo 10
Chair with details compared to plain wood.

I forgot to do a before and after shot until after I’d already started painting the second chair.

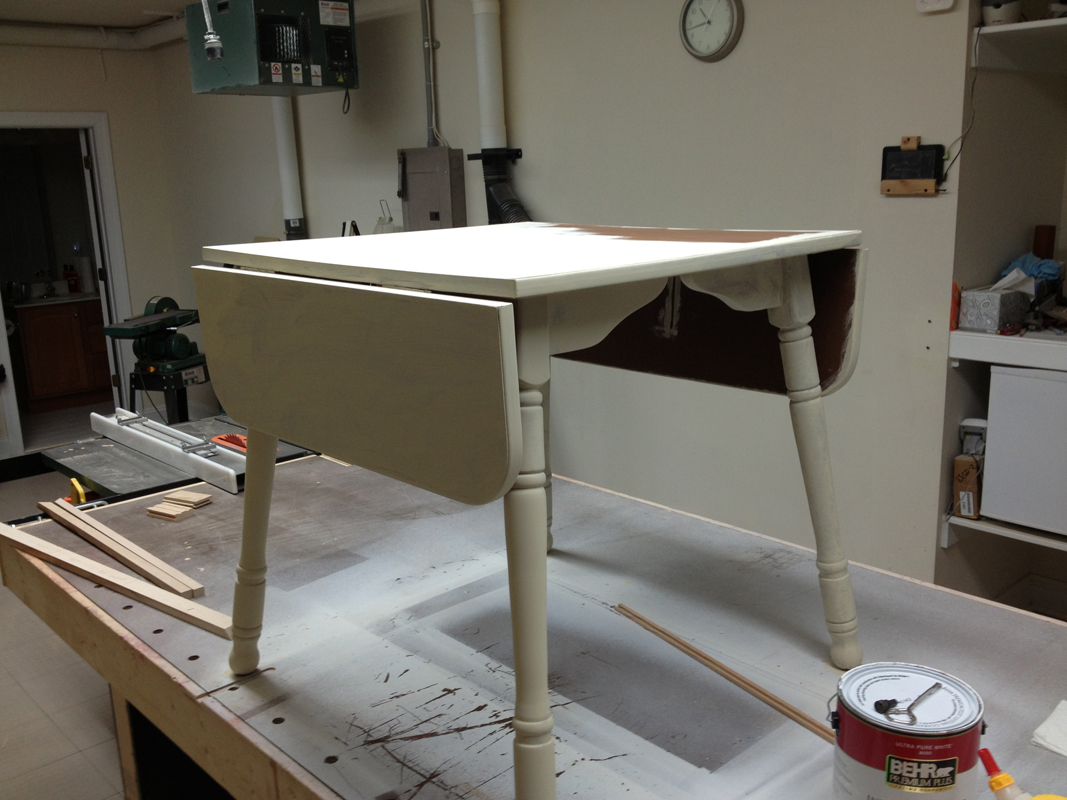
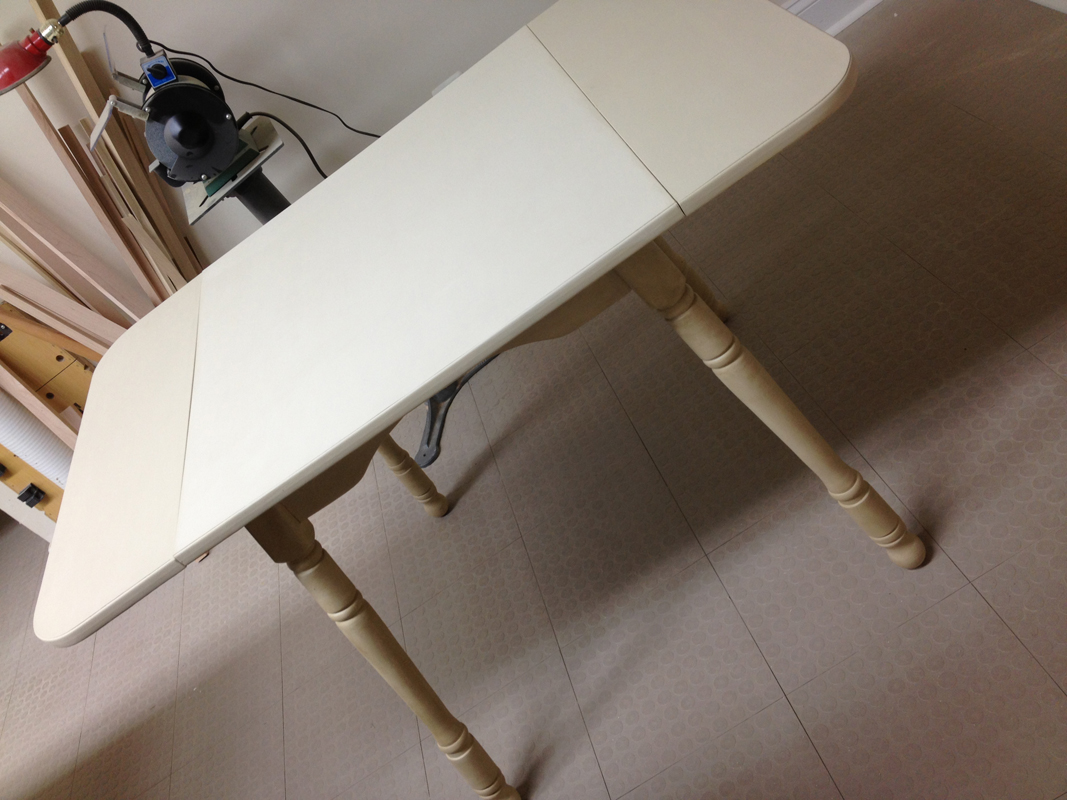
This past Saturday, I loaded up the car and headed North. I wasn’t there long before we dove into painting the other two chairs and the table.

6_Photo 18
Me, hard at work.

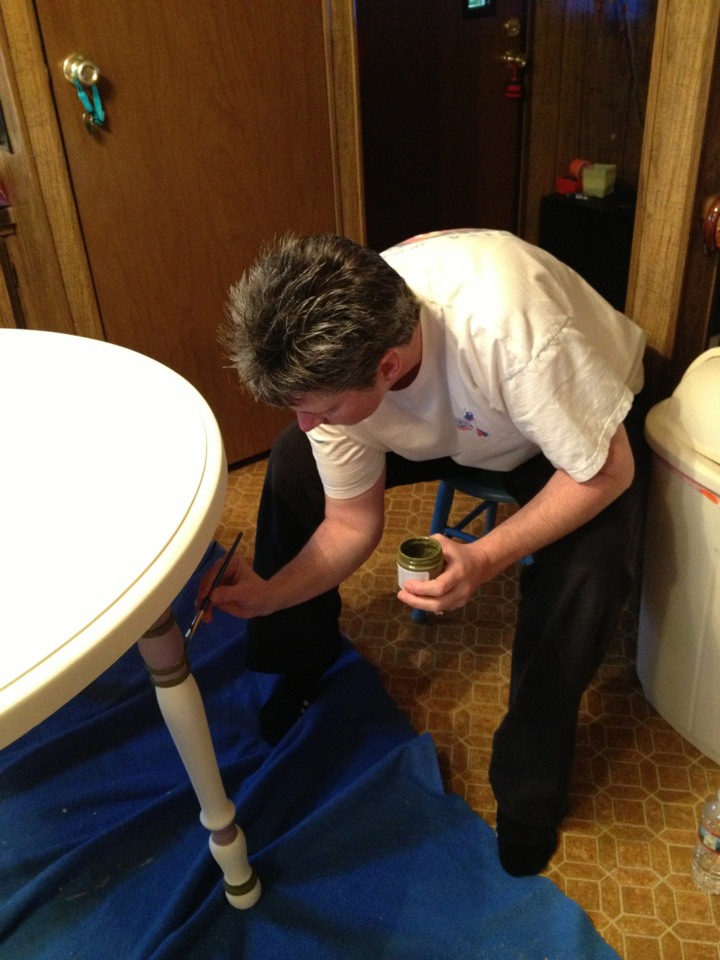
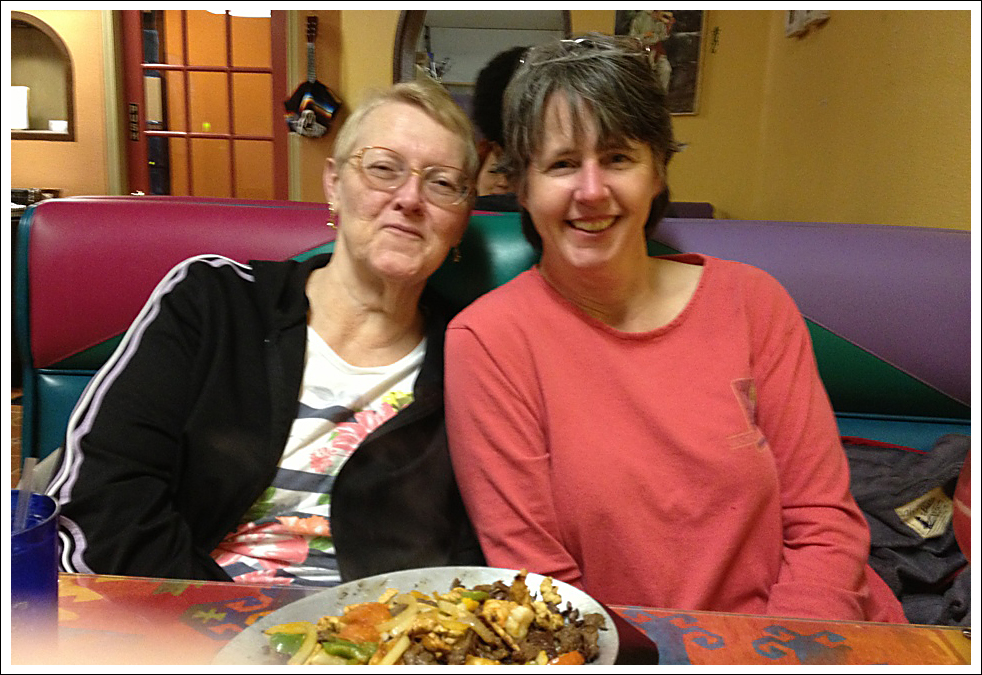
Aunt Bertha, who turns 68 in February, helped a lot. I put her to work painting one of the chairs and then the table. Once everything had the Old White base coat, I gave her some quick training and then put her to work waxing. I feel horrible that I forgot to get shots of Aunt Bertha at work.

She really was a very big help. I could never have finished without her. What I thought could be done by Monday night, ended up taking until Tuesday. If she hadn’t done so much work, we would never have finished.

I didn’t paint the whole time I was up there, I visited with Dad and Aunt Pearl, too. And I actually worked from Aunt Bertha’s house on Monday.

I am horrible at estimating how long these painting projects will take.

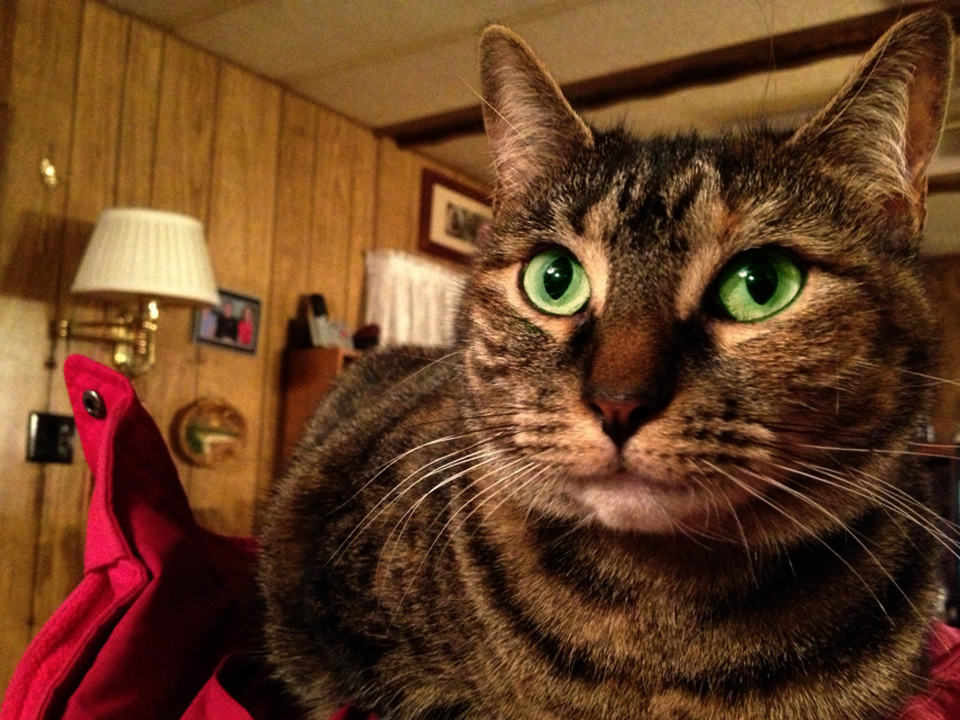
Aunt Bertha’s cat, Missy, who she just adopted about seven months ago, really watched me closely the whole time I was there.

Missy
Missy

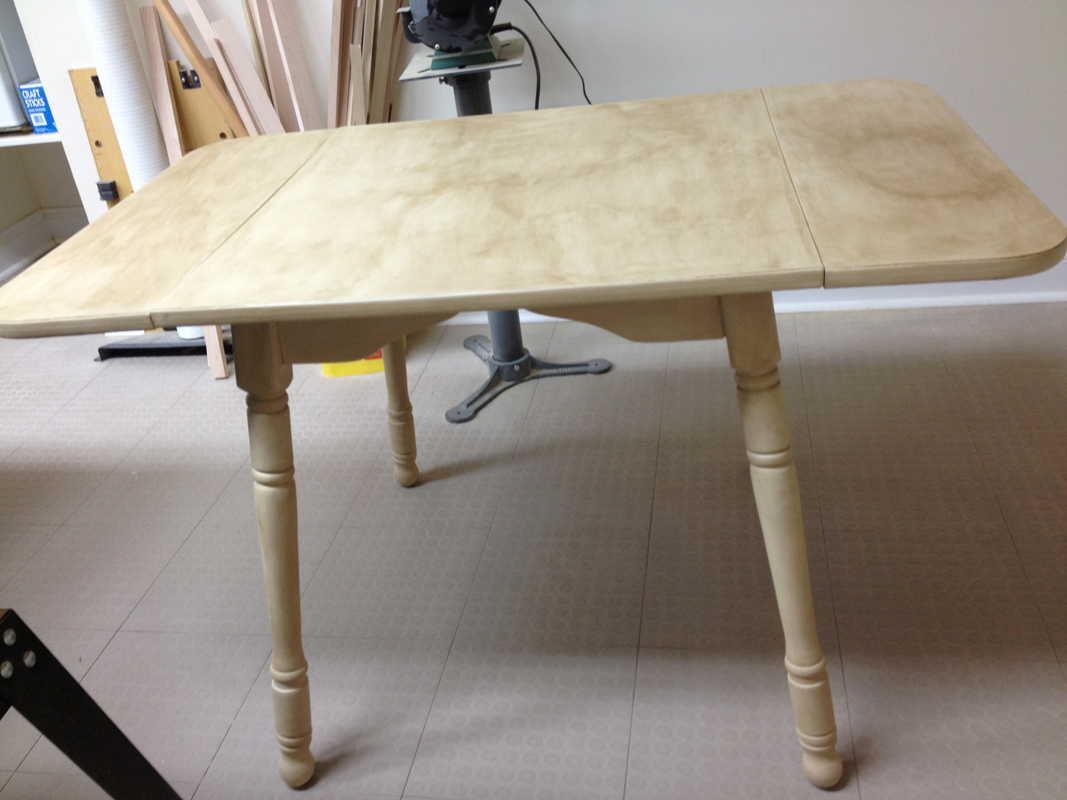
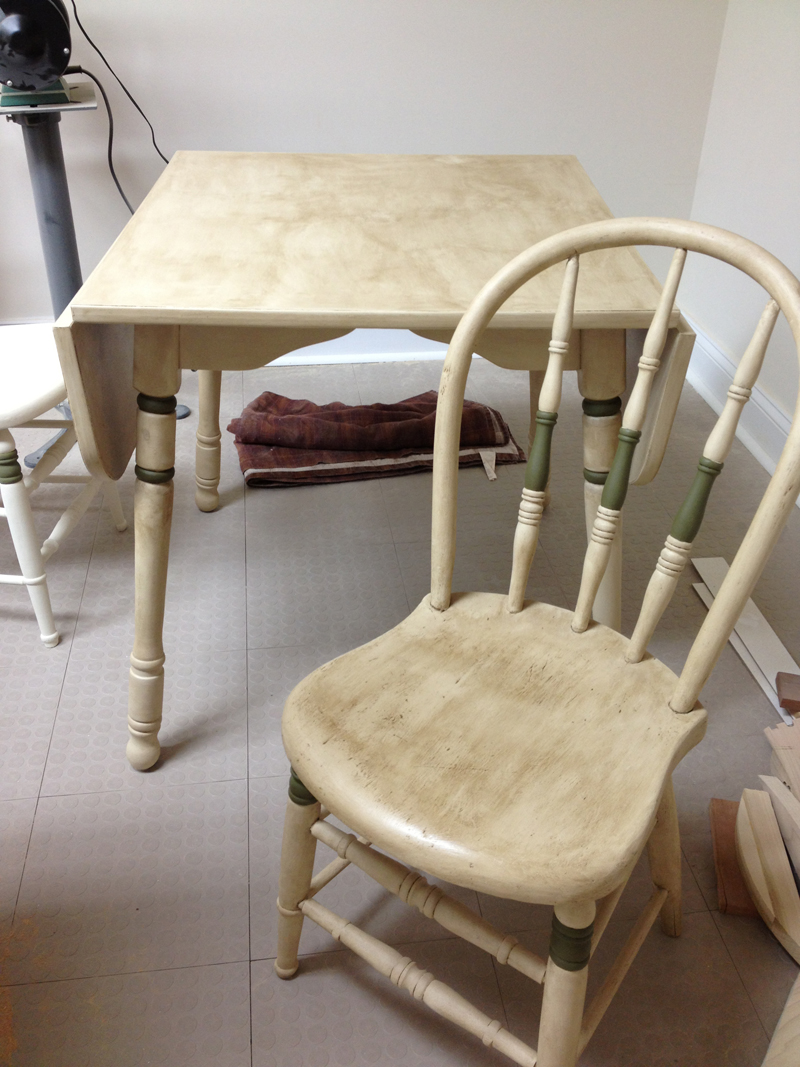
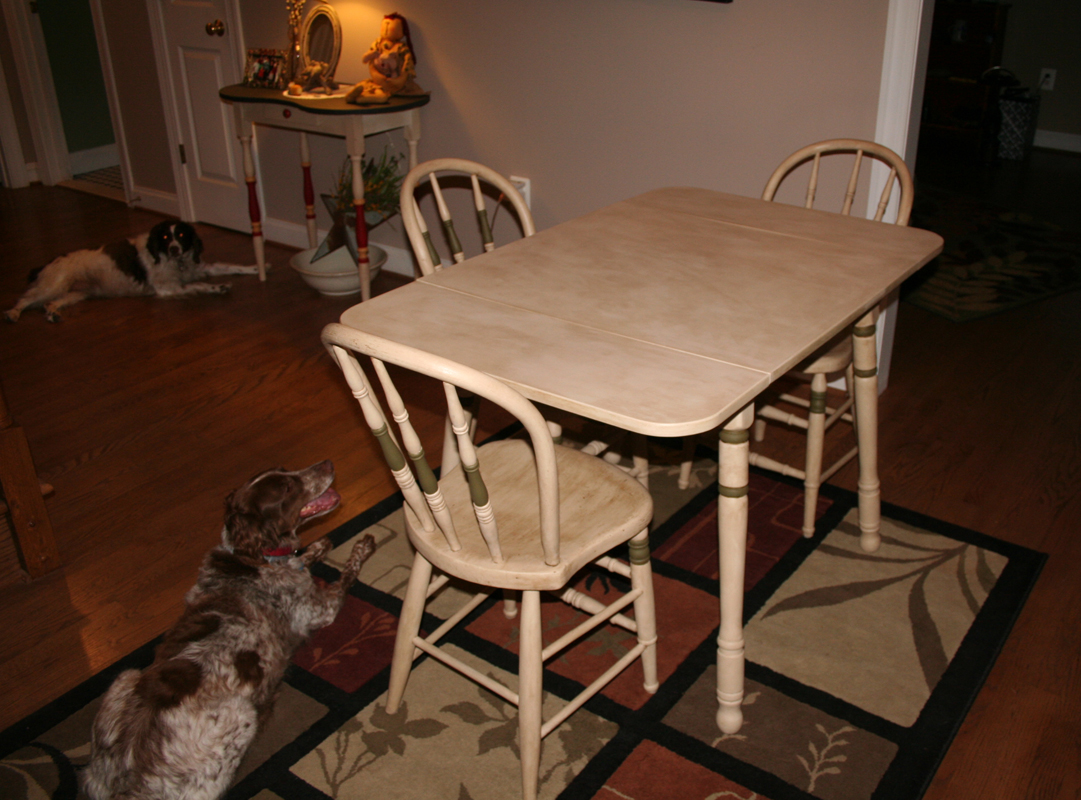
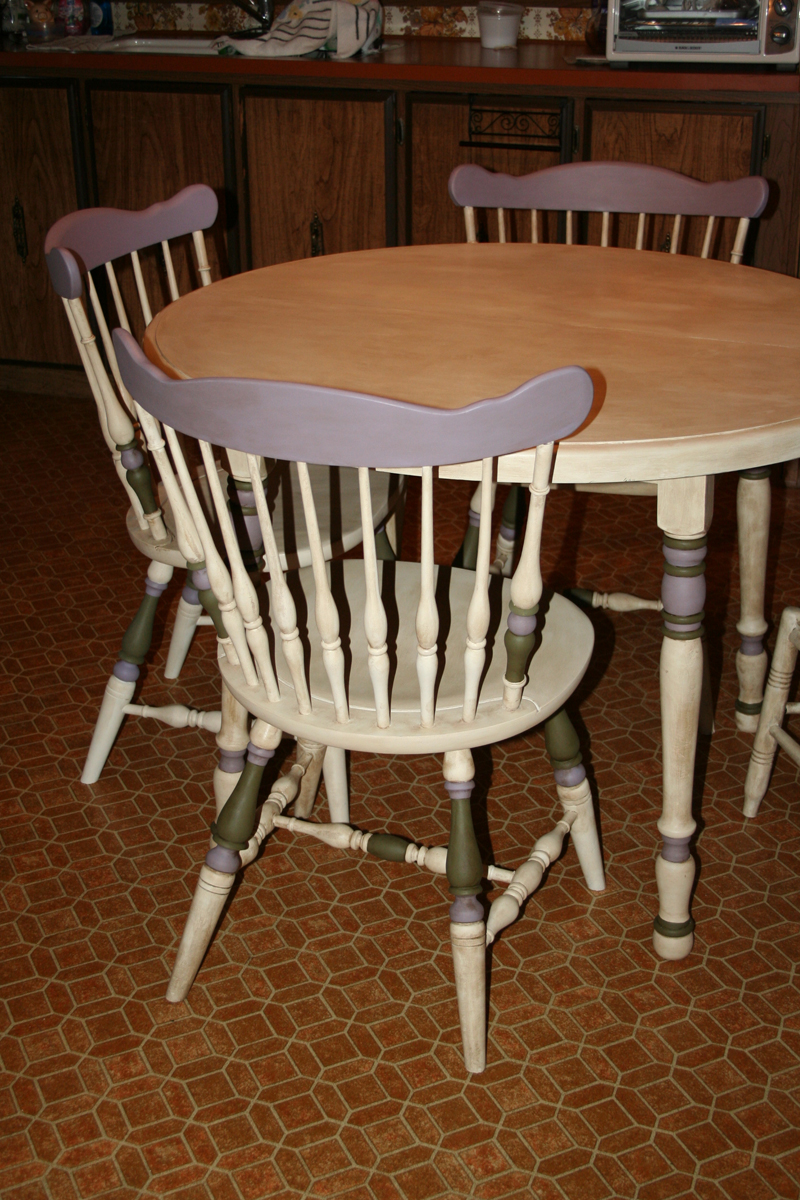
Finally, late Tuesday afternoon, the project was finished.

8_Photo 21
Aunt Bertha’s newly upcycled table and chairs.

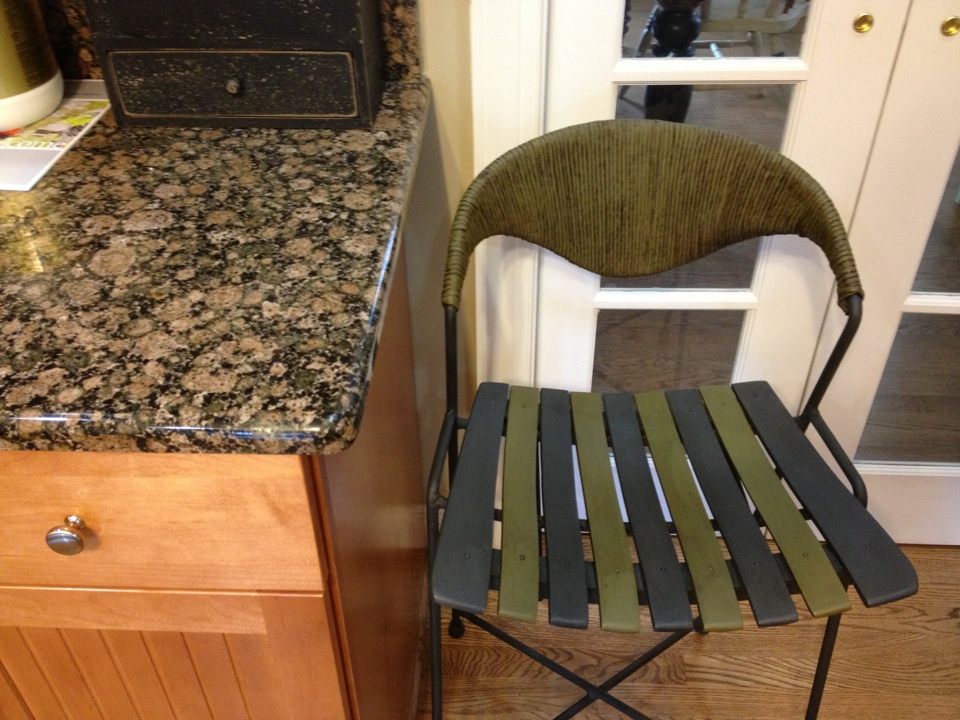
After finishing the first chair here at home, I told Aunt Bertha she was going to have the coolest, up-cycled, shabby chic dining set in all of Lancaster County. She was quite tickled when she saw the painted chairs for the first time. And we are both very pleased at the final, end result.

9_IMG_8868
Details


10_IMG_8866
Details

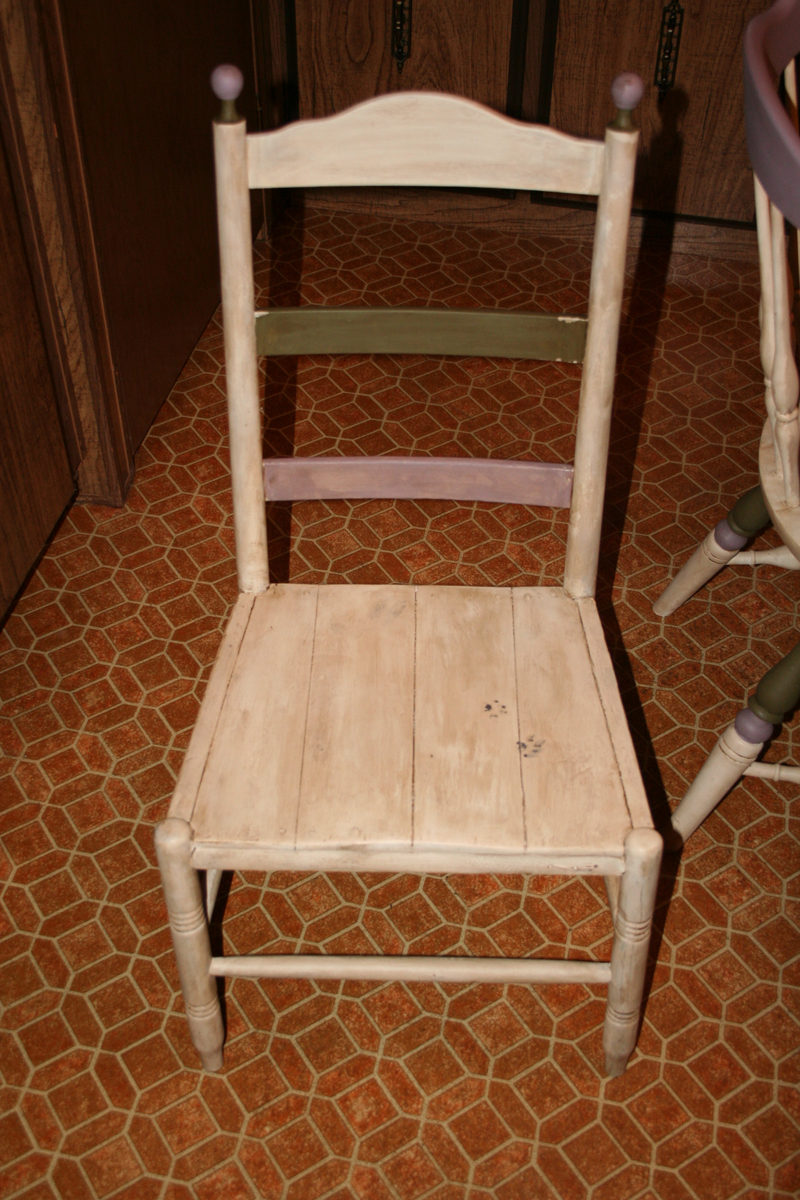
We’ve both been kicking ourselves for not taking a picture of that fourth chair she’d already owned. A chair which my Dad had given her. Previously, it had belonged to my maternal grandfather (born around 1915?). It was originally a rocking chair, but my grandfather had cut the rockers off of the chair, which he always kept beside his bed. Most likely, it was already old when he got it. We’re pretty sure it is Black Locust, which is a very hard wood.

Before we applied paint, the chair was a really, really dark, walnut brown. Now, it’s much brighter.

11_IMG_8876
Old, orphan chair.

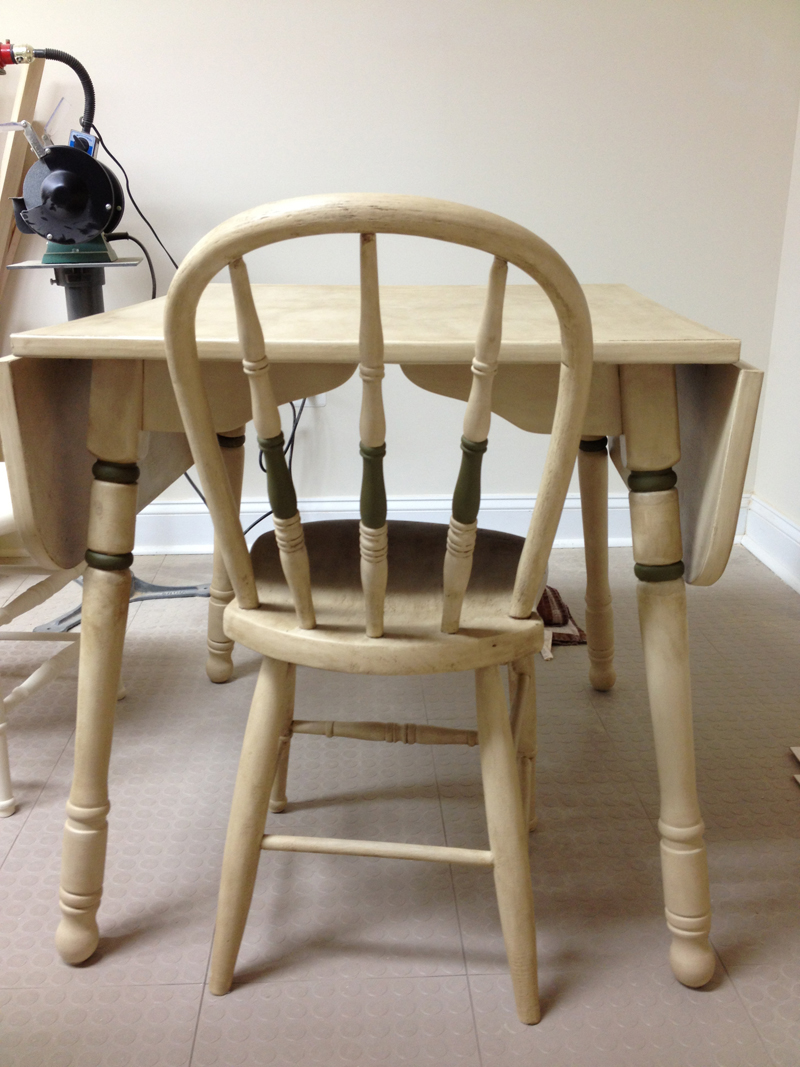
The “new” dining set brightens the whole kitchen. And remember what I said about details? For some projects, adding details is what really make a piece or pieces special.

We distressed this chair a bit more than the others.

12_old chair details
Details add an extra special touch.

And while watching Missy watching me, I had an epiphany. I thought she might enjoy helping. I wasn’t sure how Aunt Bertha would feel about it, but promised I’d do the dirty work in case it really pissed Missy off.

14_missy
I had to assist a bit…

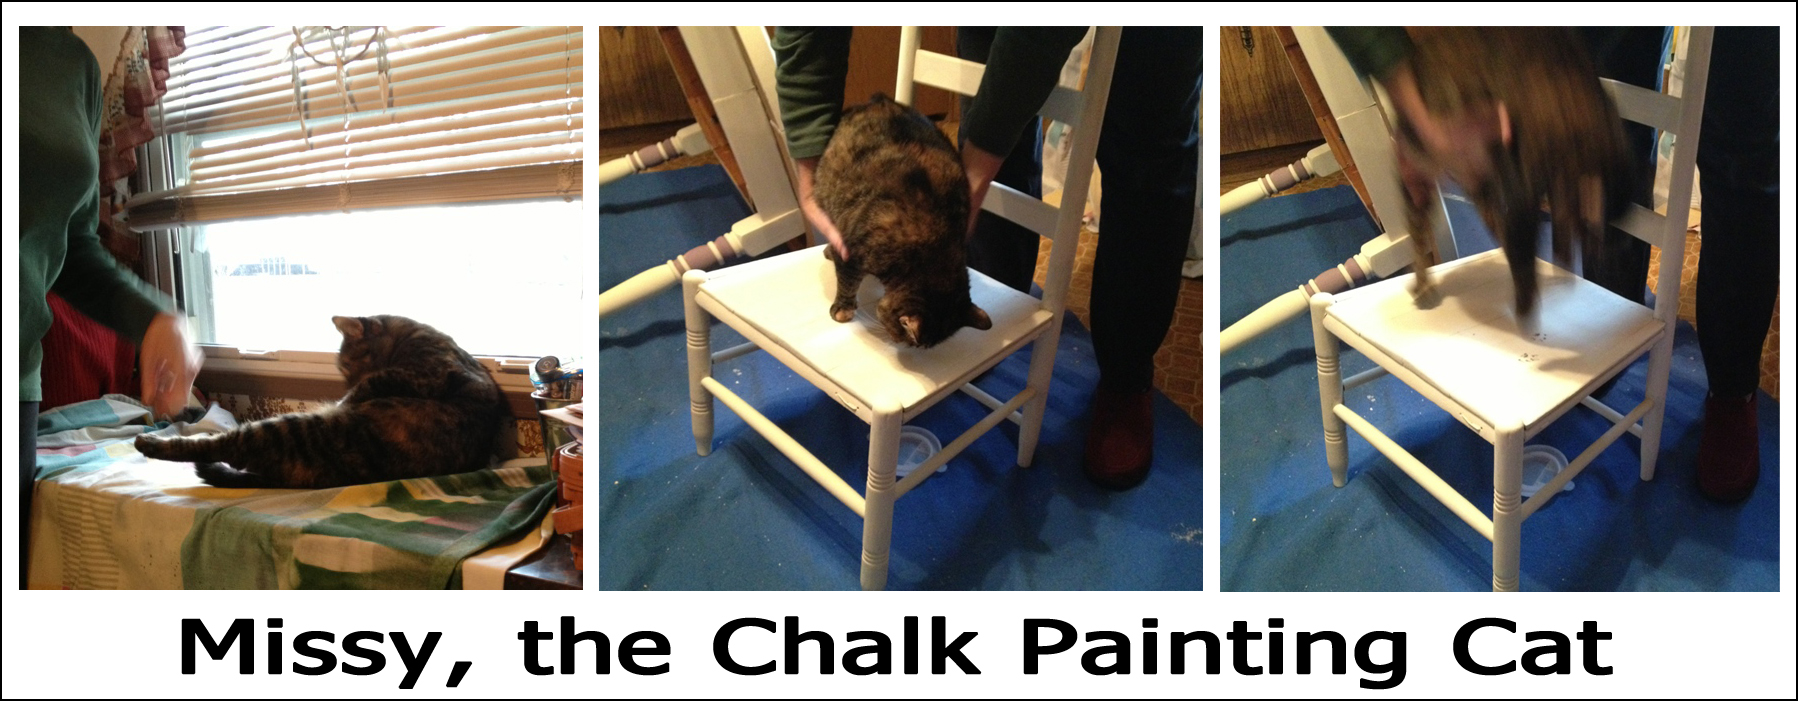
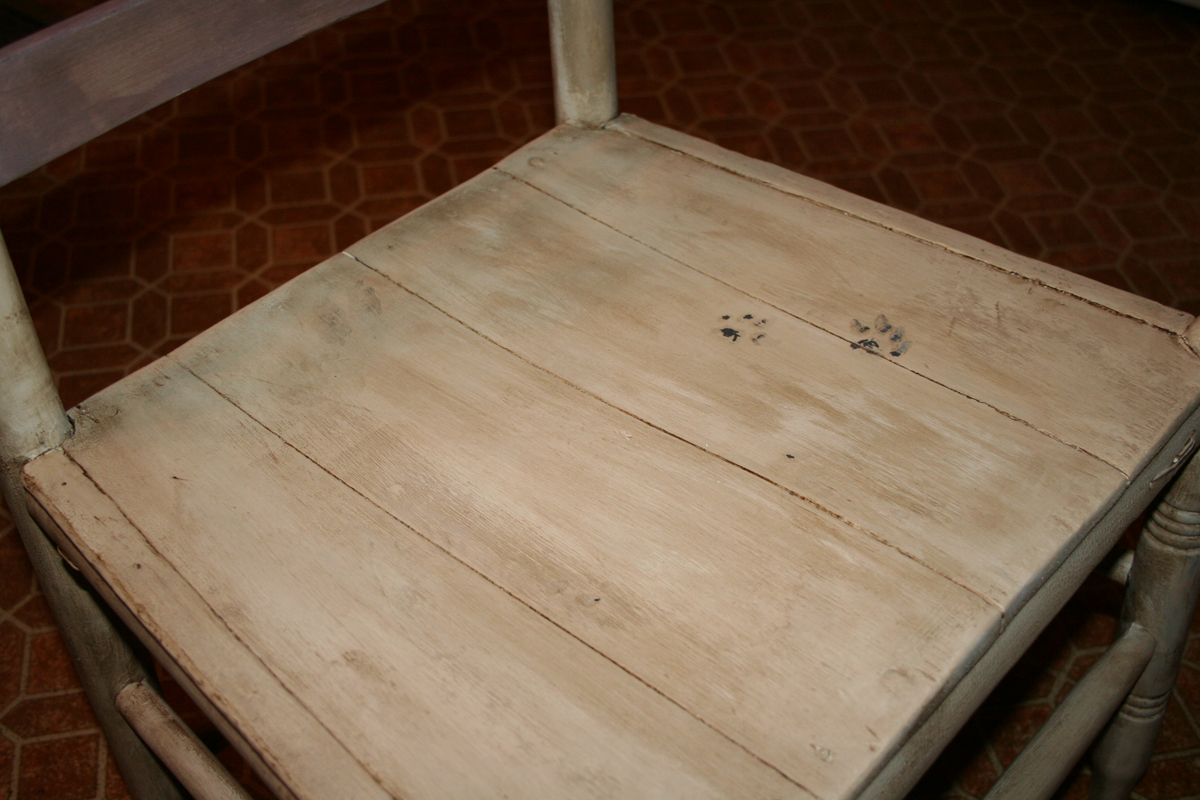
Missy’s paw prints will forever be seen on the seat of this chair.

13_IMG_8884
Missy’s special touch.

So, there you have it. What do you think?

She Has Risen…

Yep, I’m alive. Well, even. I’ve just been neglecting the blog again.

When I talked to my oldest daughter last week she said, “Wow, you’ve been busy.”

Confused, I responded with, “Um, I have?”

She went on to say she guessed that’s why I haven’t posted here lately. Truth is, I have been kind of busy, but that’s not why I haven’t posted. I just haven’t felt moved to post, I guess.

Anyway… I’m back. I’ll pick up with the vacation re-cap next time. For now, I have to share my latest chalk paint re-do.

Stool_before
Worn-out Kitchen Stool

A while ago, I bought this old, worn-out-looking stool. Its base is made of very heavy iron. The seat is real hardwood. And the back is wicker. The iron was dirty and pitted. The polyurethane coating had almost completely cracked and peeled off the seat (a good thing!), the wicker was coming unraveled, and it was missing its feet. Think of a high-heeled shoe that has lost the little rubber thingy from the heel, leaving metal exposed, and you’ll get a good picture of what the feet were like.

But it was quite comfy. And, the best part, it cost me around $30.

Hubby thought I was nuts, as usual. But I had a vision.

I needed a “visitor’s seat” for our kitchen. So no one ever again feels compelled to sit on my counter. Yes, as in on top of the counter (like this).

Call me old-fashioned, but I hate seeing people do that. It’s not even a hygiene thing for me, I just think it’s something that shouldn’t be done. Period.

The stool sat in the basement (in my LONG project queue) for months. Hubby was kind enough to buy and attach some new little rubber feet for me. I reattached the loose wicker with good old Elmer’s Glue (30-second fix).

Then, this past weekend, I FINALLY got around to painting the thing.

And here it is…

Photo 4
“New” Stool Revealed

I used Annie Sloan Chalk Paint (ASCP), of course. There’s Graphite on the metal surfaces, some of the wood, and the little rubber feet, plus Olive on the wicker and some of the wood. Then it’s all sealed with a thin coat of ASCP Dark Wax.

Photo 6
Close-up of the Seat

The only prep work required, besides adding new feet and re-gluing a bit of wicker, was to dust the thing off. Really.

Photo 3
“New” Stool

I just love how the Dark Wax gets into all the nooks and crannies.

Photo 2
“New” Stool

Of course, I only bought one stool. So if more than one person wants to hang out, seated, in my kitchen while I prepare food and/or beverages, we’ll just have to drag some chairs in.

To fully appreciate the difference, you need to see them side-by-side…

Before and After
Before and After

Not bad for an old, worn-out stool, eh?


Conjuring-inspired Chalk Paint Project

This post is for all my friends who have no interest in cute painted furniture and other home decor items so get bored with me talking about Annie Sloan Chalk Paint (ASCP).You can paint anything with that stuff. Really.

Read on to see how I’ve proven that there are NO LIMITS to what you can transform with ASCP.

It really is magical stuff. It sticks to anything, can be used to achieve some really cools effects, and truly is quite transformative.

A few weeks ago, my friend Janet (the local ASCP stockist and guru) and I went to see the movie, The Conjuring. It was based on a true story, and was SCARY. It’s one of the cases handled by the husband and wife team of Ed (a demonologist) and Lorraine (trance medium) Warren. The movie began with the story of a doll named Annabelle, before proceeding to tell the story of the Perron family, who claimed they lived with and were being tormented by spirits in their Rhode Island farmhouse.

Don’t believe the movie is scary? Check out the official trailer.

The movie was set in 1971. I couldn’t help but notice all the cool, old vintage furniture. You know, the sort of stuff ASCP fans like to transform with paint. So I wasn’t at all surprised when, as we were leaving the theater, Janet said something like, “I don’t know about you, but I saw all kinds of cool stuff screaming out to be painted.”

She was right.

I have quite a bit of stuff in my to-be-painted queue here at the house. After I finished my bathroom cabinet and, more recently, my shelf curtain (pictured below)…

Unsightly shoe tree in our bedroom.


The shoe tree is now behind the curtain.

… I embarked on a new and very different project.

When my brother and I helped Dad clean out his house earlier this year, we each left with some vintage items.

Old, slightly creepy doll.

That’s my brother with a slightly creepy doll I bought when I was about five years old. My Dad kept it around for two reasons. One, he liked that it creeped people out. Two, he thought it might be worth money one day. I brought the doll home, telling my Dad I’d see if it was worth putting on eBay. It wasn’t. It just looked like an old, nappy-headed doll. It’s pretty cool that it’s life sized though, right?

The doll is still here. It’s in my basement workshop, where I do my painting and sewing. While transforming one piece of furniture or other with chalk paint one night, a lightbulb went off.

Maybe more people would be interested in the doll if she looked as creepy as Annabelle from The Conjuring. Since ASCP sticks to just about everything, I thought perhaps paint would help the doll.

The blank slate.
The blank slate.

And I figured painting the doll might be entertaining. On a whim, I painted her lips, fingernails, and toenails, just to see if the paint really would adhere. It did.

So I decided to transform the rest of her.

Deathly pallor.
Deathly pallor.

I consulted my copy of “Color Recipes for Painted Furniture and More” by Annie Sloan to see what colors I should mix together to update that old-plastic-looking skin. I settled on Old Ochre and Graphite.

Odd moment...
Odd moment…

There were a few weird moments during the painting process when I couldn’t help but laugh at myself, but I pushed on. And I was quite delighted to see that the paint adhered beautifully.

I had to sand it a bit, to get rid of some brush strokes. I was emulating skin, after all. Then I mixed some Old Ochre and Primer Red to get a slightly pinker cast to the skin. I add some highlights here and there, too.

Once the paint was dry, I covered the entire doll in the all-important coat of clear wax (to seal the paint) and then used dark wax to add some age.

Head Shot
Head Shot

That dark wax is awesome stuff. Here are some close-ups so you can see how well the aging process worked.

Photo 20
Don’t you just love the mottled skin effect?
Photo 22
Old scab.
Photo 15
Full body view.


Photo 8
Dirty legs enhance that returned-from-the-grave look.


Photo 18
Bloody Ear

I’m really tickled at how well the transformation worked.

I tried a new outfit on her…

Photo 21
New outfit.

…but decided the flannel nightgown looks best. Although I think it’s due for some distressing, too.

Photo 33
Flannel PJs

I think the dogs were impressed.

Photo 37
Stepping outside for a photo shoot.

Now I just need to list her on eBay. Oh, and find a box.

Fun with chalk paint.

What do you think? Were you surprised at how well the transformation worked? Do you like the flannel gown or new outfit better?

Scrappy Cabinet

I finished another painting project. And I’m very happy with the end result.

Before I share pics, I have to give you a bit of back story.

Hubby knew I wanted a cabinet for our bathroom. In all fairness, he wanted one, too, because we needed a place to store our towels. So he agreed to make one. But he’s a wood guy. He would have rather made the thing out of some fancy hardwood.Which he would have then stained, of course.

Knowing I wanted to paint the cabinet, I urged him to make it out of cheap wood. So he made it out of scrap pieces of MDF that he happened to have laying around.

The "Raw" Cabinet
The “Raw” Cabinet

That’s the naked cabinet. Pretty ugly, right?

Using Annie Sloan Chalk Paint, of course, my plan was to use Old White for the outside, Olive (green) for the shelves and door highlights, and Emile (a soft purple) for the frame of the door.


Olive Shelves
Olive Shelves

Since the cabinet is always going to be filled with stuff, I limited my interior painting and waxing to the shelves and the inside of the door.

I only applied clear wax inside the cabinet. After painting the exterior of the door, I decoupaged some hydrangea art (posted by The Graphics Fairy) onto the front. I applied clear wax, followed by dark wax, and it was done. Easy peasy.

Workshop Photo of the Finished Cabinet

Here’s a shot of the cabinet in the natural light.

Natural Light
Natural Light

Now, before I show you the cabinet in its new home, I have to tell you the bathroom walls need to be painted. I don’t feel like painting the bathroom right now. But we need the storage this cabinet will provide. So just ignore the walls, okay?

Before the Cabinet
Before the Cabinet

That basket is where we stored spare rolls of TP. It only held two rolls, was quite cramped, was hard to fill, and the tissue always came out mangled.

Newly Installed
Newly Installed Cabinet

It didn’t take long to fill either.

Cabinet in Use
Cabinet in Use

Did you notice that little thing in the lower corner of the door? It’s another Graphics Fairy image, modified to meet my needs. It’s one of my favorite elements of the cabinet project.

Giving Credit Where Credit is Due

Maybe I should have called myself the Decorator or Painter instead of Designer, but I still think it’s cool.

When I asked Hubby how much the materials cost, he said, “Nothing. It was all scrap.”

I pressed him to put a cost on the “wood.” He said a 4 x 8 sheet costs about $15 and he would have used about half of that. That’s only $7.50 in wood costs.

What do you think?

Upcycling an Old Table & Chairs

This is not a “how to” post. I’ll leave that to the experts. This is for all my friends who have no desire to paint anything but wonder how my furniture transformations are achieved.

The key ingredient is Annie Sloan Chalk Paint (ASCP). No, I haven’t tried other brands of chalk paint. Why would I? This stuff is fabulous. It’s versatile, sticks to just about any surface you can imagine, can be used to achieve a wide variety of looks… rustic, modern, distressed, white-washed, pickled, etc… comes in all sorts of cool colors. And the wax, formulated to work with the paint, it wonderful, too.

I am not just recommending ASCP because I really happen to like Janet, my local stockist, and her shop (The Empty Nest). I seriously love this stuff. I’ve tried lots of different paints on furniture before. Regular later house paint, spray paint, acrylic craft paint, etc. But have never been able to achieve satisfying results. Oh, how much nicer those wood cabinets in our WV kitchen would have looked if I’d discovered ASCP years ago.

Wanna learn more about ASCP? CLICK HERE.

I never know what my project will look like when finished. I mean, I start with a base color I love.But once you start applying the wax, the piece changes. I always tell people, when I am doing a piece with ASCP, I feel like it is evolving before my eyes. The clear wax, although thinly applied, gives the paint so much more depth. And the dark wax? Oh, I love me some dark wax. Even if it is messy as all get-out. The dark wax is what really gives the piece character.

I’m getting ahead of myself, though.

First, I had to find a small table. I got soooo lucky. It only took three stops before I found this ugly, but perfectly sized kitchen table at a local thrift shop. It set me back a whopping $25. The legs are real wood, but the top is Formica-covered.

Thrift Store Table ($25)
Thrift Store Table

Janet assured me I’d just have to rough-up the top a bit to give the paint a surface to grip. The sanding took about 30 seconds. Literally.

Great Grandfather's Chairs
Great Grandfather’s Chairs

I’ve had these chairs in my basement for a while. I didn’t have a specific use for them when Dad gave them to me a while back. But I knew he didn’t have a use for them either, and he was clearing out, so I took them. They belonged to his grandfather, Pappy. Dad had gotten them stripped years ago and had tried repairing them, but they were in rough shape.

Wood Putty
Wood Putty


IMG_2661
Base is One Solid Piece of Wood

They would have looked absolutely horrible stained. And, to be honest, I was afraid they would even look bad once painted.

IMG_2727
Painted Chairs

I sanded the chairs a bit first, since there were so rough, but sanding is rarely required with ASCP (depending on the surface).

They actually took the paint quite well. Even though I was using a light color of paint — Old Ochre — you couldn’t see all the wood putty and other imperfections under the surface.

First Coat
First Coat

Ignore that Behr paint on the workbench. Hubby was using it for some other project. It is NOT on my furniture. It is his workbench, after all.

The table took the paint beautifully.

Applying a Second Coat

I had to take a picture so you could see the difference between one coat and two coats of paint (toward bottom).

Before and After Clear Wax

The table legs and leaves had already been treated with the clear wax. The larger surface of the table had not yet been waxed.

Clear Wax and Dark Wax

That shot immediately above shows the difference between clear wax and dark wax.

I could have left it alone after applying the clear wax, but I wanted a more aged look. So I applied the dark wax, too.

Finished?
Finished?

The table was done! Or so I thought.

Painted and Clear-waxed

As I was applying the clear wax to the first chair, I couldn’t help but think it needed some color. Yes, the dark wax would be adding some color, but I thought it needed something else. I didn’t want to get too crazy with color, since this was being done for my Dad, but it was just missing something.

Chair with Old Olive Accents
Chair with Olive Accents

So I added a bit of Olive to the chair. I loved it. But once I sat the chair beside the table, I realized the table needed accenting, too. That’s what I mean about evolving…

Chair & Table with Olive Accents

Yep, that bit of Olive was exactly what the chair and table needed.

Chair & Table
Chair & Table

See how the dark wax gets in all the nooks and crannies, highlighting the imperfections. That’s what adds character. If you are looking for a cleaner, more-modern, or more-finished look, don’t use the dark wax.

Art?
Art?

I really do feel as if I just finished an art project. Not to say that this is a masterpiece or anything, it just feels like I have given these things new life. I mean, you can’t deny the transformation.

Finished!!!
Finished!!!

I did remove some of the dark wax from the top of the table before pronouncing the project complete. I liked the look, but a table-top should look clean. And I thought it sort of looked grungy.

Finished!!!
Finished!!!

How cute is that? 🙂

Dad and His "New" Table
Dad and His “New” Table

The most-important part? Dad really likes his new-to-him table and made-over chairs.

Now you know how it’s done. What do you think?

Butterflower

It’s been rather wet in these parts lately. It’s good for the flowers, though. And the weeds are growing just like weeds have been known to grow… fast and furious.

I’ll be policing the yard this week for sure. Have to stay on top of those buggers.

Early this morning, the off-and-on rain had become a gentle mist. A thin layer of water coated everything. For me, in Spring, that sheen of tiny droplets makes for some rather interesting pictures.

I’ll try and share a few more tomorrow. Tonight, I just had to post my favorite capture of the day.

Butterflower
Butterflower

It wasn’t the water droplets that drew me to capture that image. I just found it interesting. Especially since at first glance I thought I was seeing a butterfly.

But when is the last time you saw a butterfly with water droplets on its wings?

It’s just a flower with some petals missing, but doesn’t it make a cool capture?