It took a while. First, I had to decide on a color. Then I had to make the time.
Originally, I was going to do the bench in black. Or red. Or some combination of the two. But then I decided to borrow a blue from one of my lighthouse images.
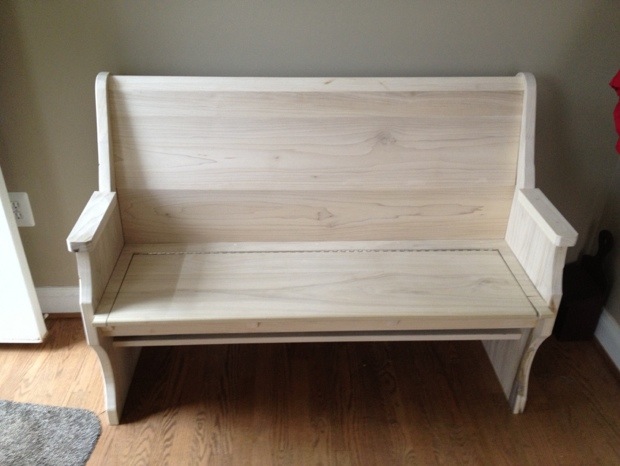
This is what I started with.
New Bench
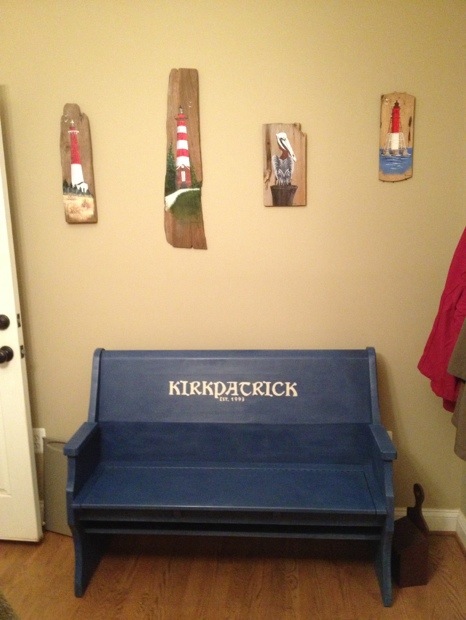
Hubby is very proud of this bench. As he should be. He designed and built it from scratch. Using raw, un-milled lumber.
The shoe compartment is quite clever, don’t you think?
Shoes Exposed
It makes that corner of our breakfast room much more orderly. And that’s just what he wanted.
Ready to be painted.
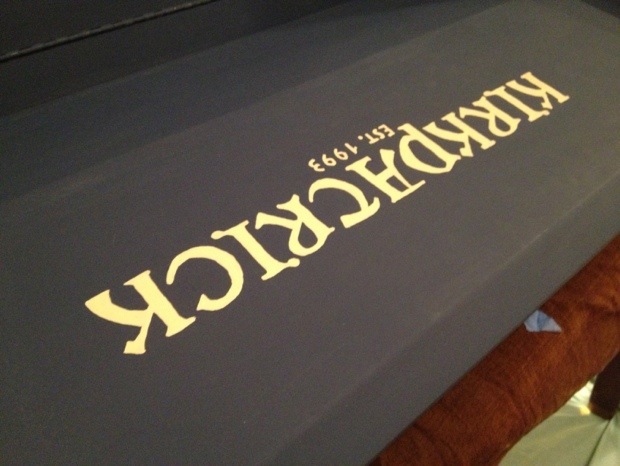
I didn’t use any special techniques. It’s just Napoleonic Blue Annie Sloan Chalk Paint finished with Clear Wax. I sanded it lightly after waxing, intending to apply Dark Wax, too, but I like the way it looks as it is.
The thing I like about painting items is that they evolve as you paint. I hadn’t planned on adding any decorative elements. And I thought I was going to make the armrests white.
At the last minute, I decided the armrests should be the same color as the bench. The more I looked at the bench, the more I thought it needed some sort of design. So I decided to stencil our name on the back, along with the year we were married.
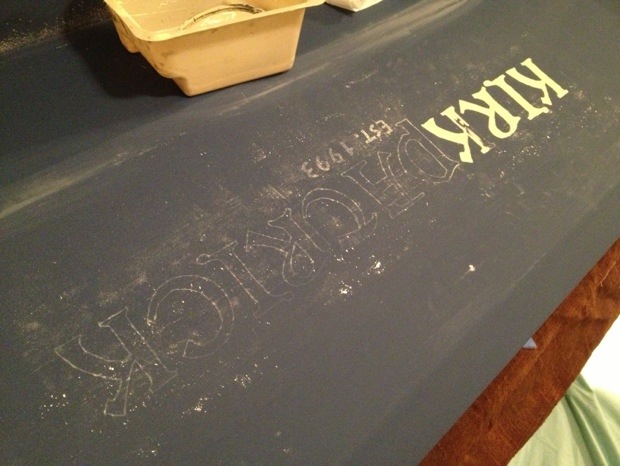
Of course, I didn’t have any stencils, so off I went to see Janet Metzger, my favorite ASCP Stockist, to get some letter stencils.
She didn’t have any in the size I needed. I told her I’d just run to Wal-Mart, but then she said, “You don’t need a stencil. Just do your letter on paper, rub chalk on the back, and trace on the front to transfer the stencil.”
It sounded easy enough. But after I did what she said, I ended up with a scary, chalky mess.
What a scary mess.
Honestly, at that point, I was scared that I’d wrecked the piece. Or at least did enough damage to require another coat of paint.
The outlines were there, though, so I pressed on. I had to do some freehand painting to fill in the letters, which was a slow process requiring a steady hand.
When I was finished, and sure the paint was dry, I cleaned the bench off with a barely damp paper towel.
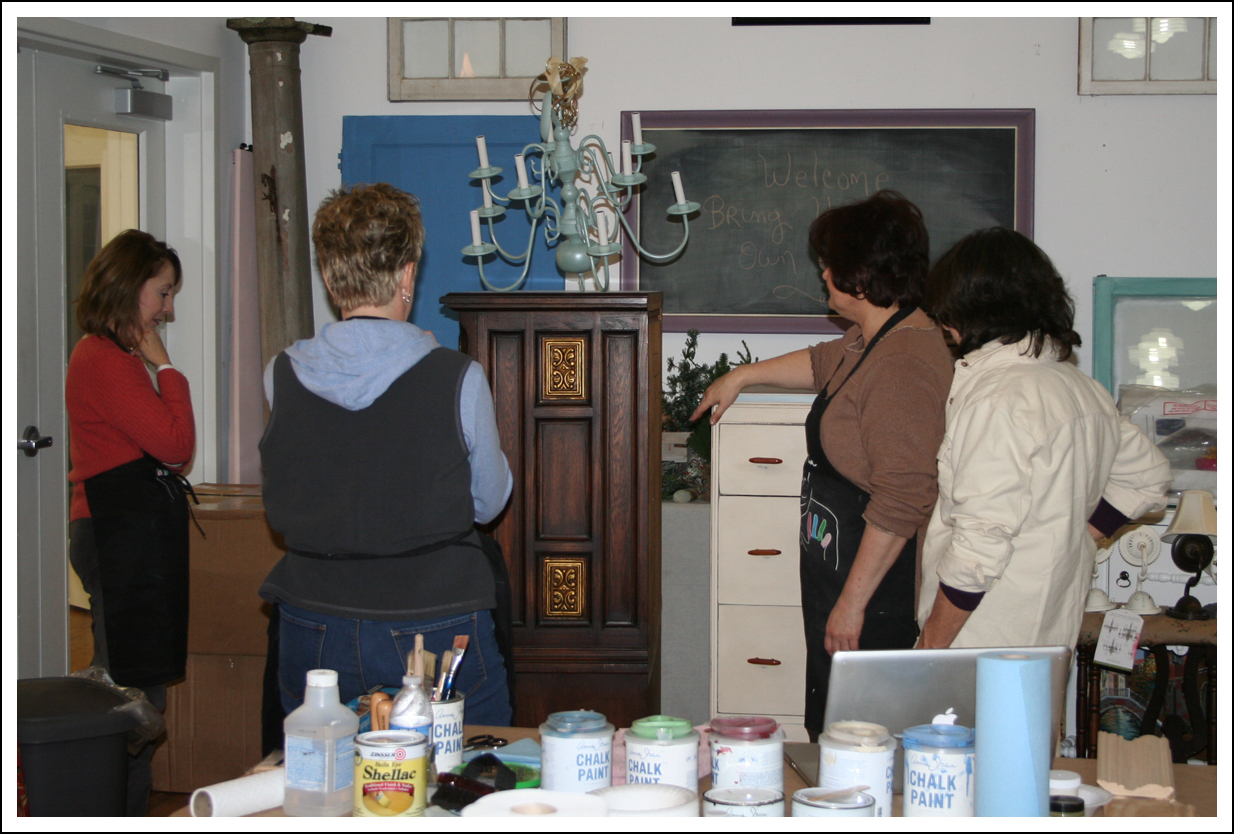
As I mentioned in my last post, this past Saturday I attended another Annie Sloan Chalk Paint® (ASCP) Workshop. It was presented by my friend and local ASCP Stockist, Janet Metzger, owner of The Empty Nest in Warrenton, Virginia.
I’ve mentioned The Empty Nest here a lot. It really is a lovely store. And it’s run by an even lovelier, multi-talented woman. She doesn’t just paint furniture, she paints pictures, too. And she sews. You should see the stinkin’ cute stuff Janet makes and/or alters. Don’t miss her aprons either.
Be careful when you look, though, as you may find yourself itching to get out there and buy some vintage linens. Oops, did I warn you too late? Sorry. If you are already inspired, there are quite a few tutorials on Janet’s web site.
Back to painting… Janet is quite passionate about ASCP. And Annie Sloan the person. She says Annie is extremely down-to-earth, really enjoys meeting her many admirers, and is very supportive of her stockists.
Me and Janet
There’s me with Janet, just before class.
Janet showing off a recent acquisition.
One of the ladies scheduled to be in the class was stuck in traffic, so Janet took a few minutes to show us the sort of things that can be acquired and painted. Even the chandelier in that photo has been transformed. ASCP sticks to practically anything.
The Classroom
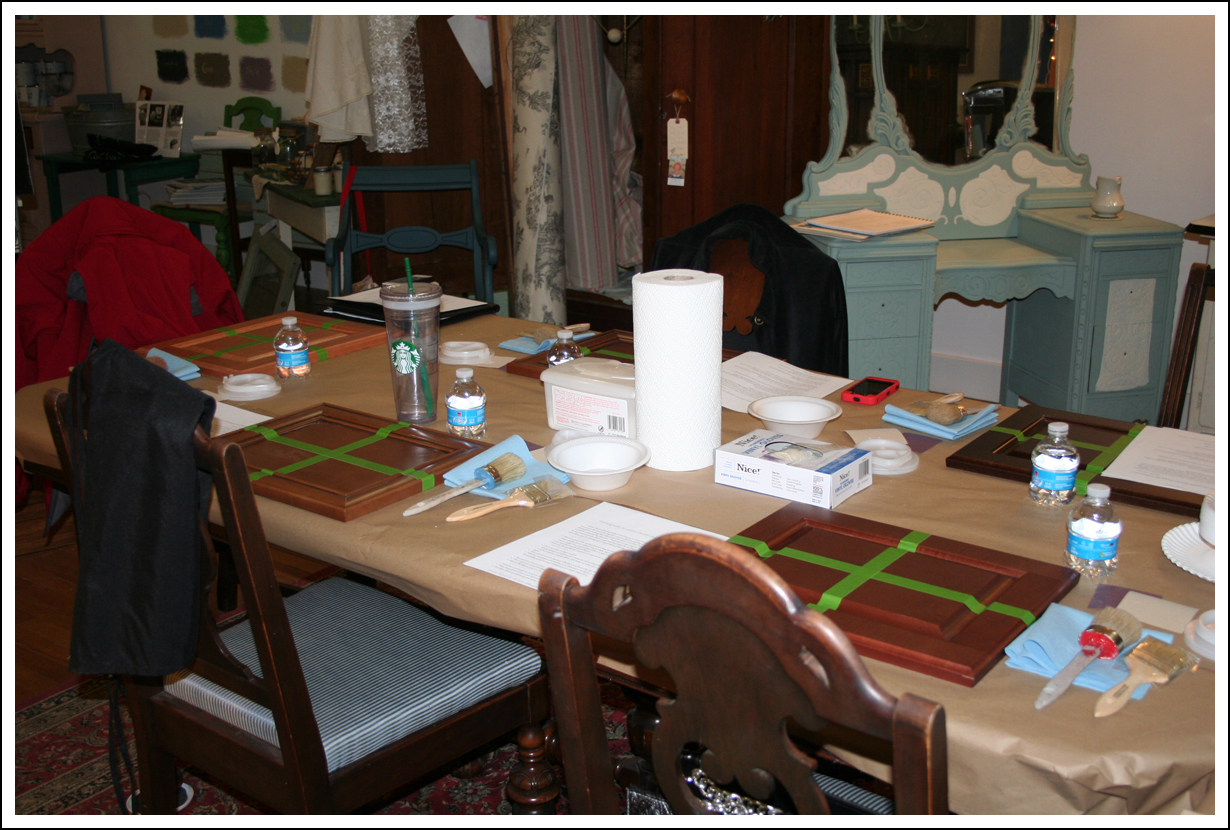
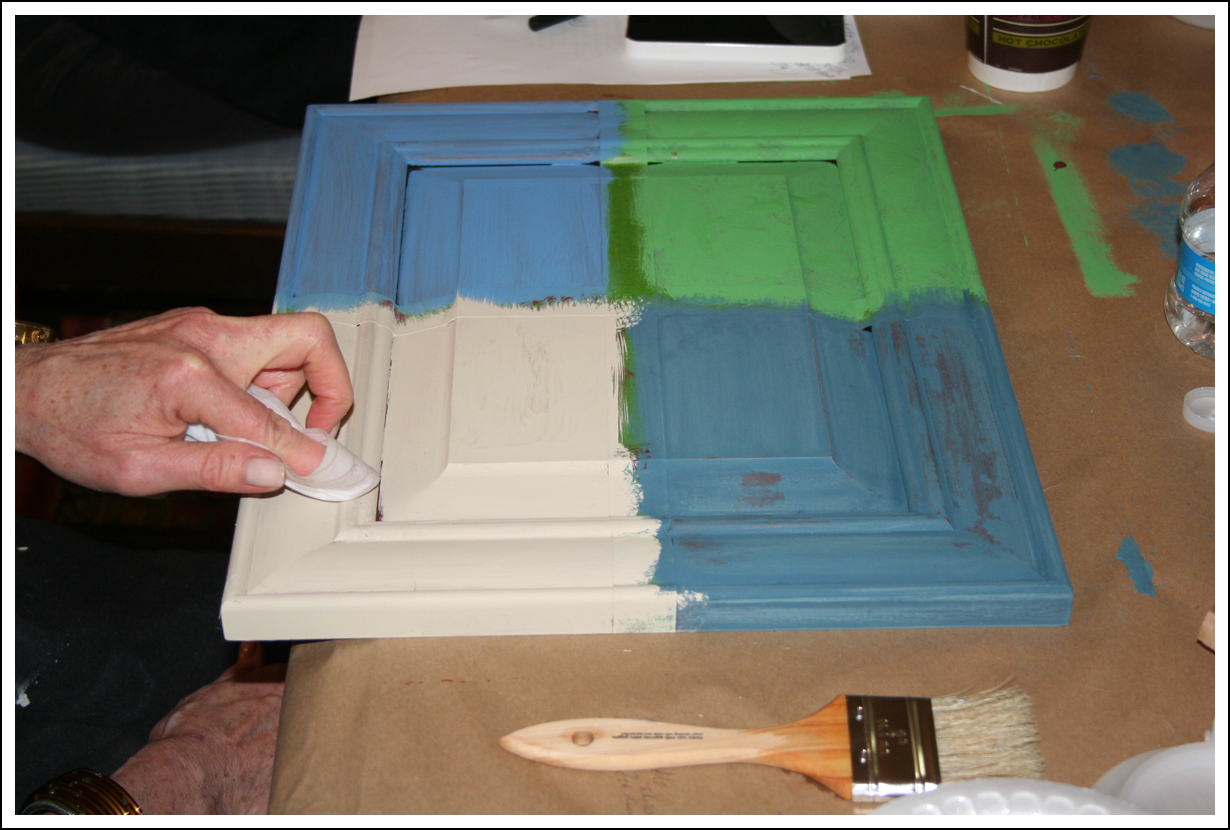
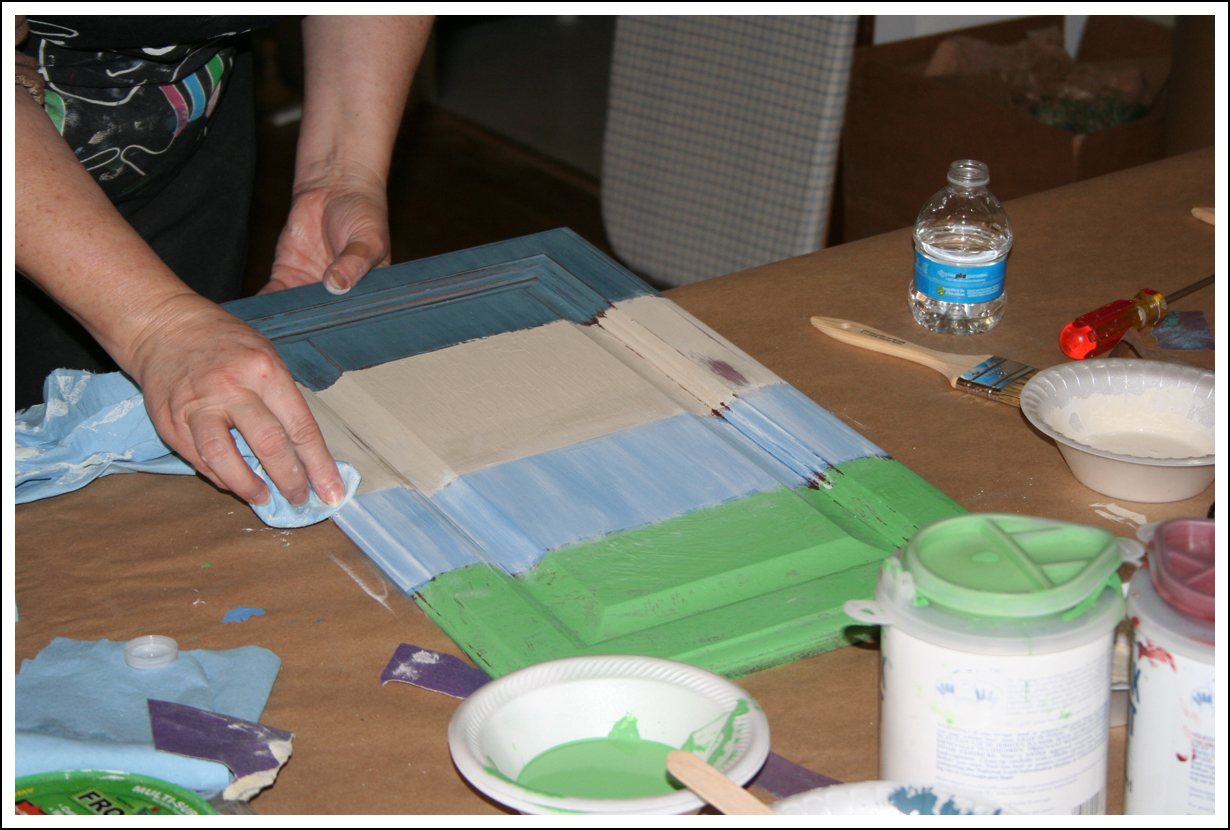
Janet demonstrated four different finishing techniques.
Sample board.
Layered finish.
Janet’s demonstration board.
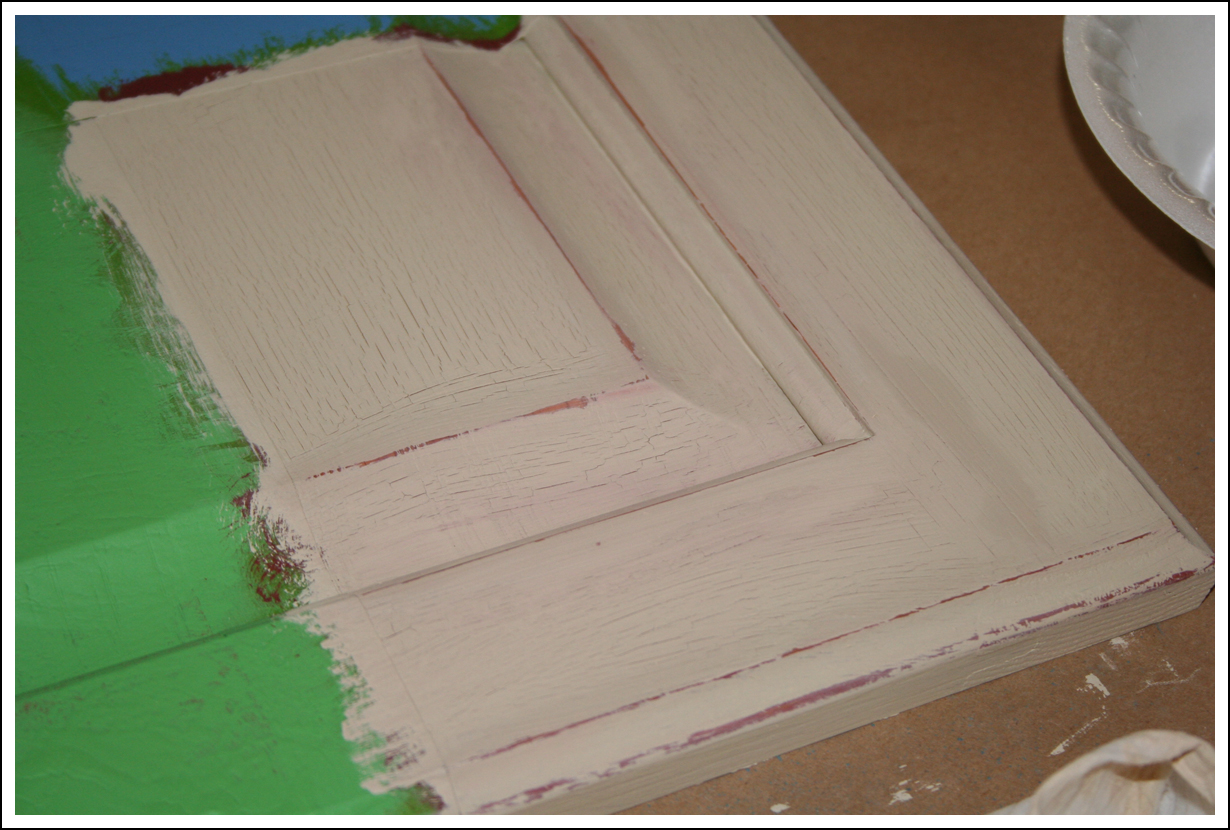
From the top of Janet’s board down, the finishes we learned were Modern, Layered, Washed, and Rustic.
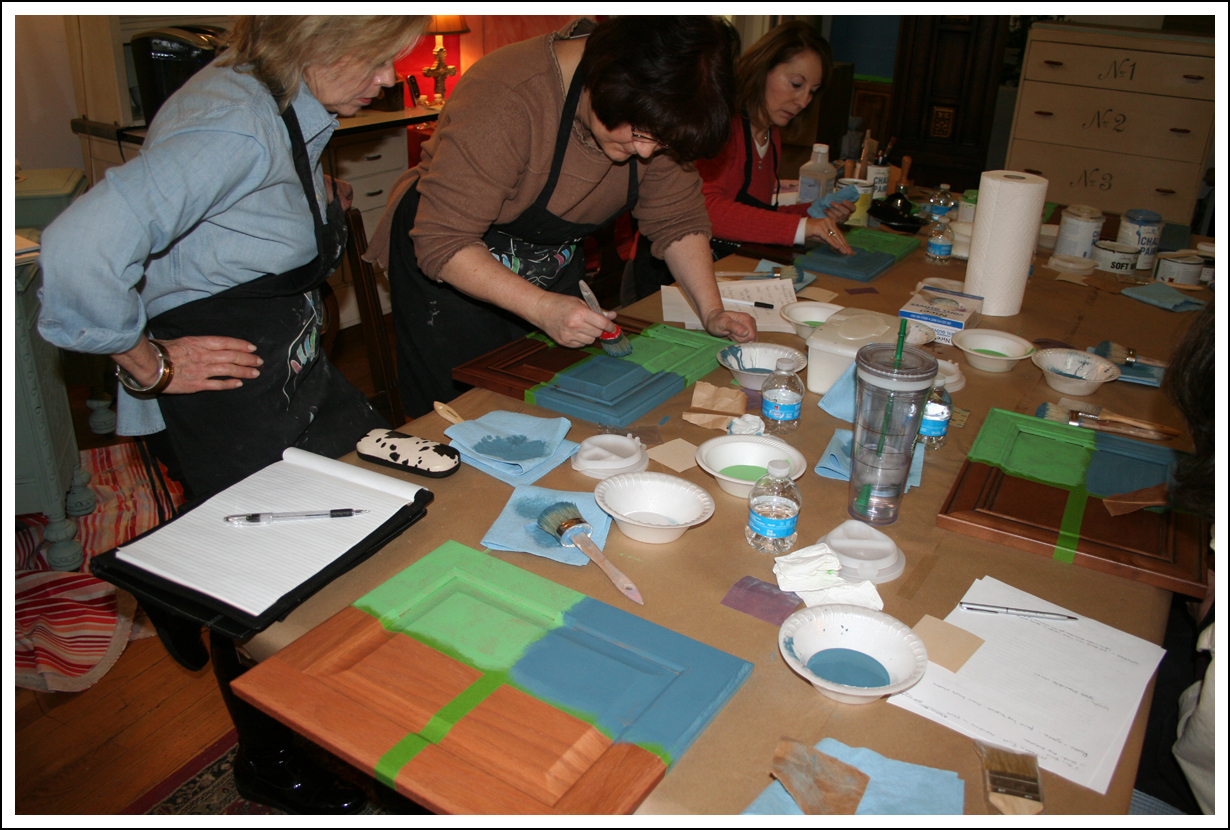
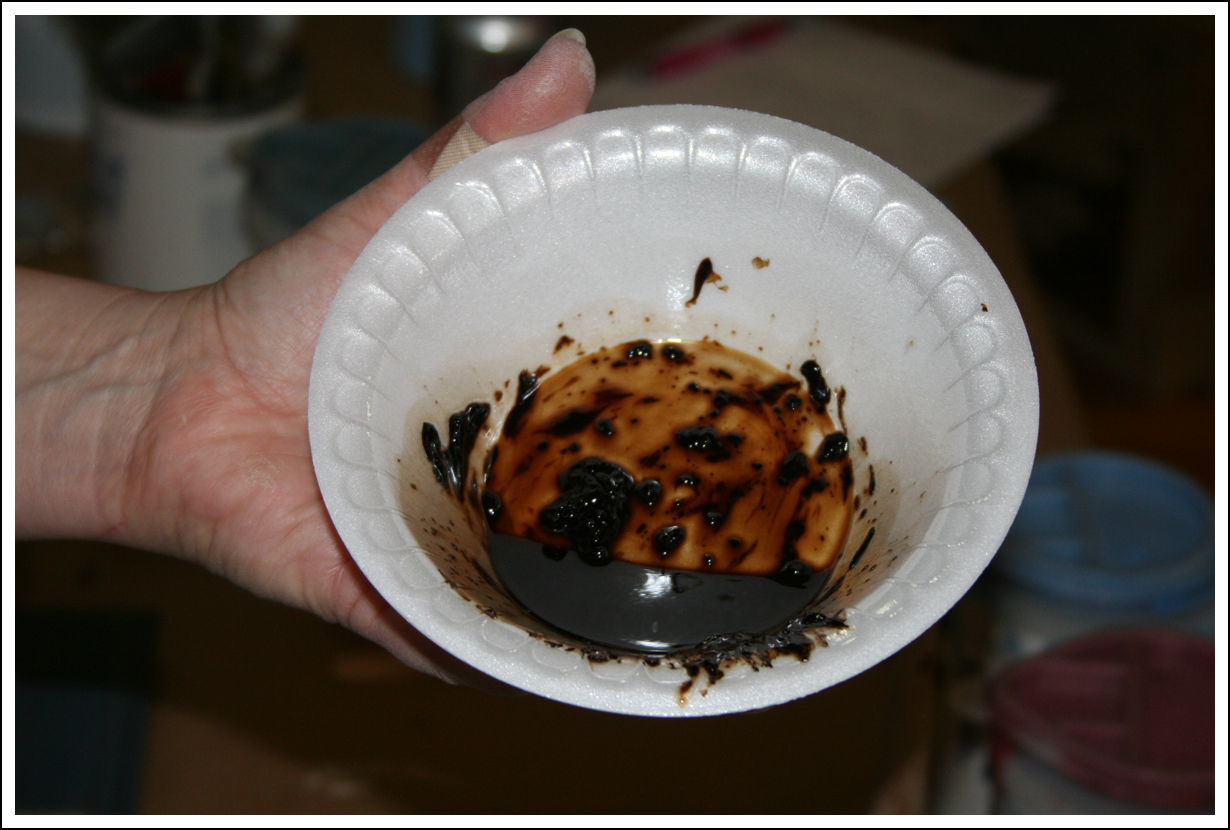
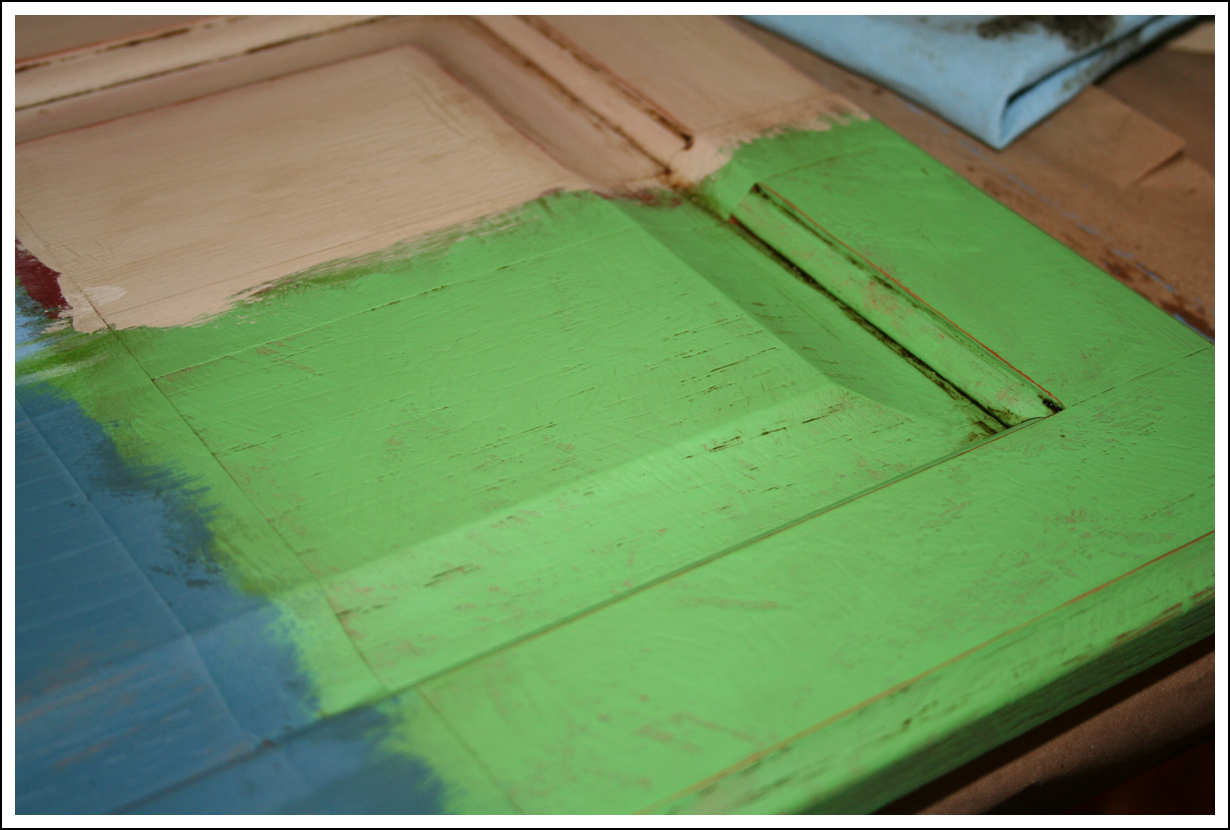
Dark Wax is a key component of the rustic finish. The dark brown wax leaves behind a hint of residue in the cracks and crevices, which provides an aged patina
Dark wax slurry.
Applying the Dark Wax to the green.
Newly applied, old-looking green paint.
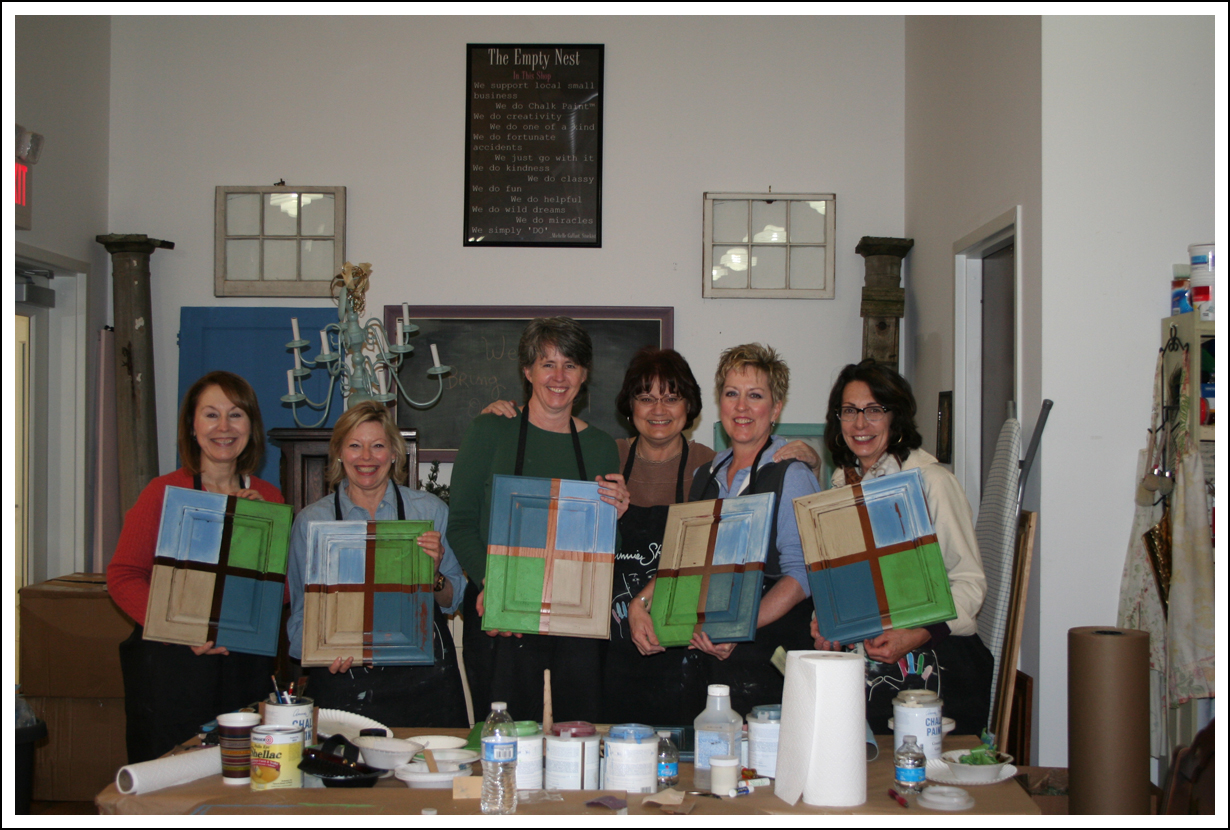
L-R, Jenna, Linda, Me, Janet, Pamela, and Jane
ASCP is cool stuff. Really.
And I must say, living within walking distance of The Empty Nest is awesome. I can pop in for tips anytime. Of course, I try to be mindful of Janet’s time. So I don’t linger too long. But it’s great to have an expert on-hand in a crunch. Last week, she solved my stencil dilemma and I am super-pleased with the result. But that’s for the next post.
Thanks to Janet and all of my classmates for a fun and informative Saturday afternoon!
I’ll leave you with one final shot from Janet’s shop. This decked-out bird makes me smile.
I’ve been doing lots of painting lately, which is good. Since I did say 2013 was going to be my creative year.
The various items I have covered in color over the past few weeks have provided great creative outlets for me. The chalk paint is great to work with, but I have so much more to learn. So tomorrow, I’ll be at The Empty Nest enjoying another chapter of chalk paint training.
Back in early January, I told you about this awesome bench Hubby made for me.
Shoes Exposed
He made it for us, really. I’m always on the hunt for something fun to paint. And he needed a way to tame the mess of shoes that was always scattered below and around the cute black bench that used to occupy that spot.
I’ve been working on it all week. Tonight, I just might finish the thing. So the big reveal will be appearing here soon.
I’ve got a busy weekend ahead of me, though. Tomorrow during the day is chalk painting class. Tomorrow night, I MIGHT go out to see a live band. Then Sunday morning I’m off to Annapolis, Maryland for a peek at the venue where my son Eric’s wedding will be held.
That’s less than two months away. GASP!
After that, it’s a bit further north to Baltimore for a lunch date with my Dad. Eric will be joining us, but Dad doesn’t know that yet.
Then it’s back down to Crownsville, near Annapolis, to hang out with my future daughter-in-law, Kelsey, and her parents. They mentioned going out to dinner, but after a late lunch, that might not happen. We’ll have to wait and see.
Finally, I’ll be driving back to Virginia.
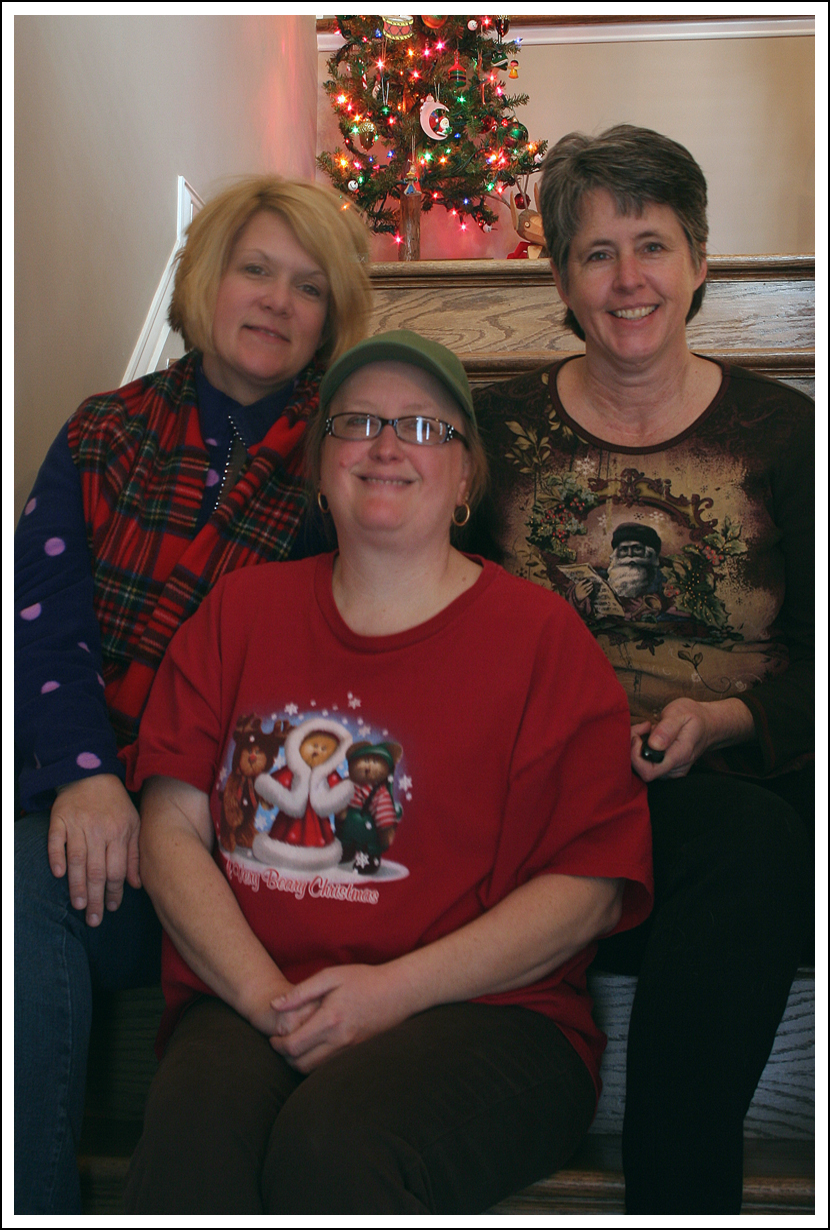
More excitement is on the horizon, too. Thursday, the last day of February — another GASP — I’ll be going to PA for my annual girlfriend getaway with my two besties.
That’s Tracey beside me and Carol is in the front.
Now, if you don’t see me for a while, you’ll know why.
I promise to post a pic of the bench when it’s done, though.
One of my goals for 2013 — NOT a resolution — is to roll up the ole shirtsleeves and get cracking on some of those creative projects I have been meaning to tackle. Like furniture painting (discussed in this post earlier in January). And quilting.
Yes, quilting. Some of you may not have known that I can sew, too. I’m no master seamstress, trust me. And I have done little more than sew a bunch of squares together, a few triangles, make curtains, etc. I’ve made quilts, but they are not quilted in the traditional sense (fancy needlework), but instead tied, which is much easier. Tying quilts is when you use yard, heavier thread, string, etc., to fast the backing onto your quilt top. Remember, a quilt is nothing more that a backing, batting (stuffing), and the quilt top.
Anyway… back to quilting. One of the things that draws me into quilting are the colors. I could spend hours and hours and HOURS looking at fabrics in quilt shops. I just love the colors. And the textures. And the different designs.
My good friend Granny Trace — of Granny Trace Scraps and Squares fame — got me started with sewing. She makes beautiful things. Years ago, she made lots of hand tied lap quilts. She kept saying how easy it was. So one Saturday afternoon I had her show me. And sure enough, by the end of that day I had a lap quilt. The edges weren’t complete, but still. It was damn good progress for a girl who had never touched a sewing machine.
When my parents saw how excited I was about my project, they offered to give me the sewing machine they’d gotten as a wedding gift in 1959. Of course I was tickled to take it off their hands. After finding a manual on-line, learning how to thread the needle, do the bobbin things, unclog jams, oil it in the right places, it was good to go. It’s old and really heavy, but man is that thing a work-horse.
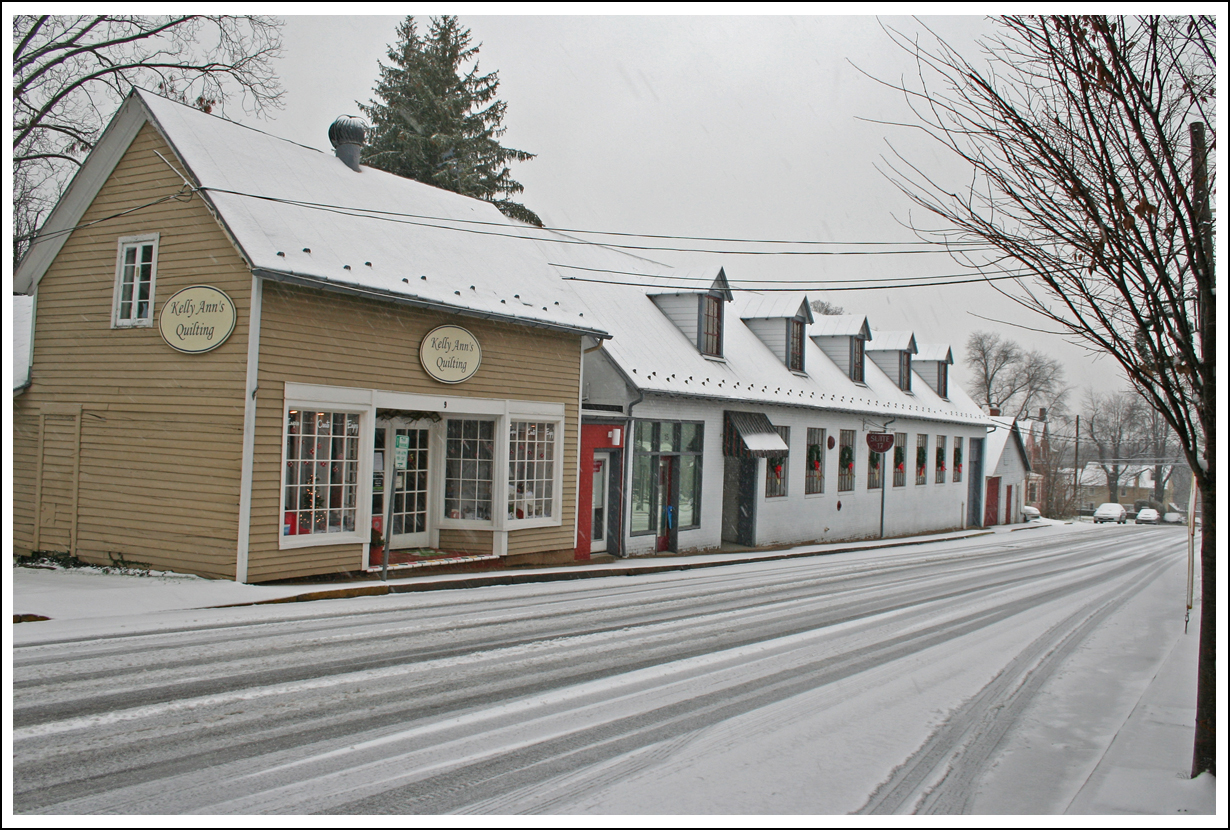
That little bit of instruction from Tracey is all the instruction I’d ever had. Until yesterday. That’s when I took my first quilt class right here in Old Town Warrenton.
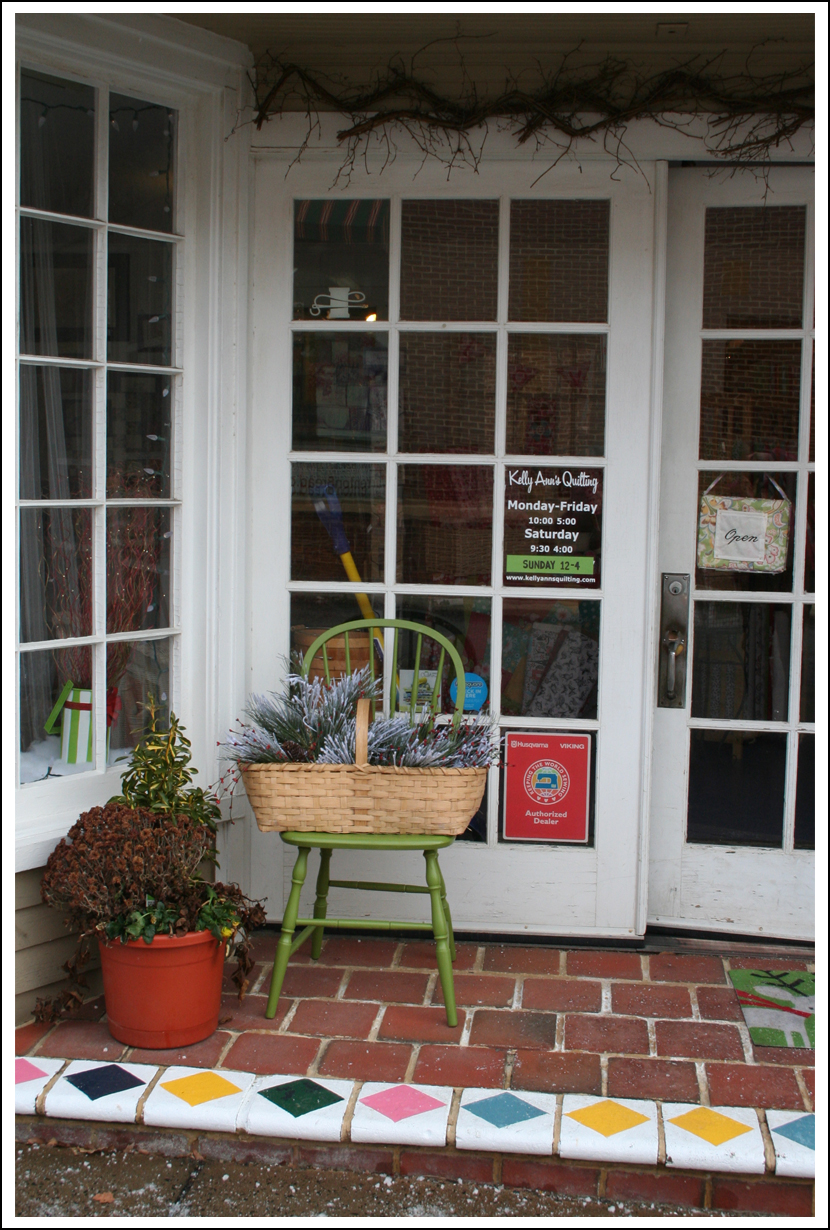
Kelly Ann’s Quilting, 9 5th Street, Warrenton, Virginia
That’s a photo I took the day after Christmas. I’ve always admired Kelly Ann’s cute little shop. It’s catercorner from that bakery — Great Harvest Bread — that I always talk about. And it’s in this darling little old house. The kind of house you just know has a warren of rooms and is probably chock full of little nooks and crannies to explore.
Entrance of Kelly Ann’s Quilting
And it always looks so inviting. I don’t know how many pictures I have taken of the place over the last year or so since we moved to Old Town Warrenton (OTW).
For the longest time I wouldn’t go inside. Because I already have a stash of fabric I have collected over the years AND a bunch of fancy tools I don’t know how to use. The last thing I needed was MORE fabric. Especially after being in such a long sewing rut.
One day, I’ll be able to devote more time to my hobbies. But that day isn’t here yet. And I have such a long list of little projects to be completed. So I figured I’d stay away.
Then I met Kelly Ann (who I always call Kelly because Kelly Ann just seems like such a Southern thing). Truth is, I met her on-line after I attended and blogged about the grand opening of The Empty Nest. We communicated on-line quite a bit. Then one day, I decided to pop into Kelly Ann’s Quilting to meet her in person.
It was actually several months after our initial “meeting” in July before I made it to her store. After Mom passed in mid-August, I was away for a couple of weeks. And then we went on vacation for a couple of weeks. Then work was really busy. Sigh…
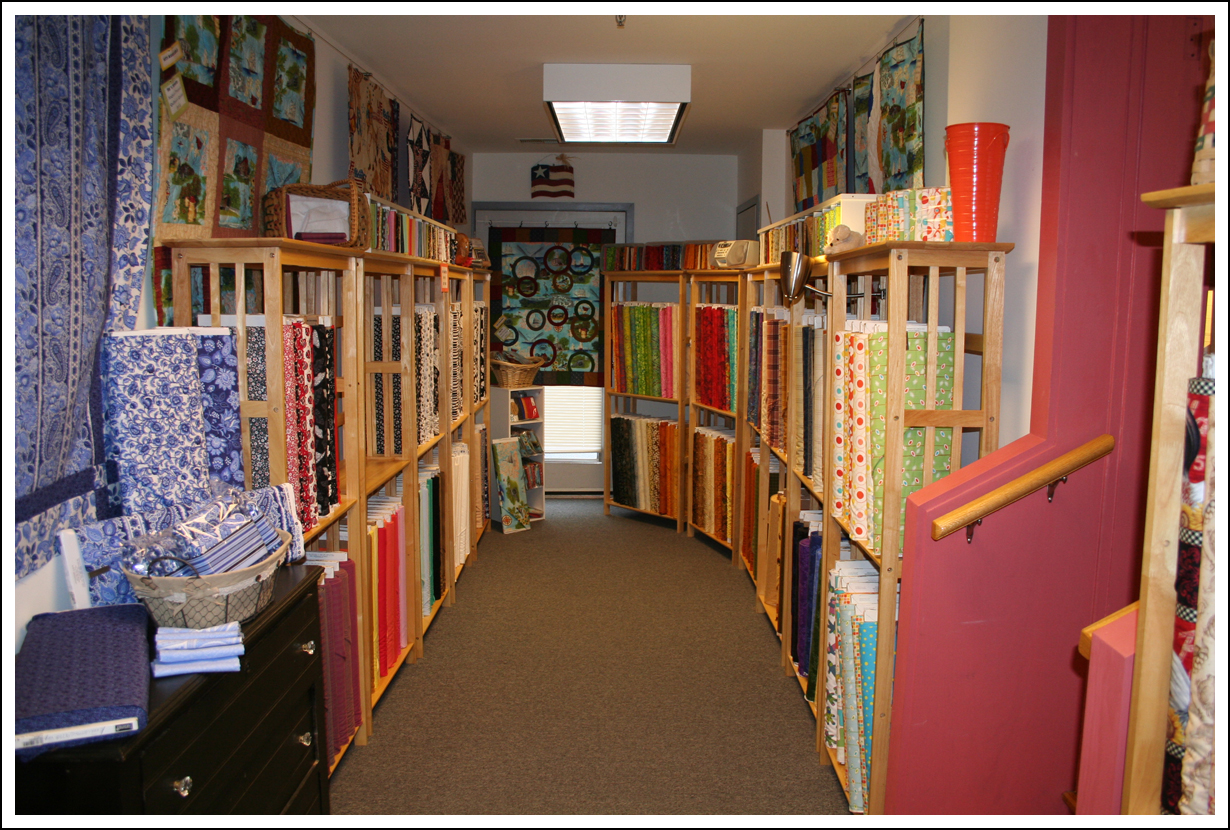
It took several visits before I finally managed to meet Kelly in person. But once I entered that shop, I was hooked. It really is SUCH a cute little shop. It feels like your girlfriend’s sewing room. And all you want to do is walk around and look at everything.
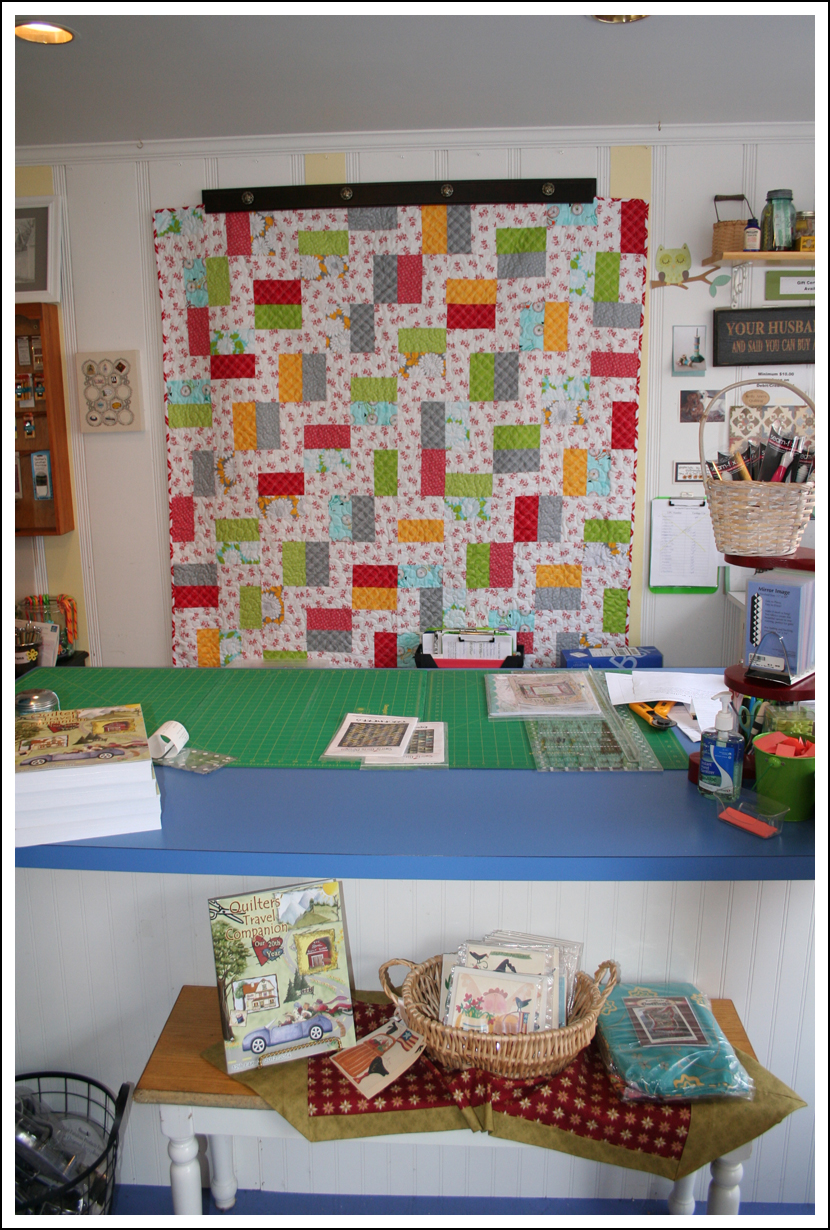
Sales Counter at the Front of the Store
All the ladies who work there are very nice and friendly. You never feel as if they are stalking you as you take your time to absorb all the wonderfulness in the store.
Although most times I end up gabbing when I am there and don’t poke around too much. So yesterday was extra fun because I got to mosey around a bit and take a bunch of photos to share with you all.
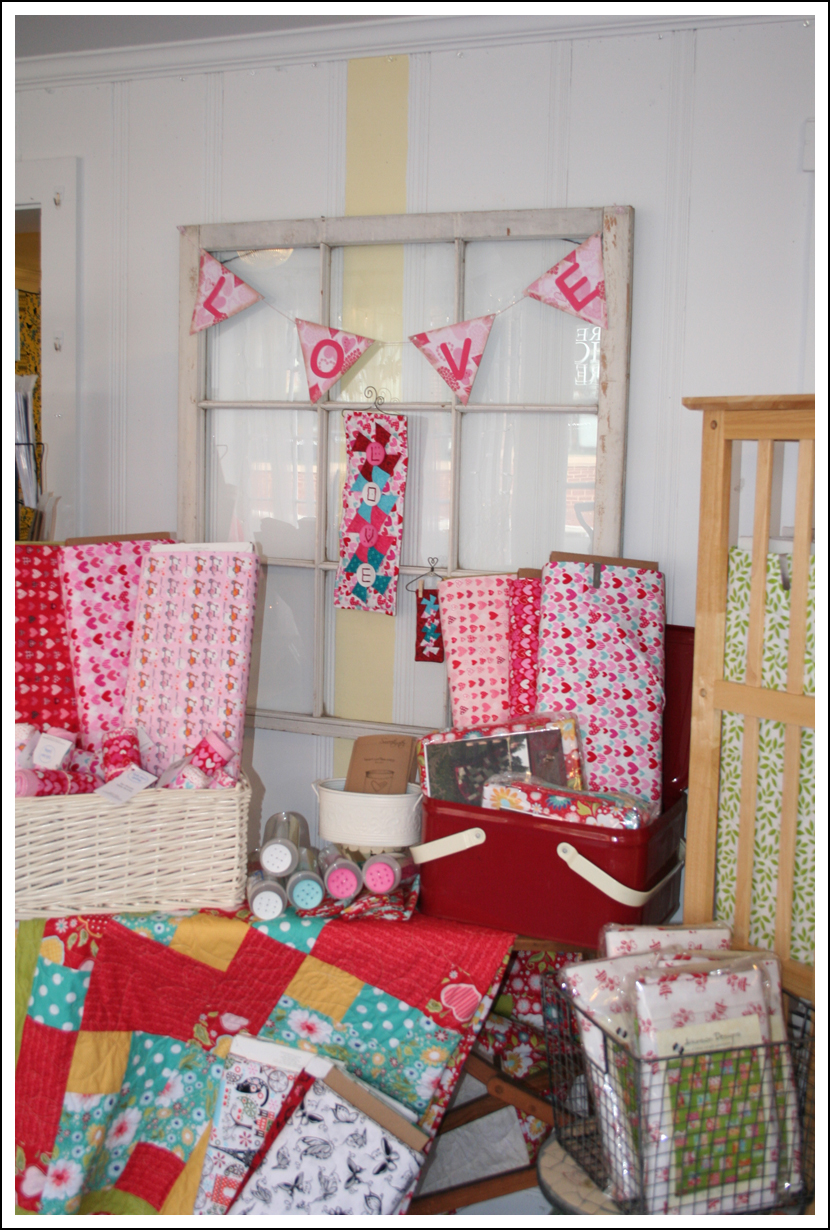
Valentines Love
See what I mean about the color? That is some vibrant stuff.
Vibrancy not your thing? She has more-subdued fabric, too.
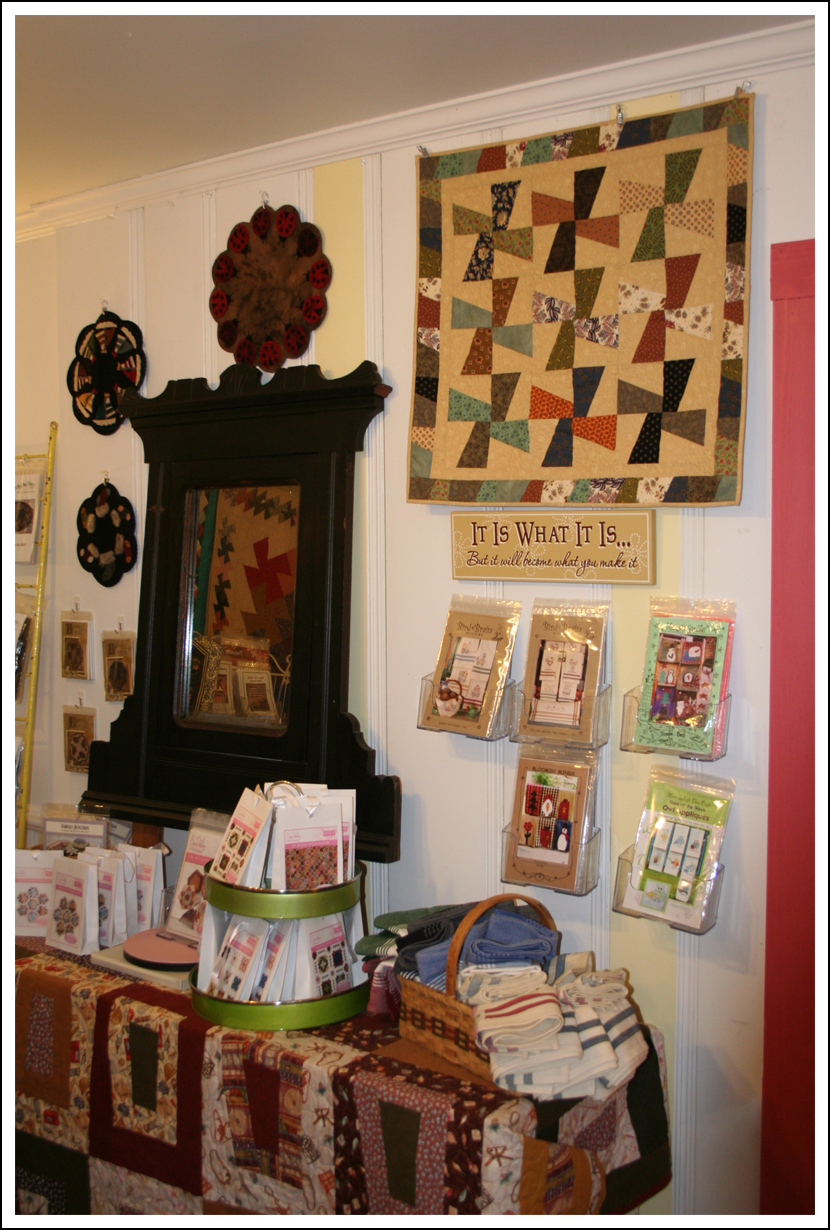
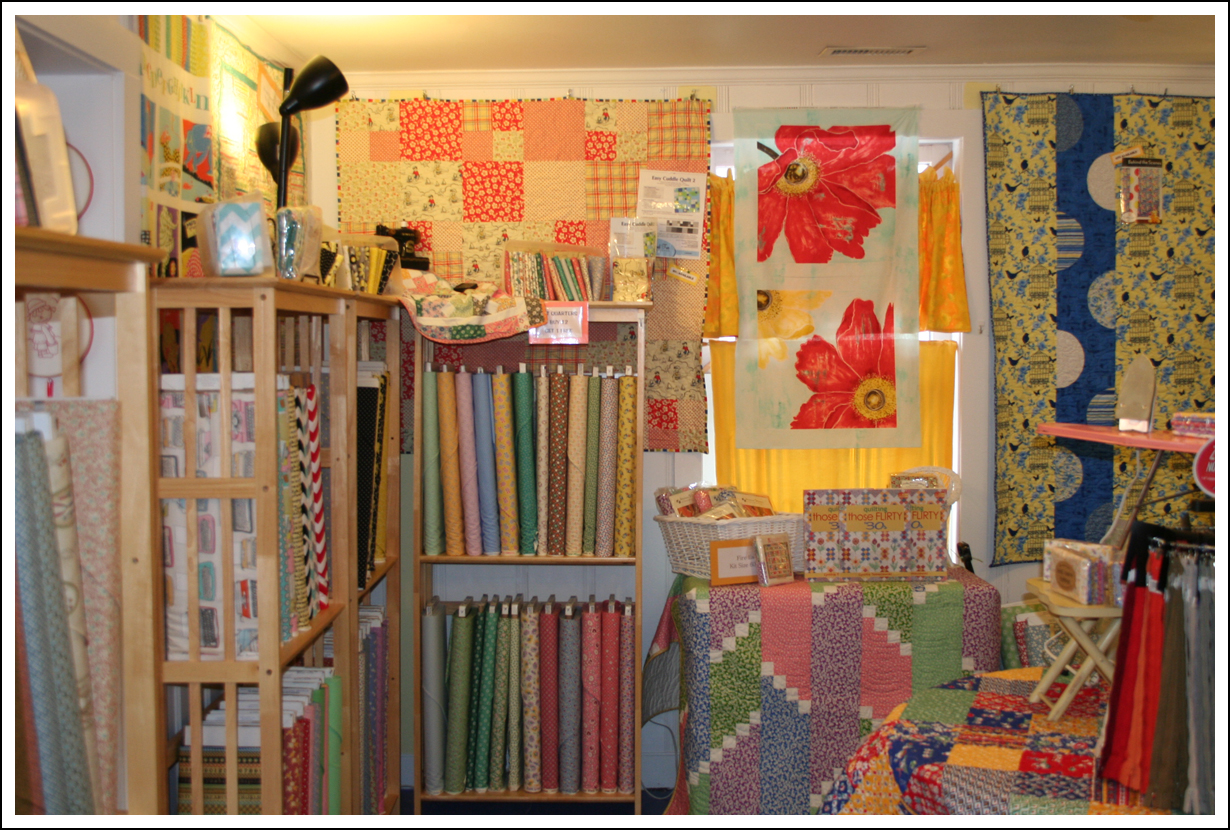
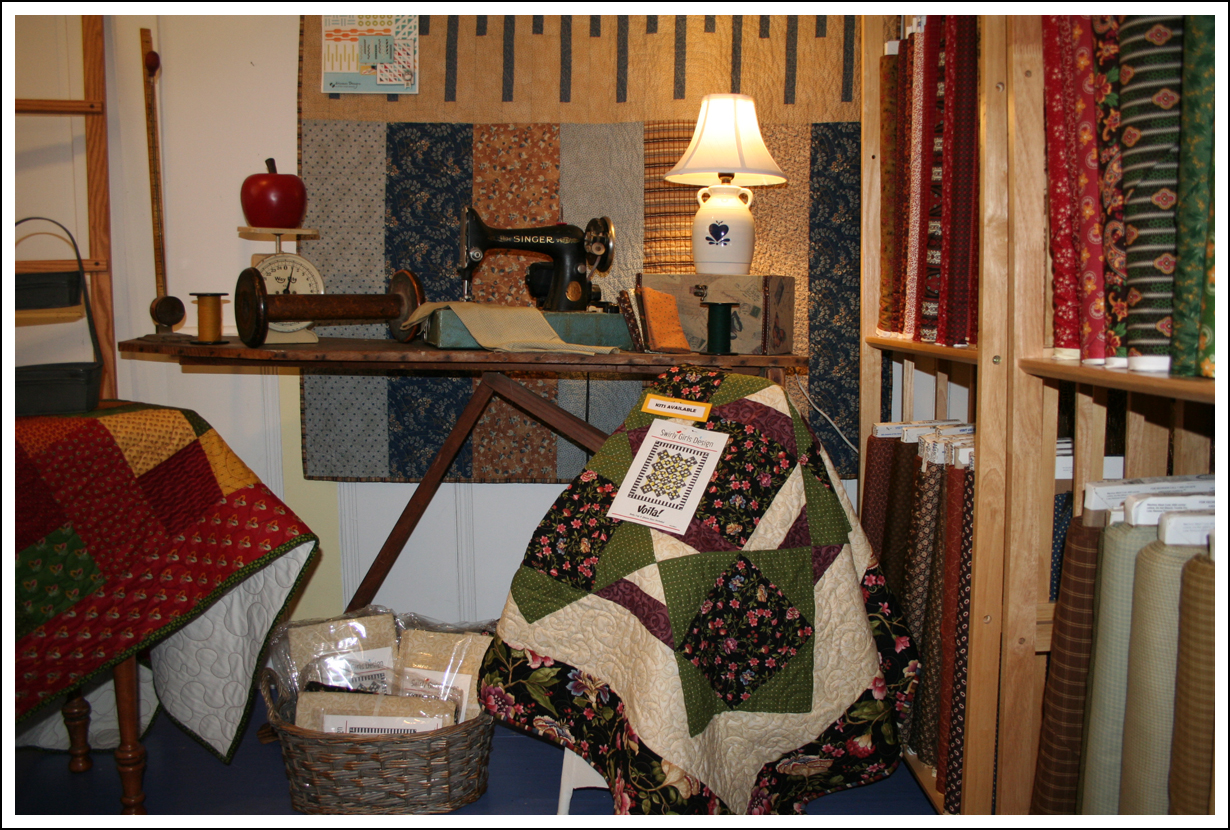
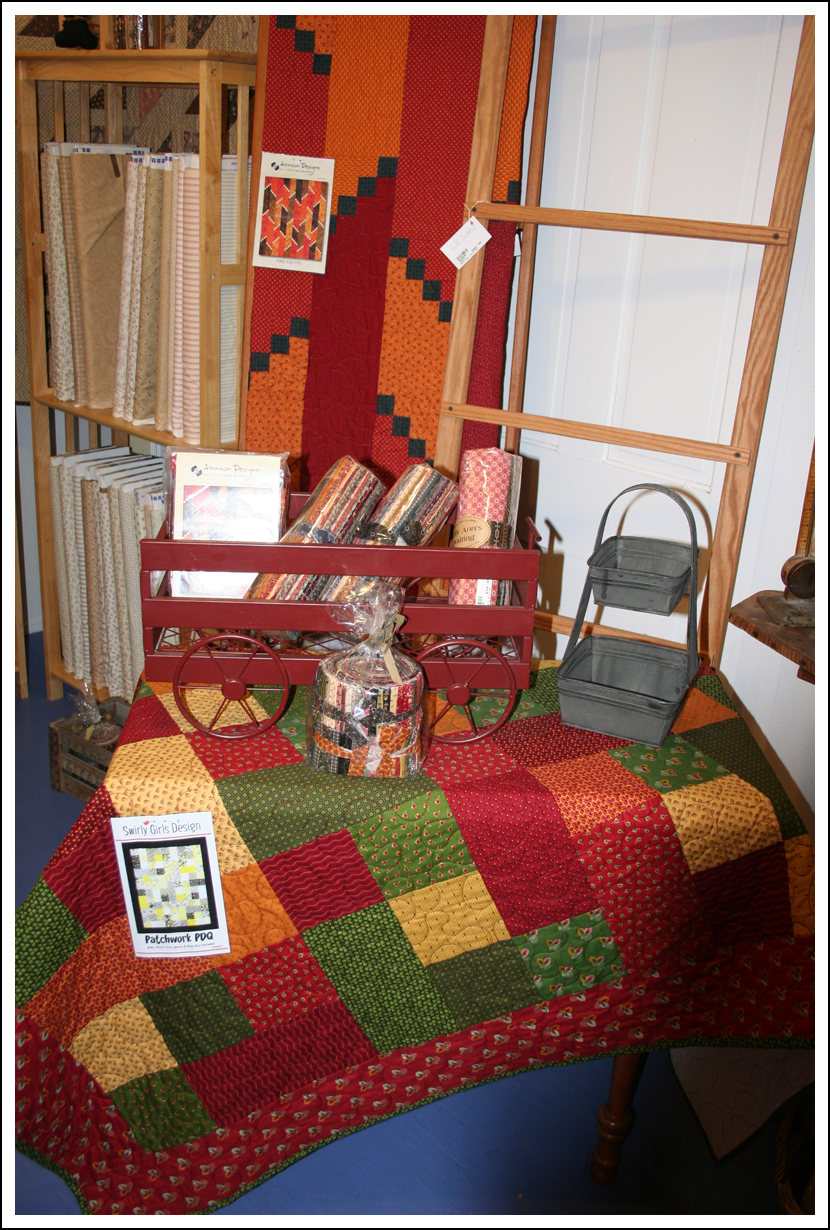
Inside Kelly Ann’s Quilting
Inside Kelly Ann’s Quilting
Inside Kelly Ann’s Quilting
Inside Kelly Ann’s Quilting
Inside Kelly Ann’s Quilting
Inside Kelly Ann’s Quilting
Kelly and her crew have done an excellent job harnessing that homey, welcoming, quilt shop feel.
So, yesterday was my first class. It was Kelly Ann’s 101 PDQ class, which covered the basics of quilting, such as fabric selections (quality), proper use of your rotary cutter and sewing an accurate 1/4 seam. That may not sound like much, but I actually learned a lot.
Remember, my Mom didn’t sew. So not only had I received little instruction in the past, I didn’t have any memories for reference either.
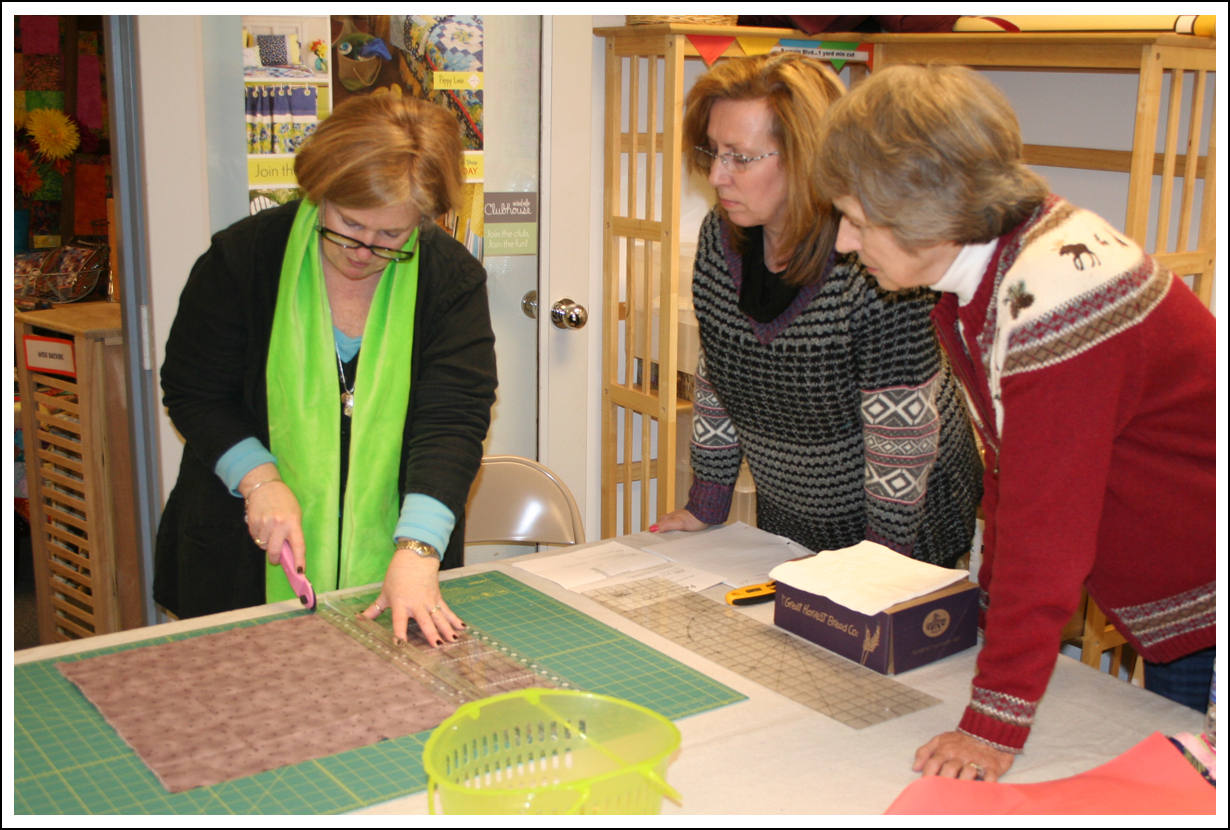
Kelly Ann demonstrating proper cutting techniques.
There were three other women in the class with me. Watching Kelly cut are Kathy (middle) and Sandy (right).
Sandy cutting her fabric.
Kathy’s fabric.
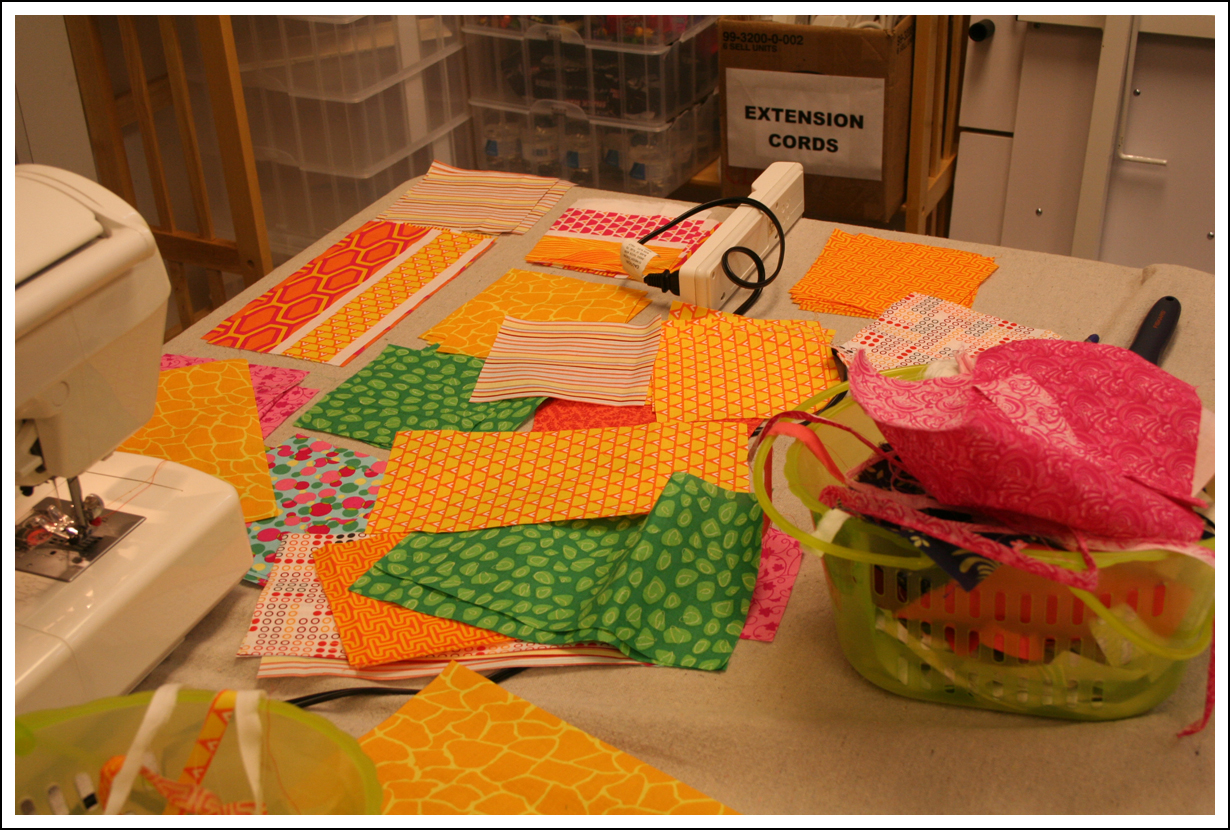
Truly, the thing about quilting I love the most is combining colors. And while I could never see a quilt with these colors in my house (it doesn’t go with my other colors), I can appreciate — and absolutely love — the vibrant, rich, variation of the colors Kathy chose for her quilt.
All of us did well with color choice. I just didn’t do a good job capturing images of everyone’s choice because I was busy cutting, pressing, and sewing.
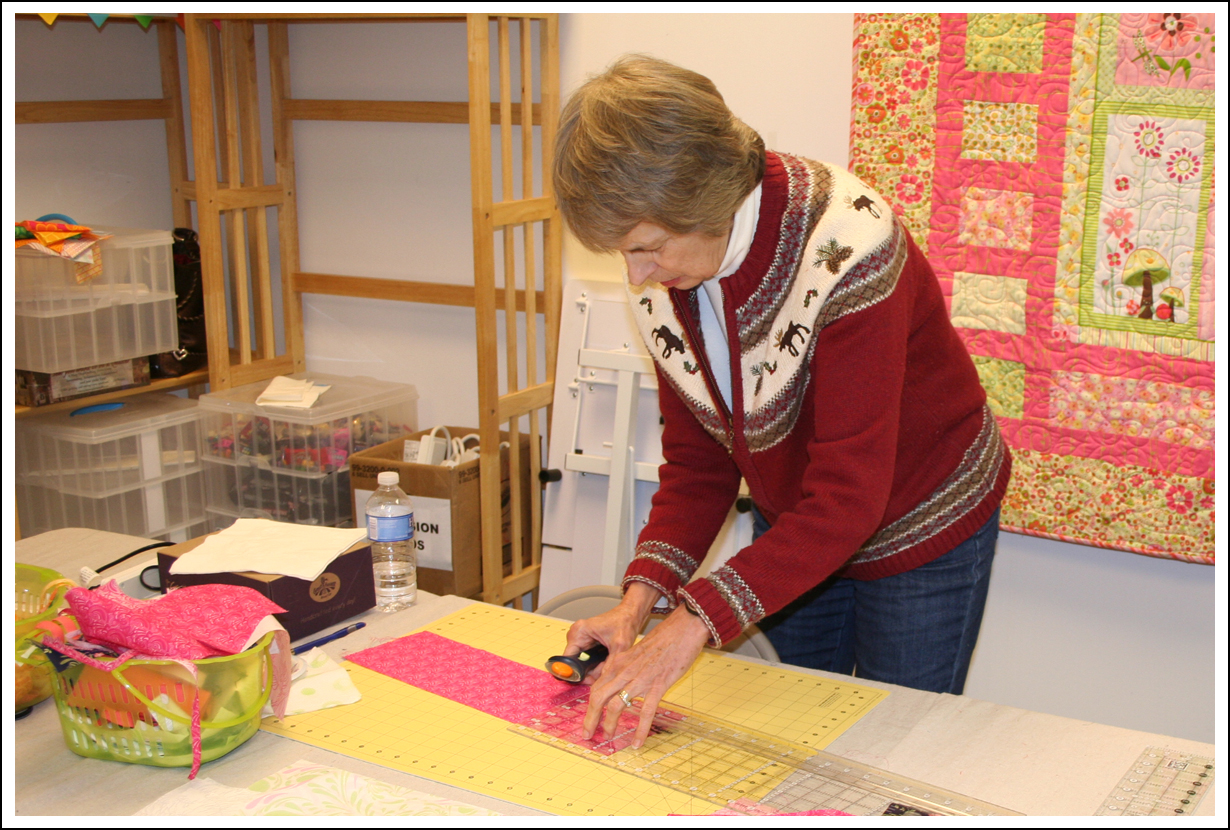
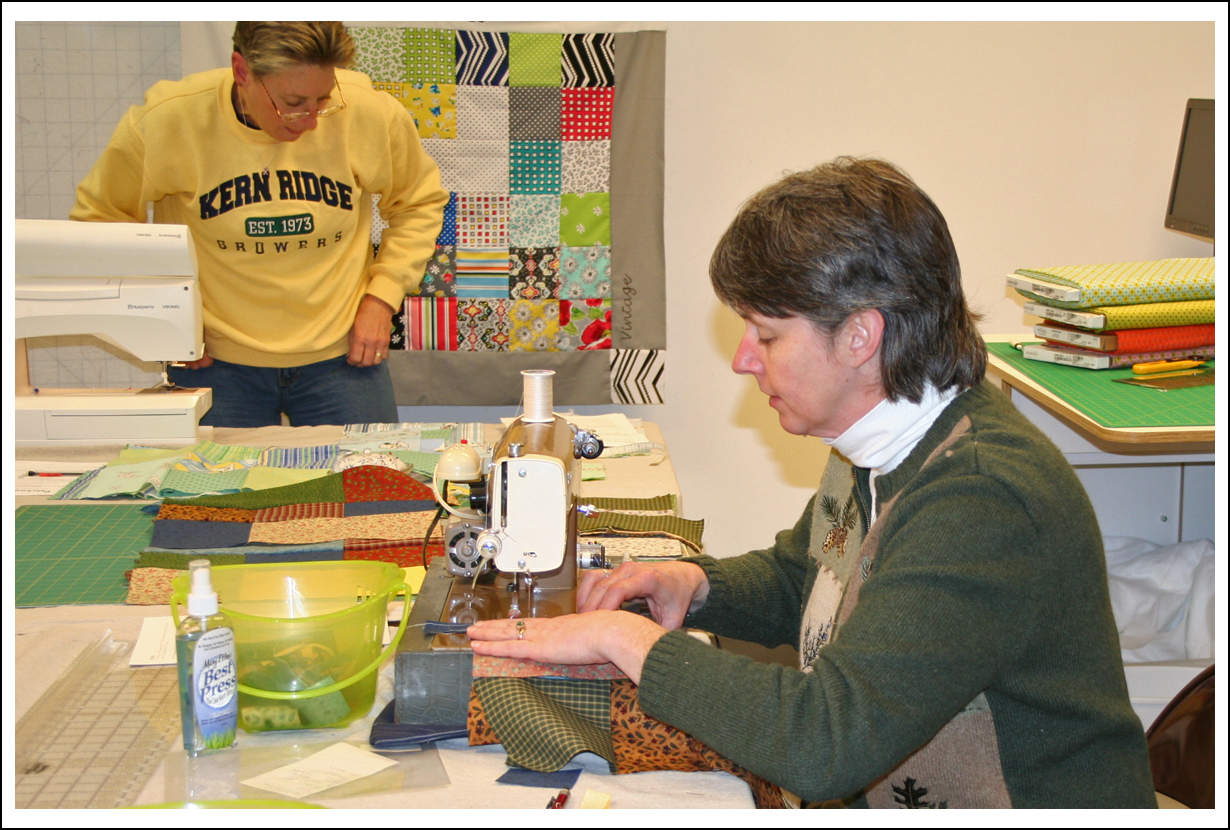
Kelly was even kind enough to capture some action photos for this post…
Rare capture of ToadMama in action!
The lady you see in the background is Sandy.
We all need to return to finish our block assembly (we ran out of time). Kelly Ann admitted that was the first time she’d taught that format, and the cutting took us longer than she expected. So we’re all hoping to make it back on February 23.
I’ll be there. Of course, it’s easy for me since the cutest little quilt shop in Warrenton is within easy walking distance.
ToadMama in action!
I hope to see all you other ladies again, too.
Kelly and crew, I’m sure I will see you all sooner.
More on the class later when my quilt is all done! Or at least, after our late-February continuation class. 🙂