The Ends

I finished another creative project.

I’d gotten tired of looking at the coffee and end tables we’d had in our family room for about 17 years. So, we moved those to my MIL’s house and I painted some old end tables for a fresh, new look.

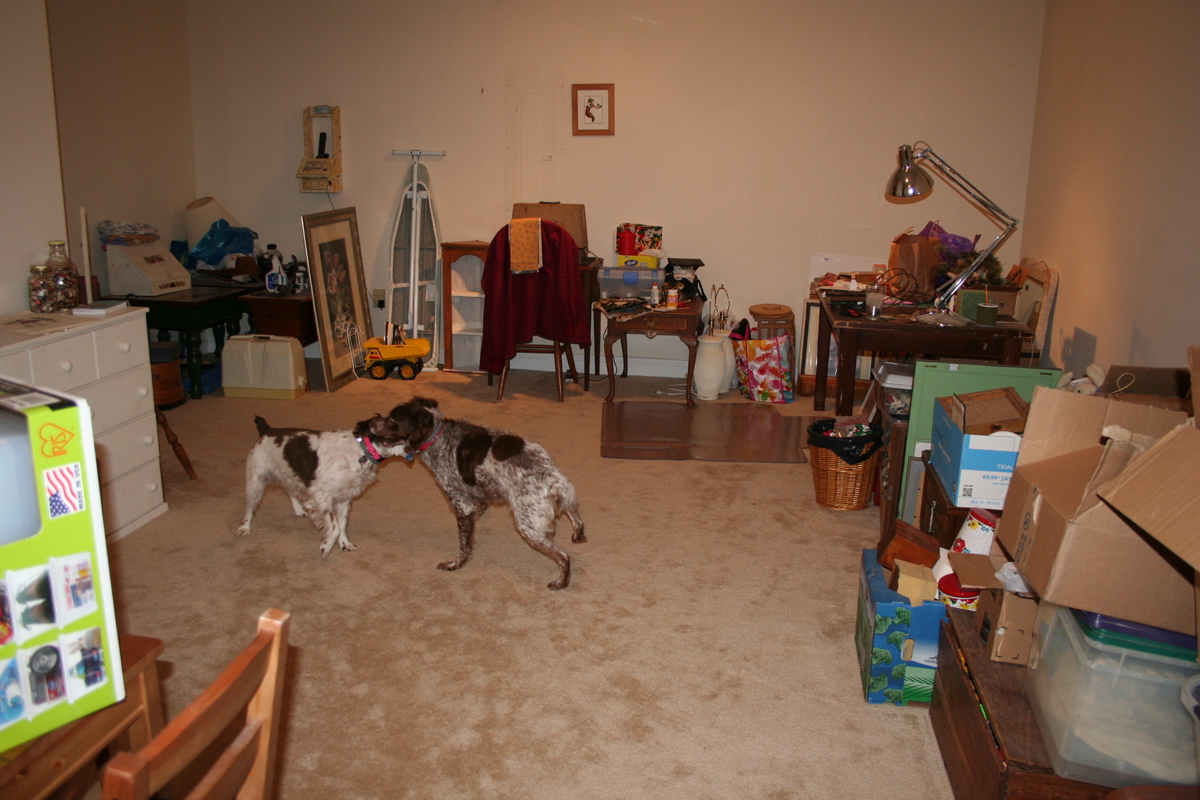
By “old end tables” I mean pieces I acquired at a local thrift shop about three years ago. They’d been sitting in a corner of our basement, collecting dust, just waiting for inspiration to finally hit.

End_Table_Before
Thrift Store Find (Before)


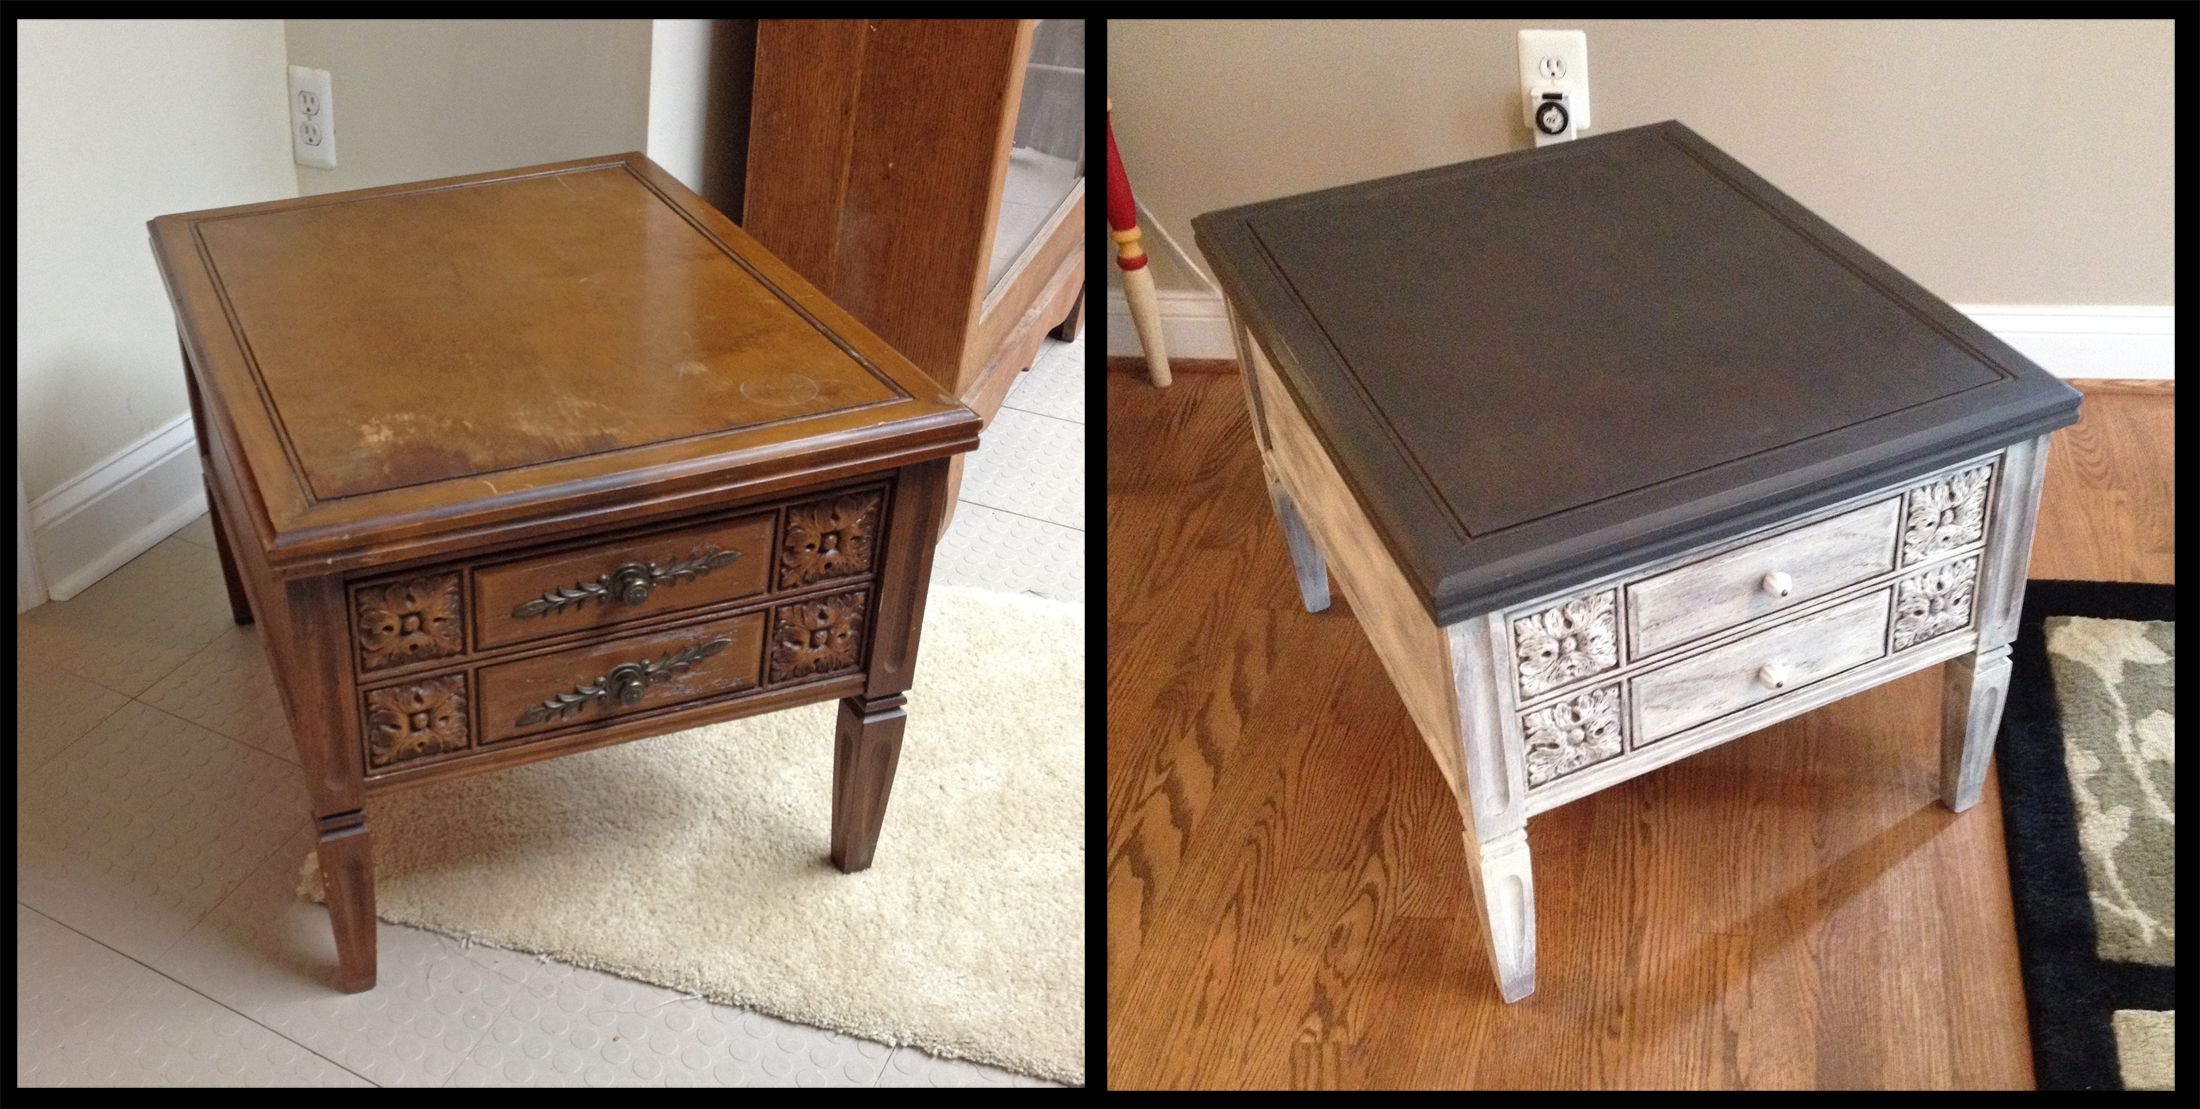
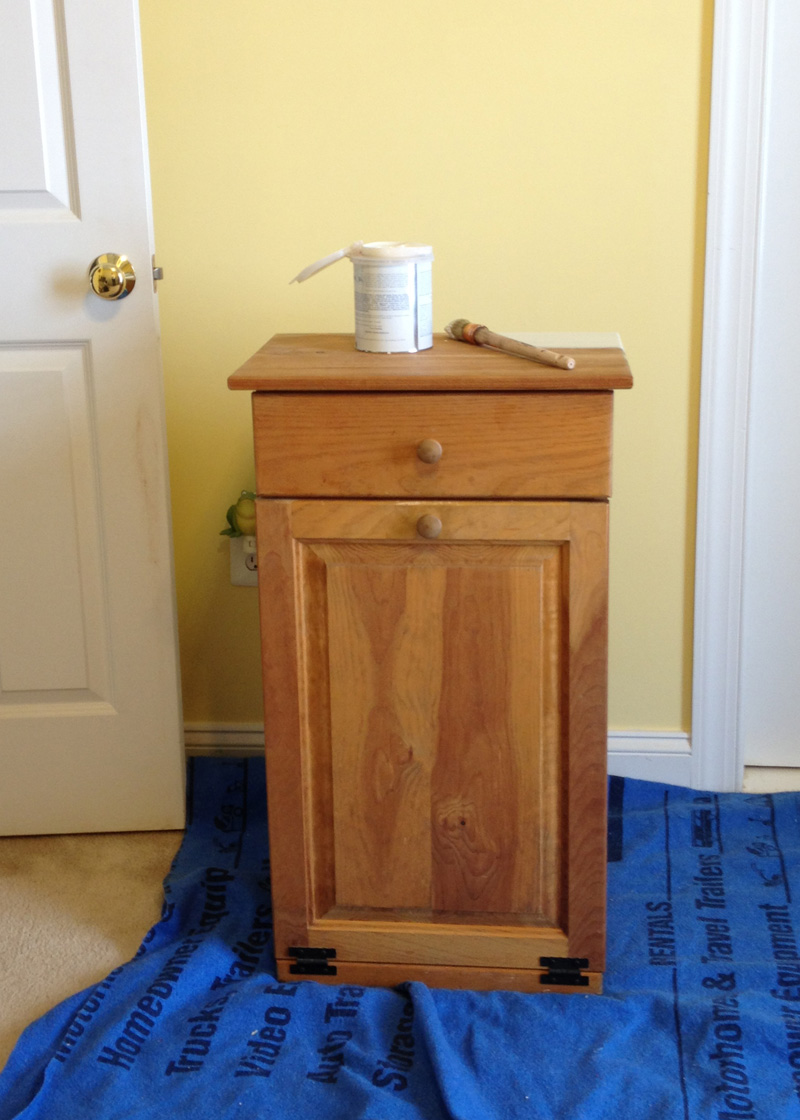
Part of the fun of these furniture painting projects of mine is finding the pieces to transform. I snagged this pair of end tables for about $50. Knowing what I know now, I probably could’ve gotten them for a bit less, but that wasn’t terrible.

I know I’ve said this before, but that Annie Sloan Chalk Paint® (ASCP) is miraculous stuff. It really does stick to anything, and really let’s you give a piece, or pieces, character.

I wanted to do something colorful and fun, but not too much fun, otherwise that Hubby of mine would hate it.

End_Table_After
Thrift Store Find (After)


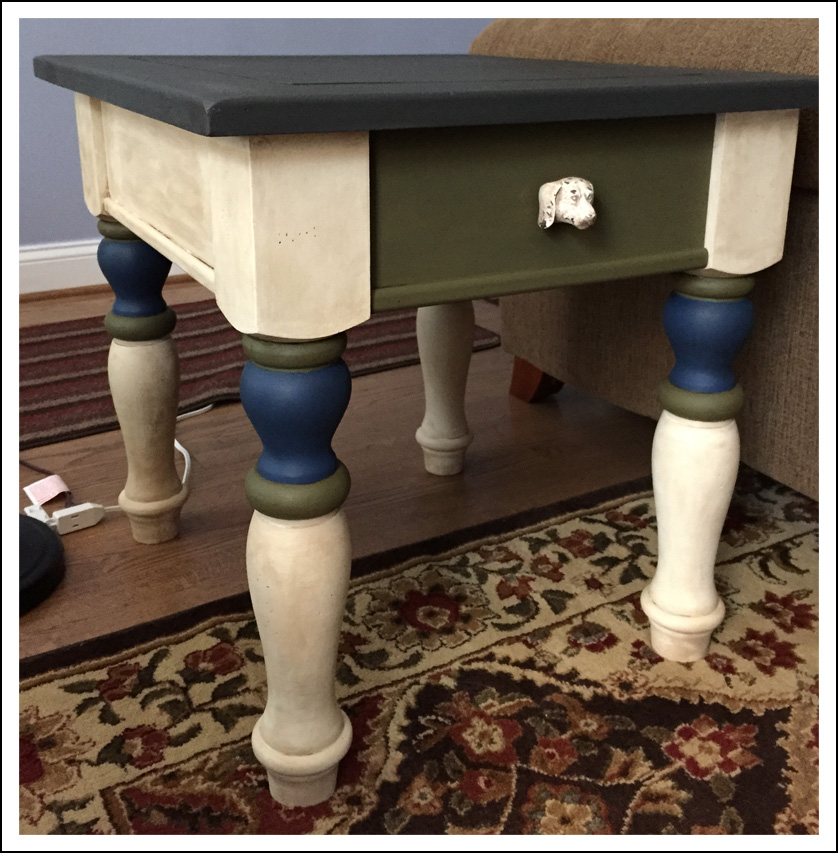
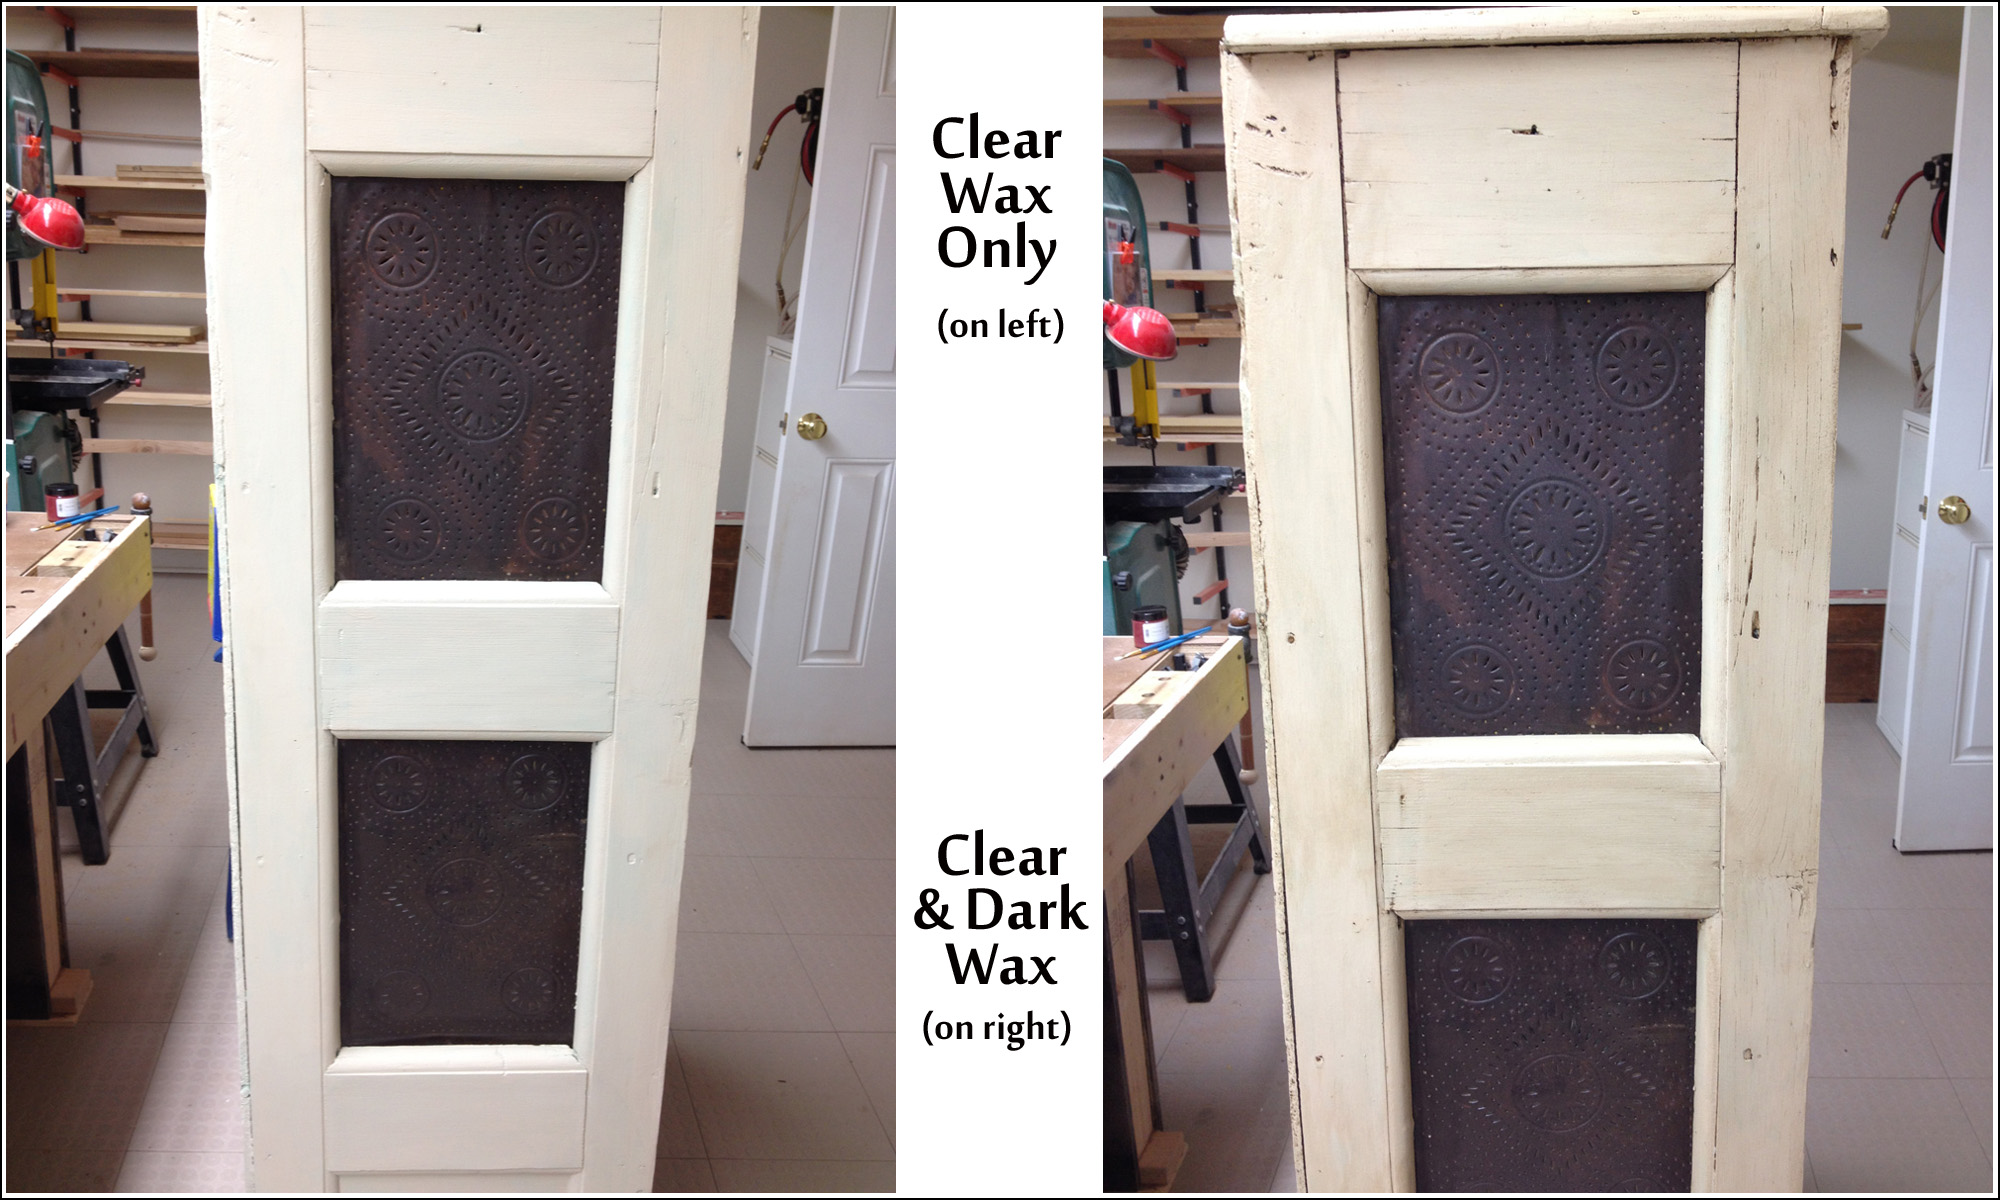
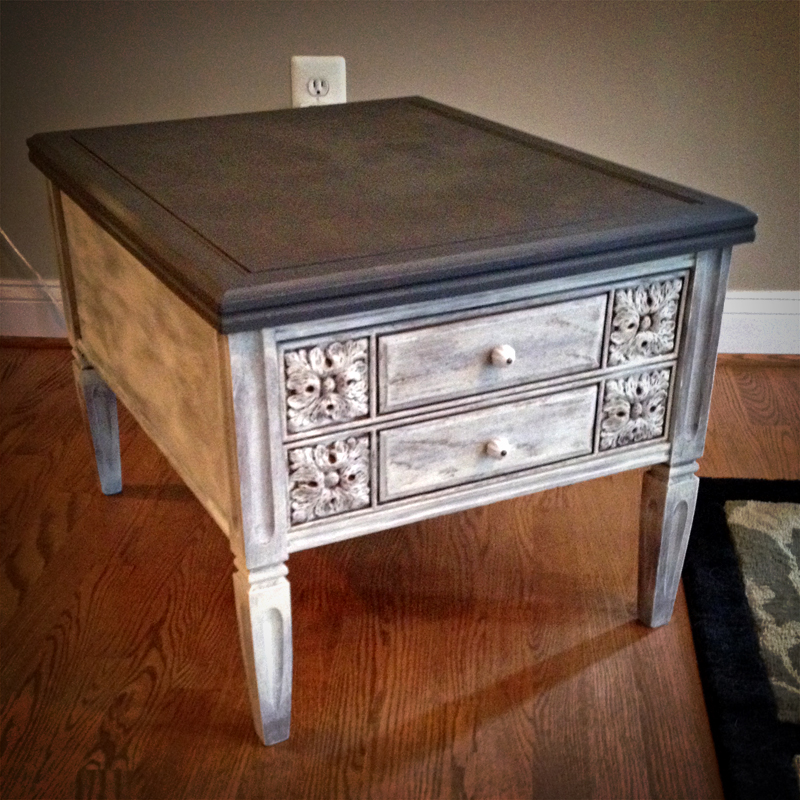
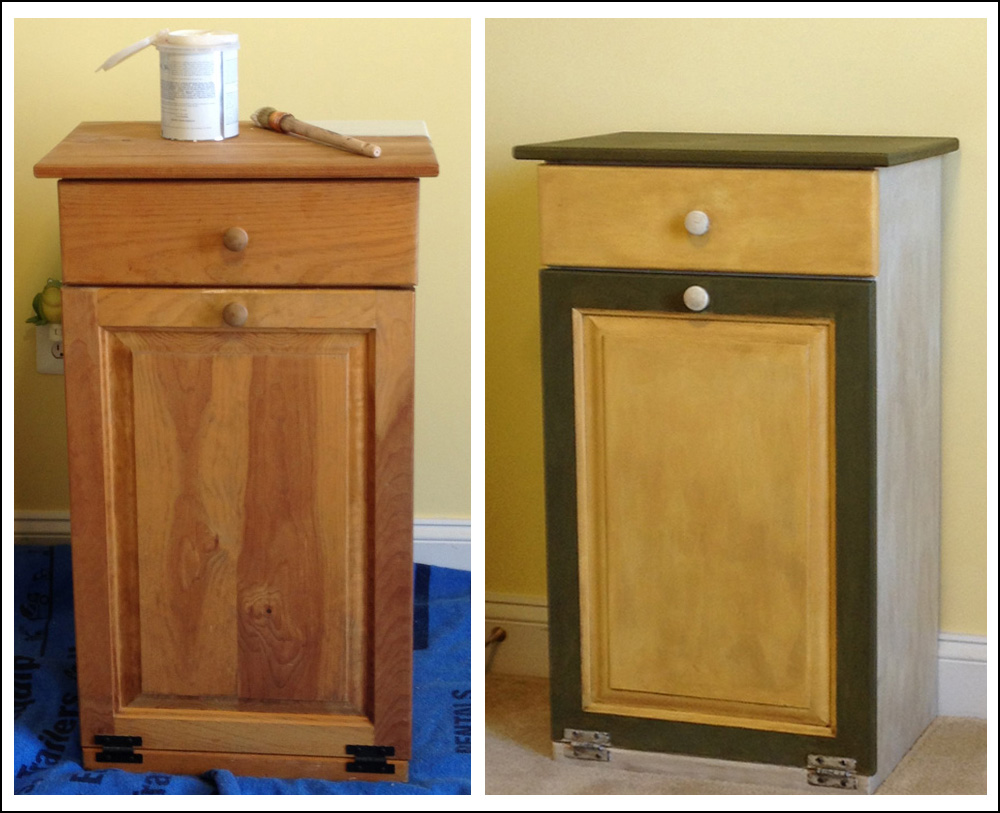
I like the distressed look, but you could easily achieve a “new and clean” finish with ASCP, too. It’s the dark wax that really lends the aged look to a piece. In the image below, the drawer on the left is how it looked before I topped it off with dark wax.

End_Table_Drawer_3
L-R, Before and after dark wax.


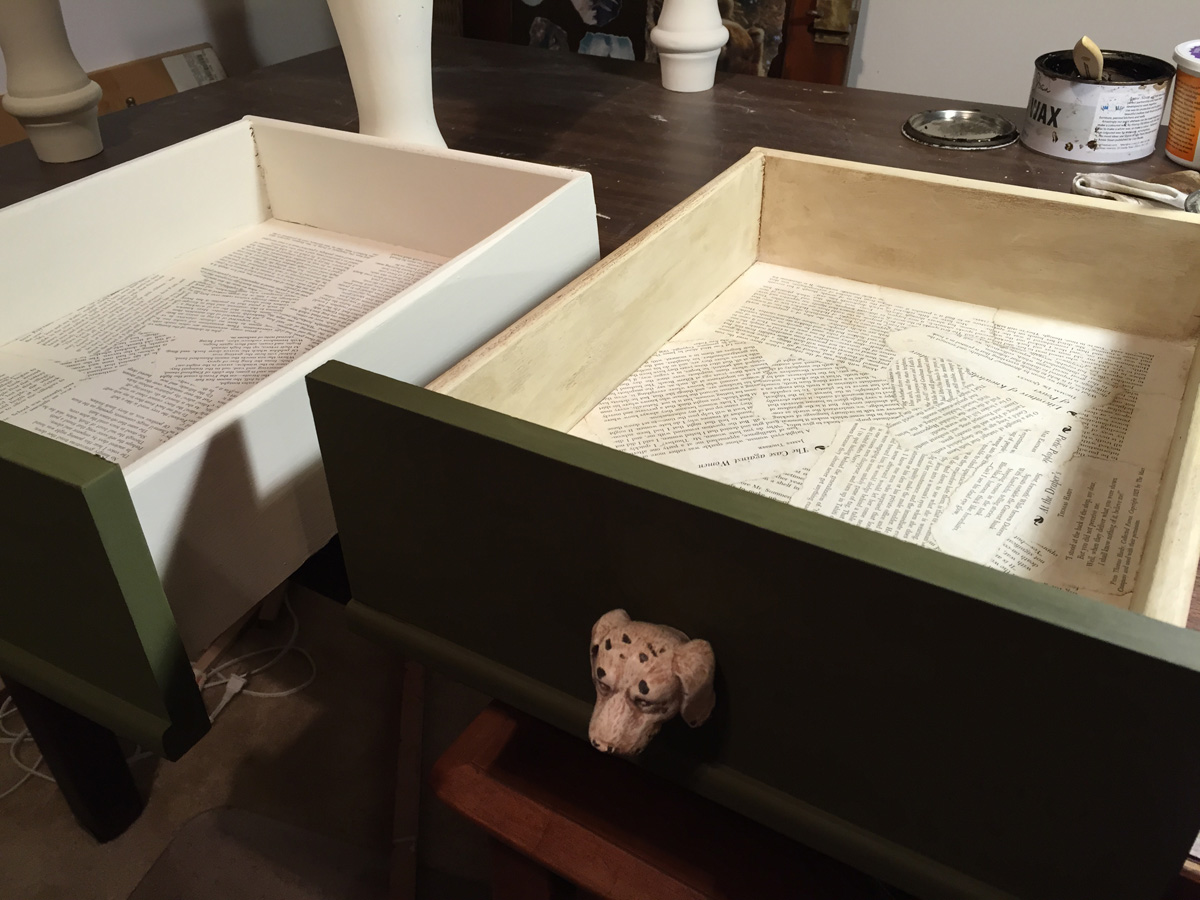
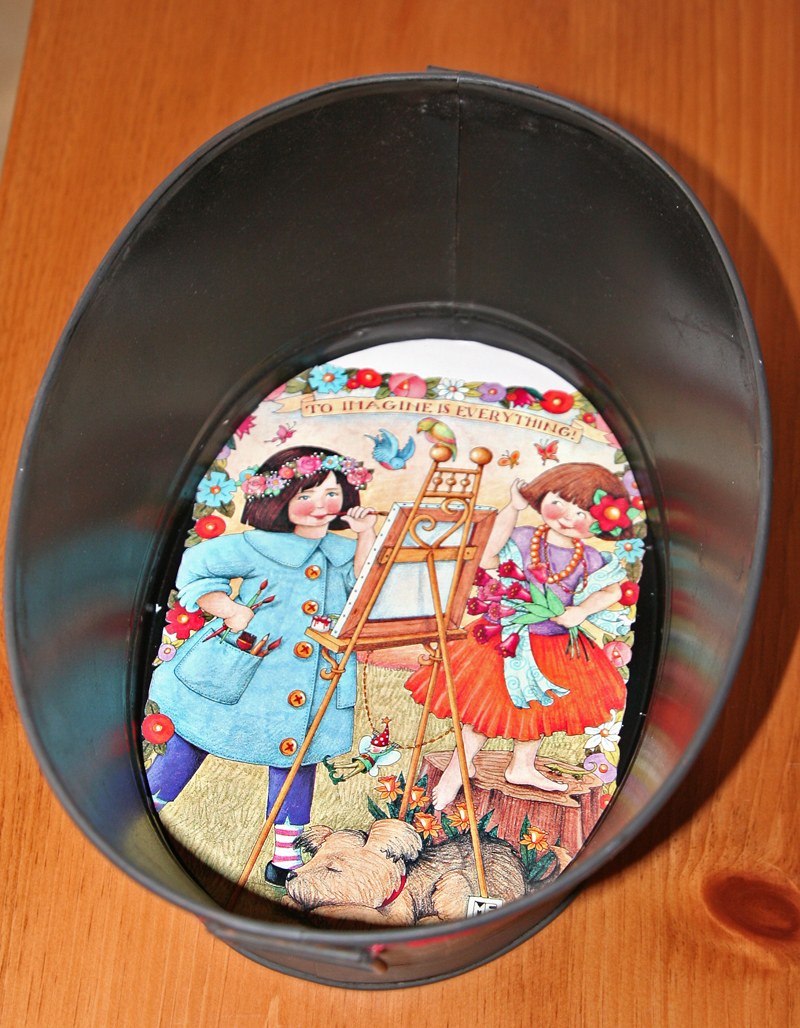
Speaking of fun, I wanted to line the drawers using decoupage, a technique I’ve seen my friend Janet — The Empty Nest — use many times. I didn’t have any dog-themed or appropriately colored paper on hand, and I didn’t want to go buy anything new, so I decided to use pages out of an old literature textbook.

End_Table_Drawer_4
1950s-era Textbook


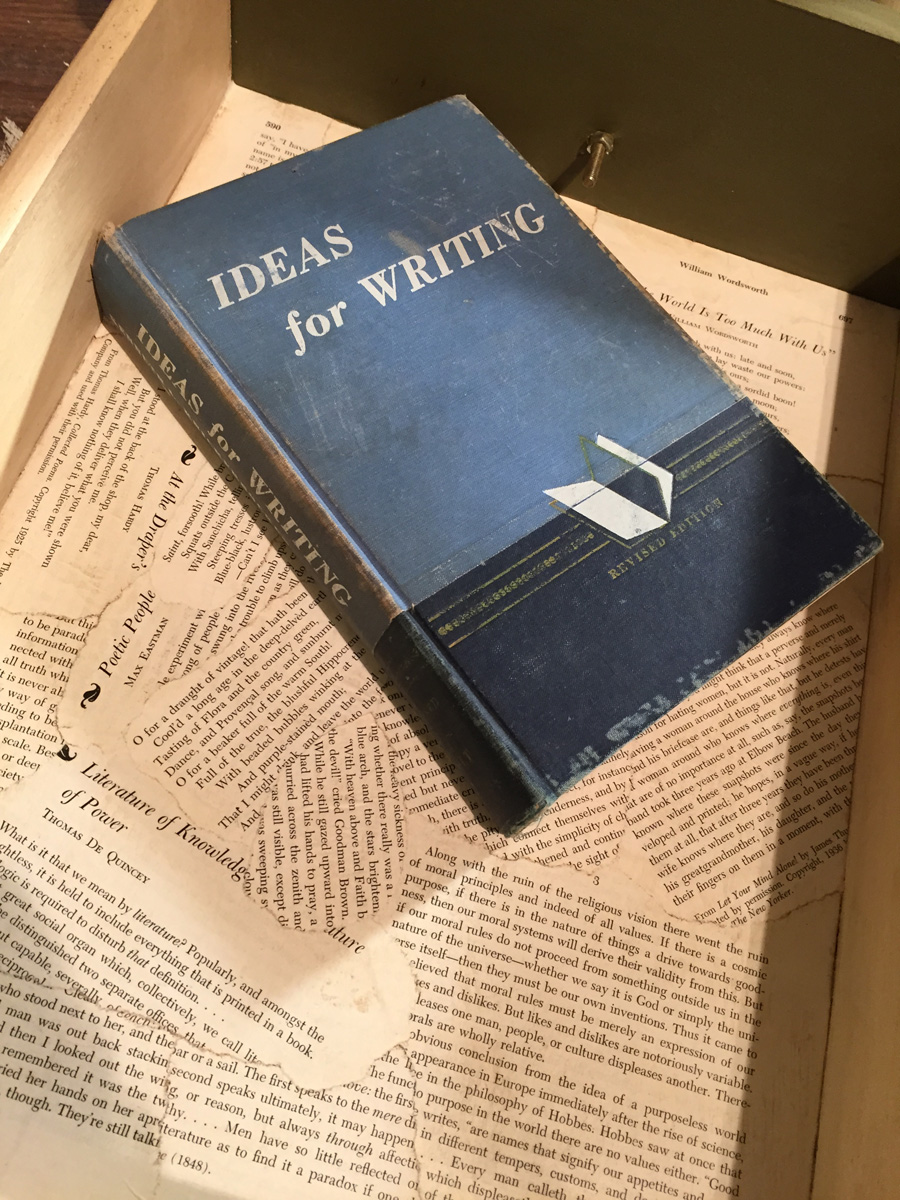
I’d picked that book up a while back when my auction-house friend told people to help themselves to some boxes of books that hadn’t sold. Actually, if I remember correctly, she said all buyers had to take at least one book with them or they couldn’t leave. I was selective and only grabbed a few, some of which were excellent reads. But Ideas for Writing wasn’t one of them. I’d been hoping it was more how-to book than textbook.

I’ve actually been meaning to toss the thing. Which is why it struck me as odd that it was quite hard for me, a book-lover, to tear pages out of that book. I mean, I knew it was headed for the trash heap, or at least the donation pile, but still. It’s a book. Full of essays, stories, and poetry created by literary greats.

End_Table_Drawer_2
Drawer lining.


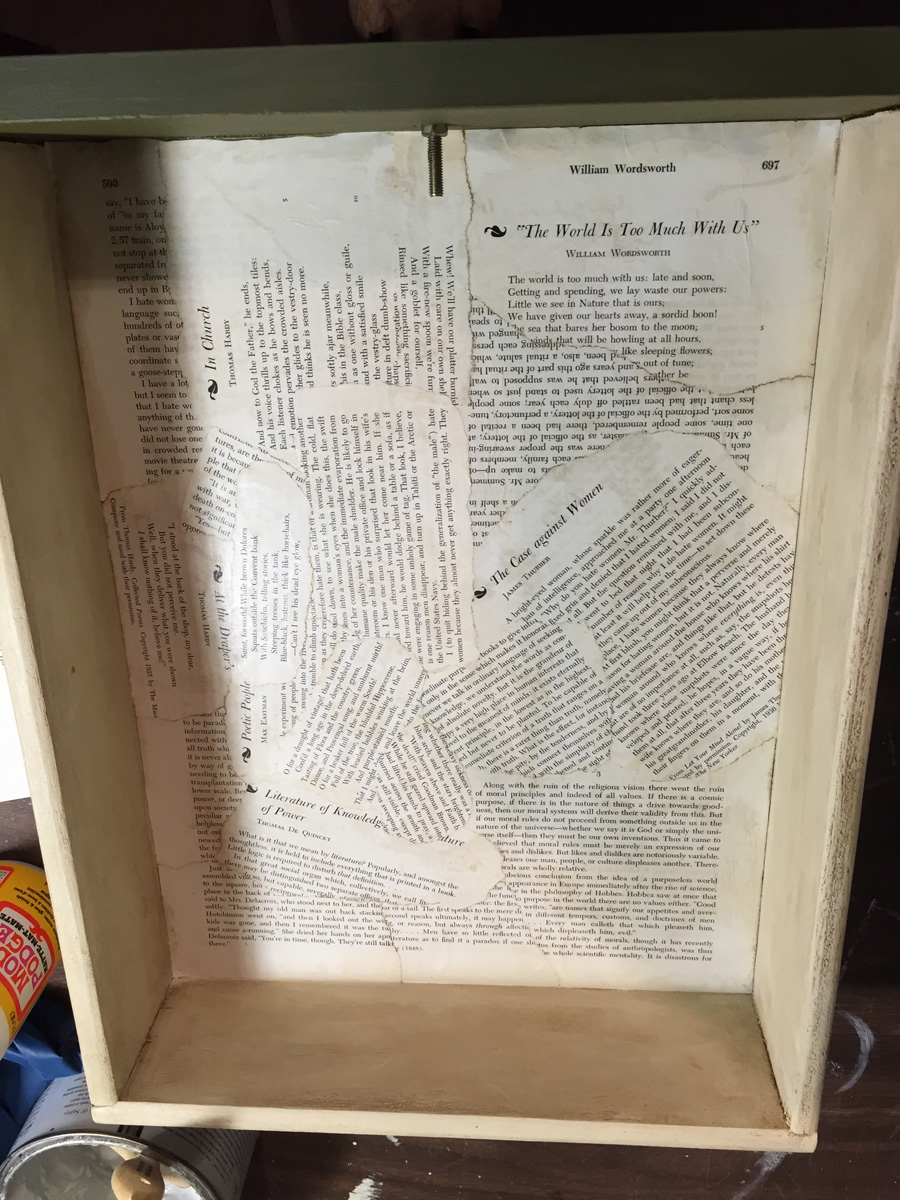
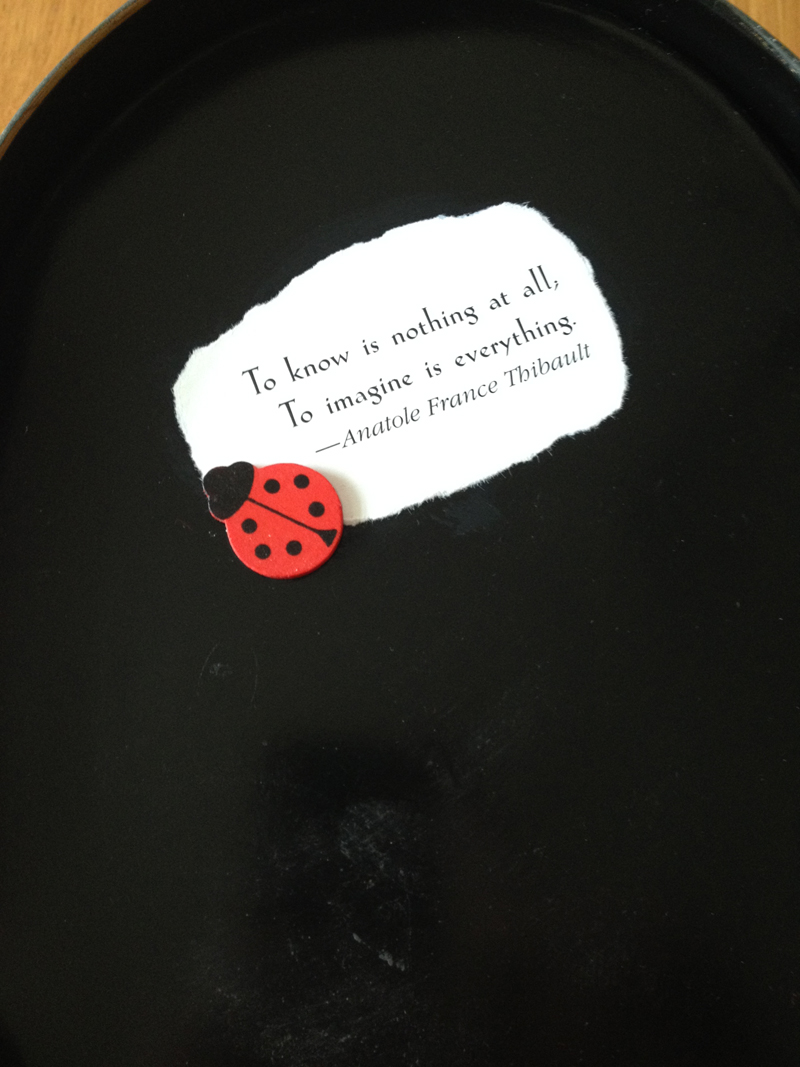
I think it turned out kinda cool. I even tried to use interesting bits of text.

End_Table_Drawer
The Finished Piece


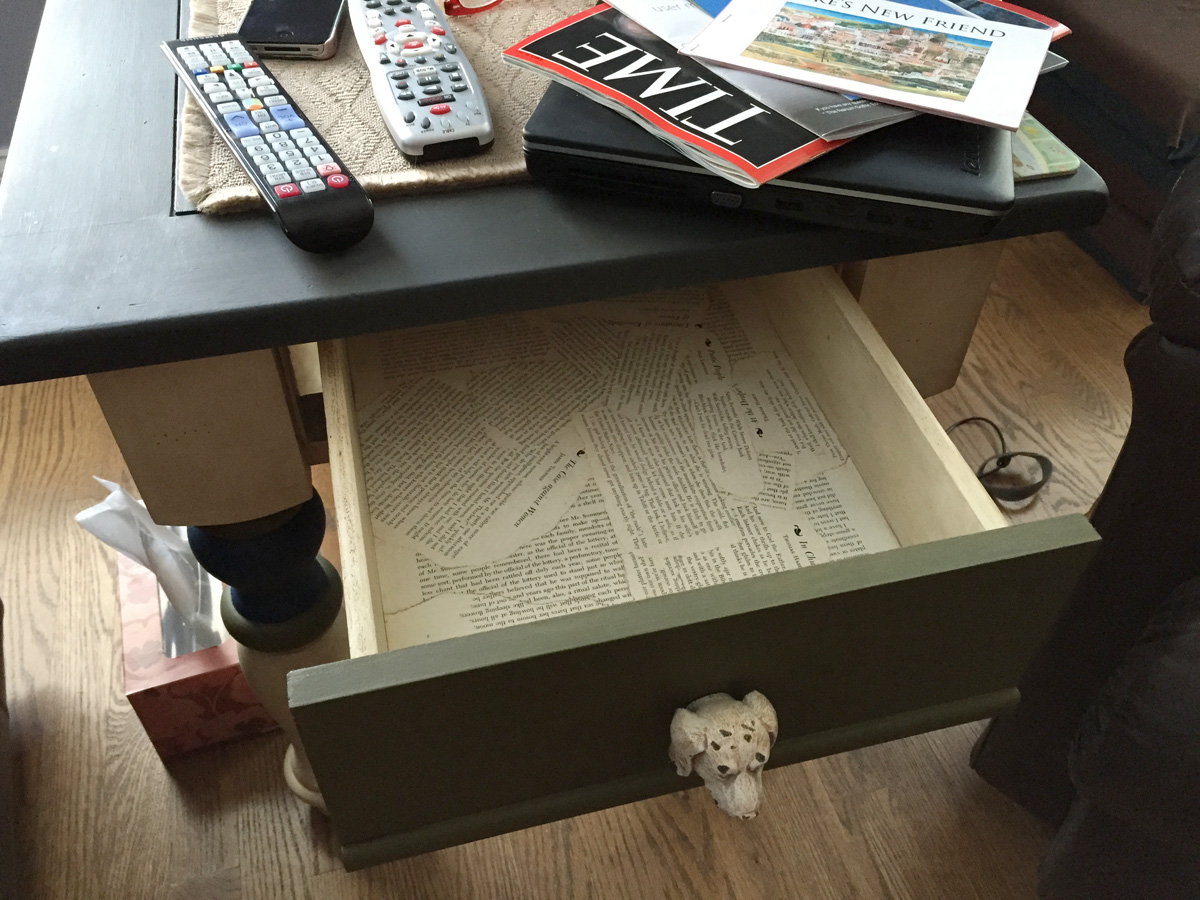
Cute, right? Not that we’ll see much of that drawer bottom on a regular basis.

End_Tables_Both
A Matching Pair


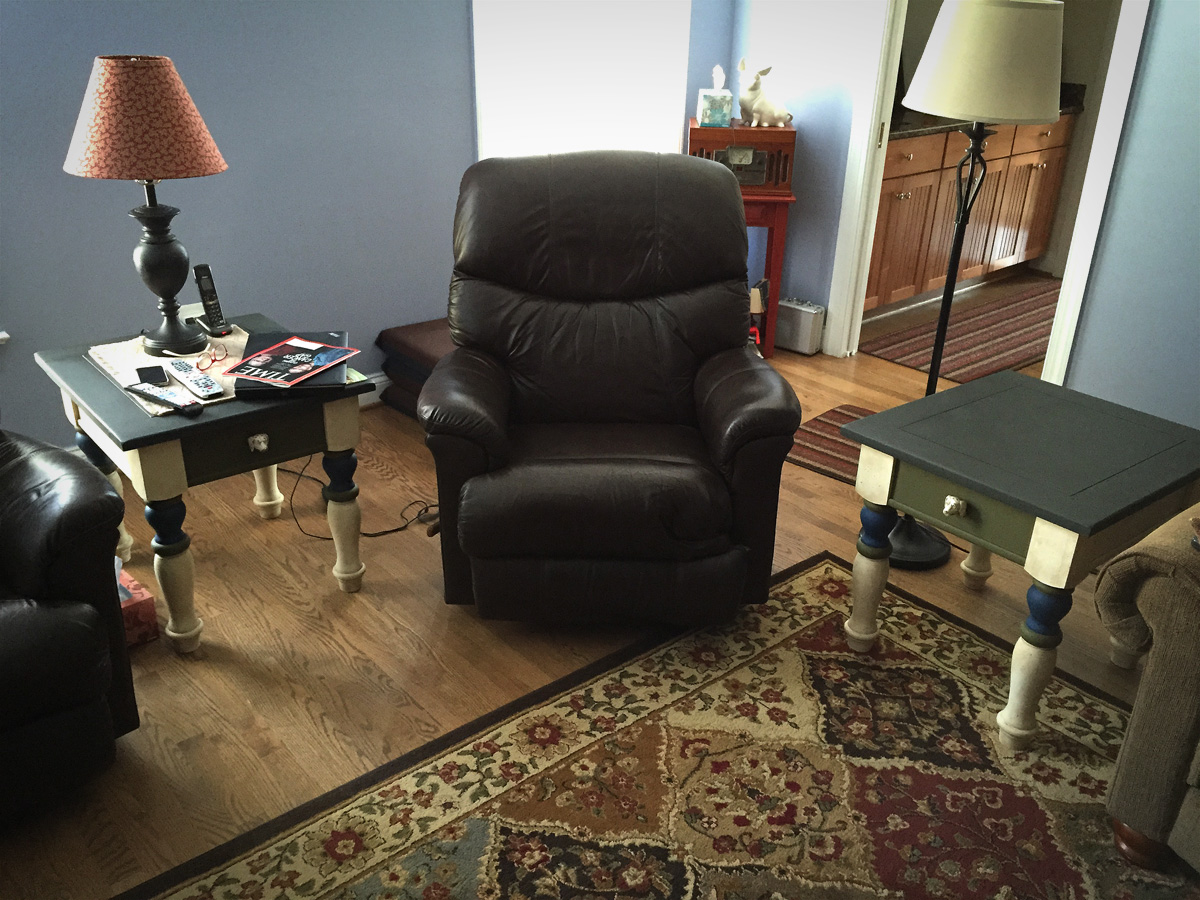
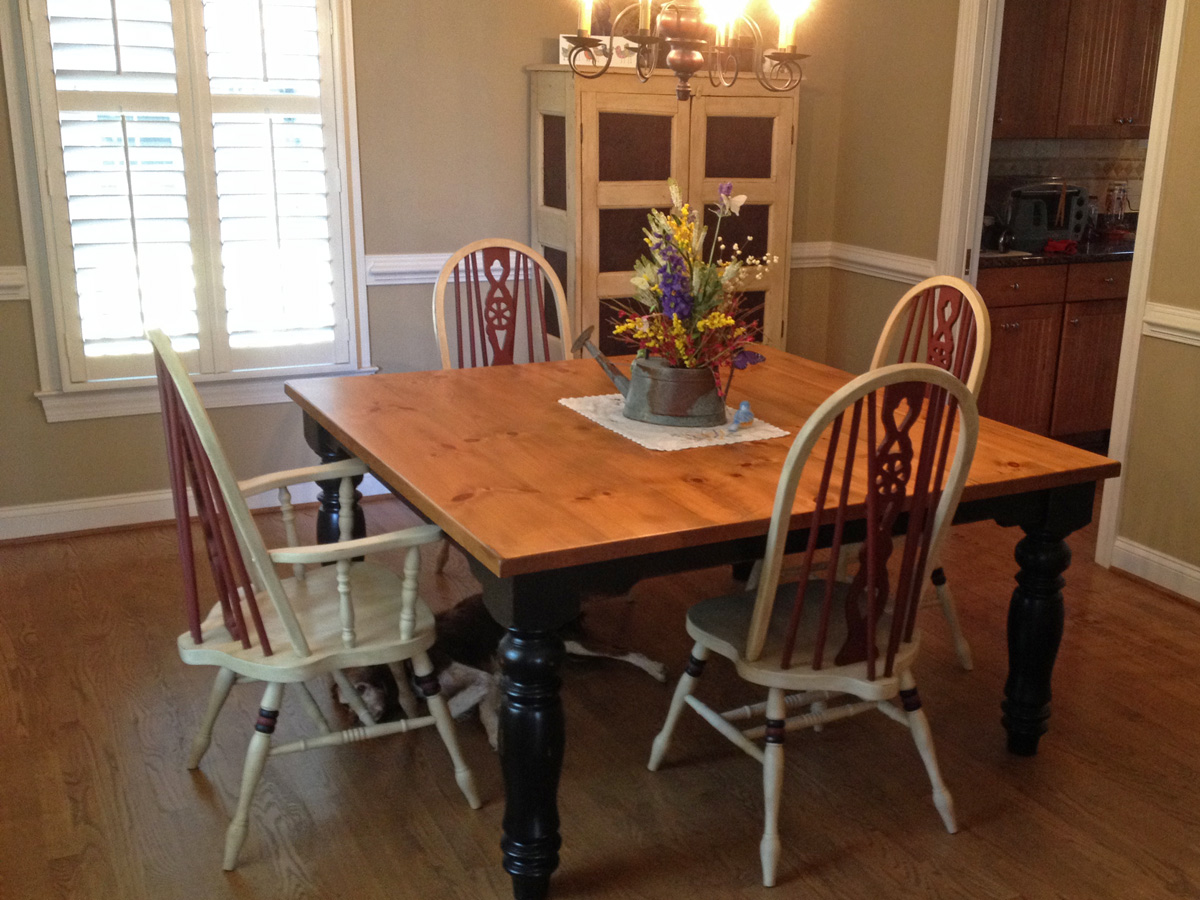
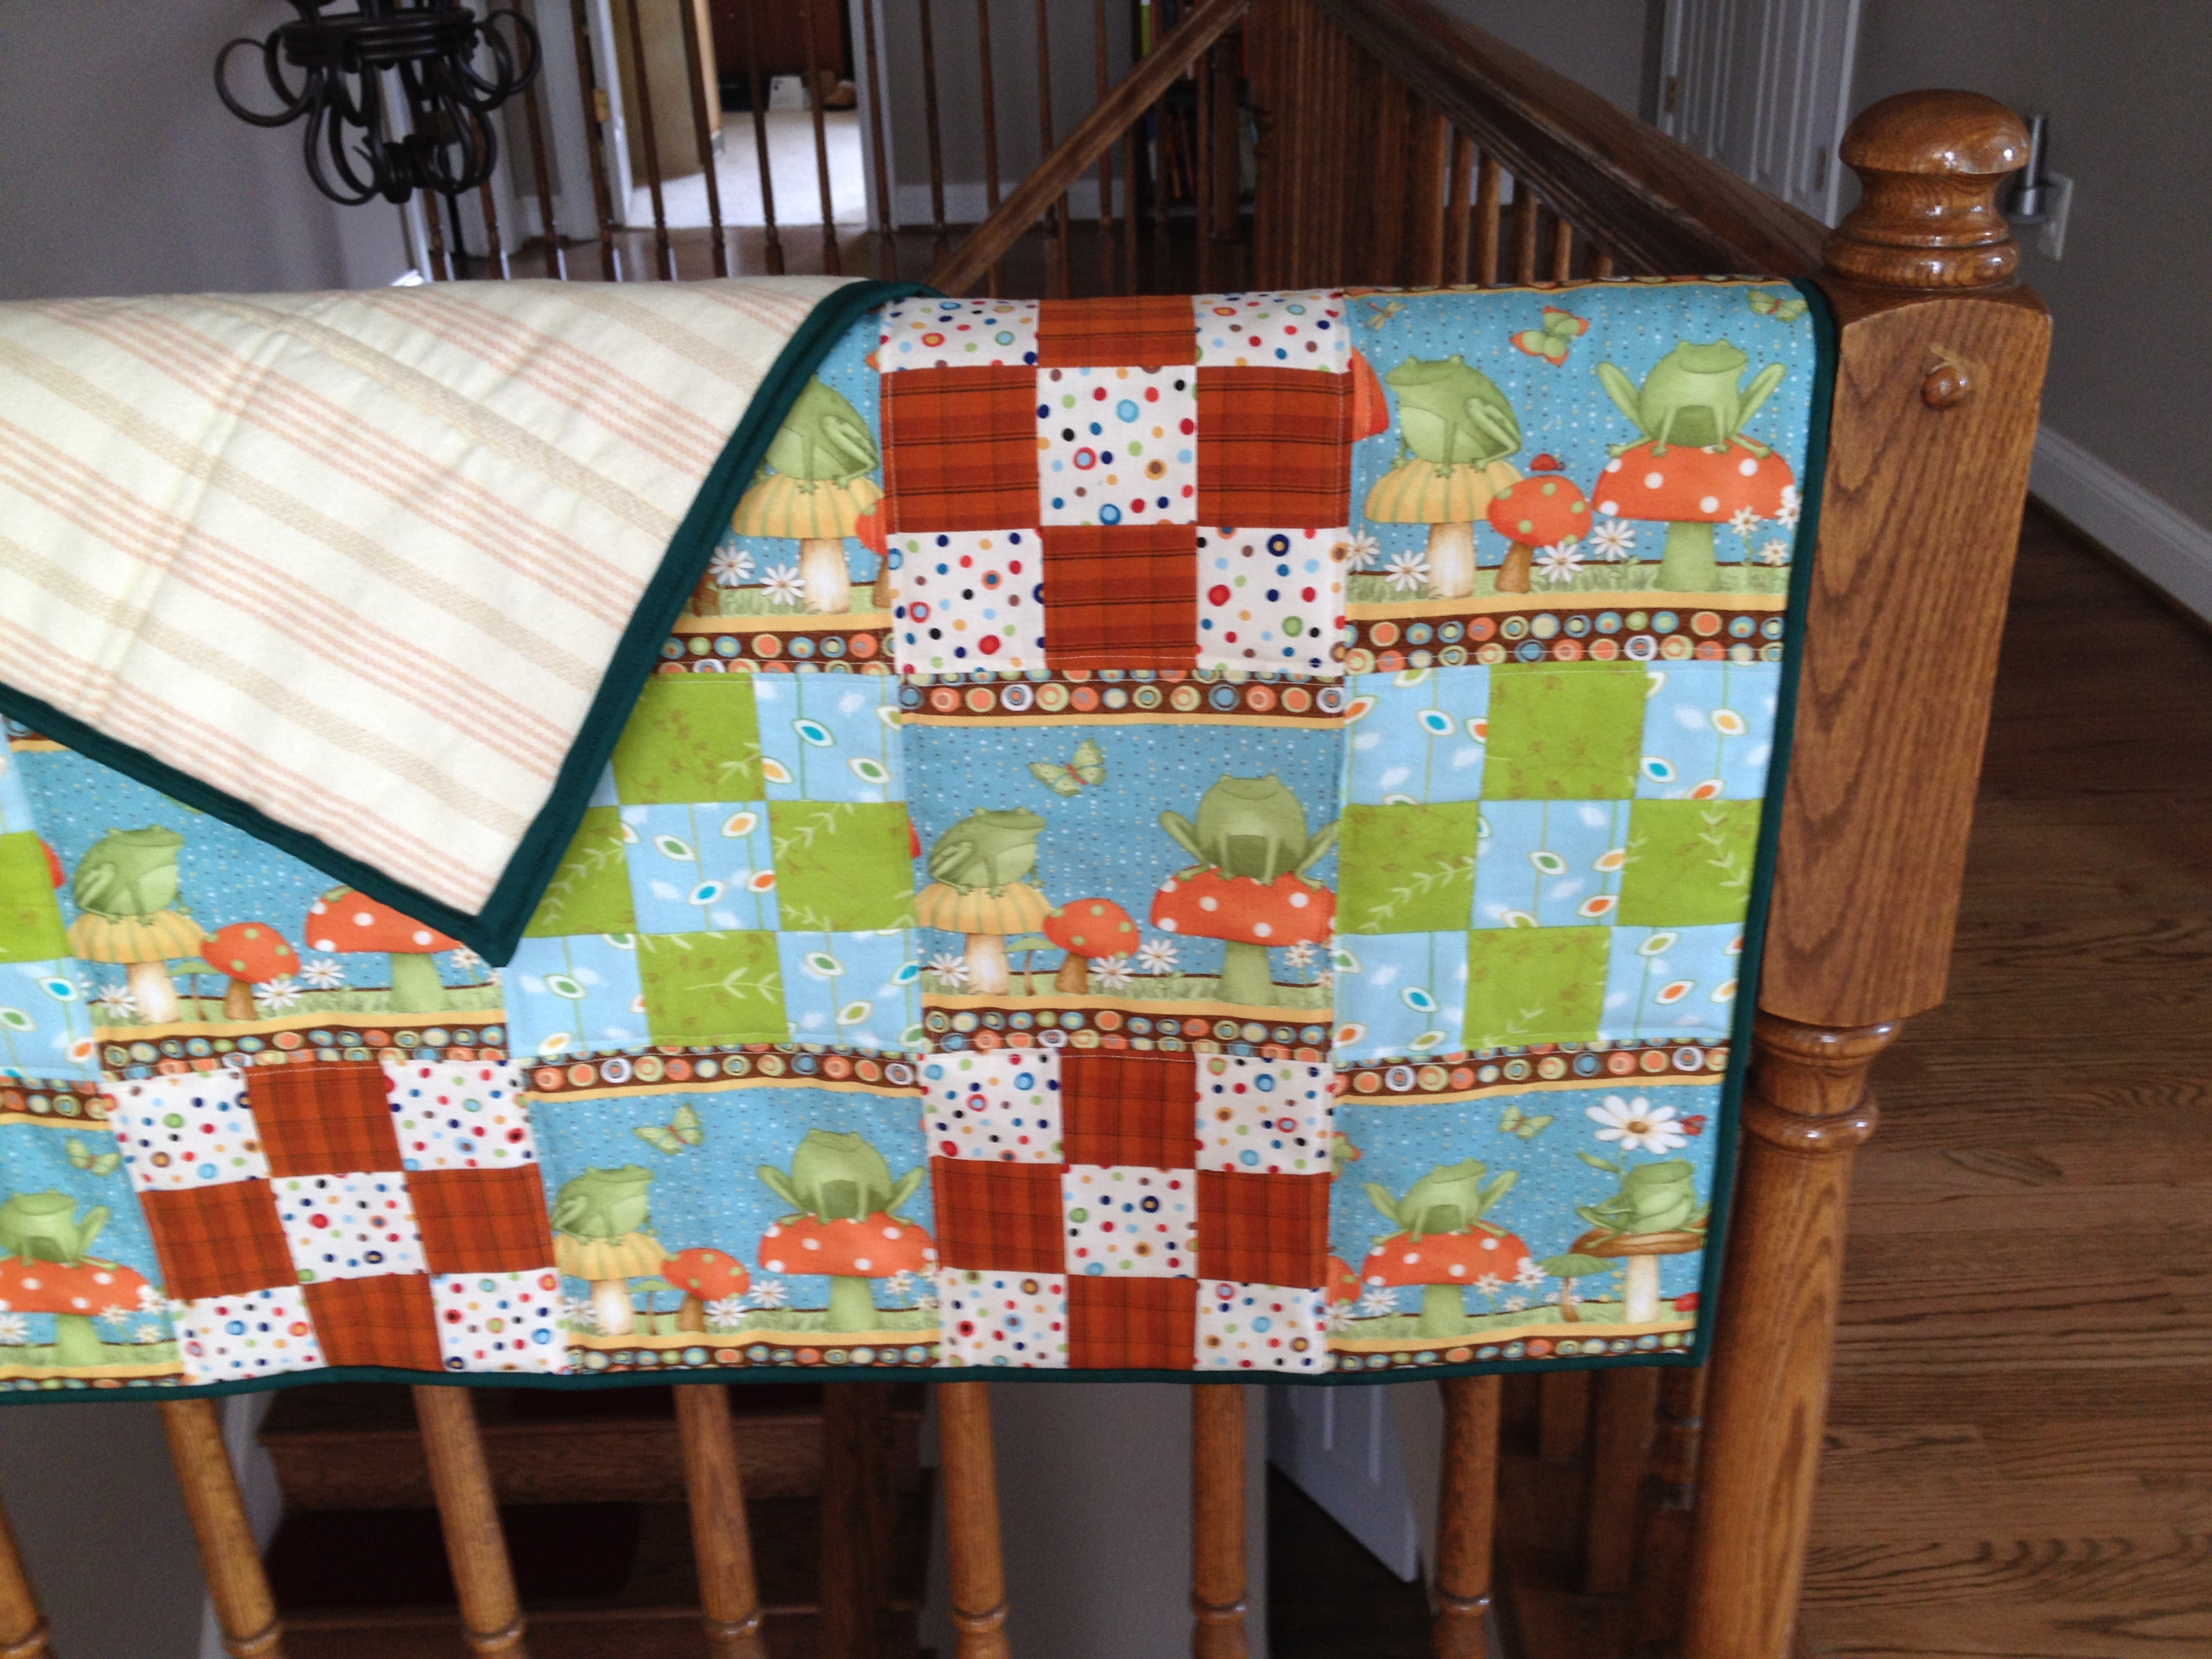
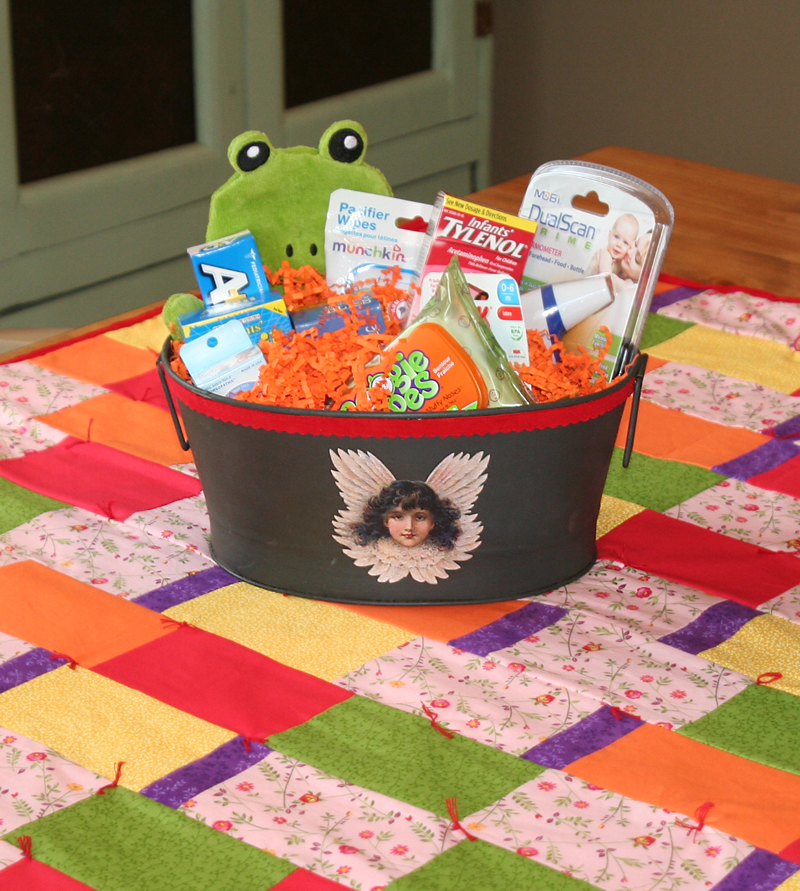
I’ll be adding table-toppers, which I will sew one day, to tie in more of the red and gold from the rug.

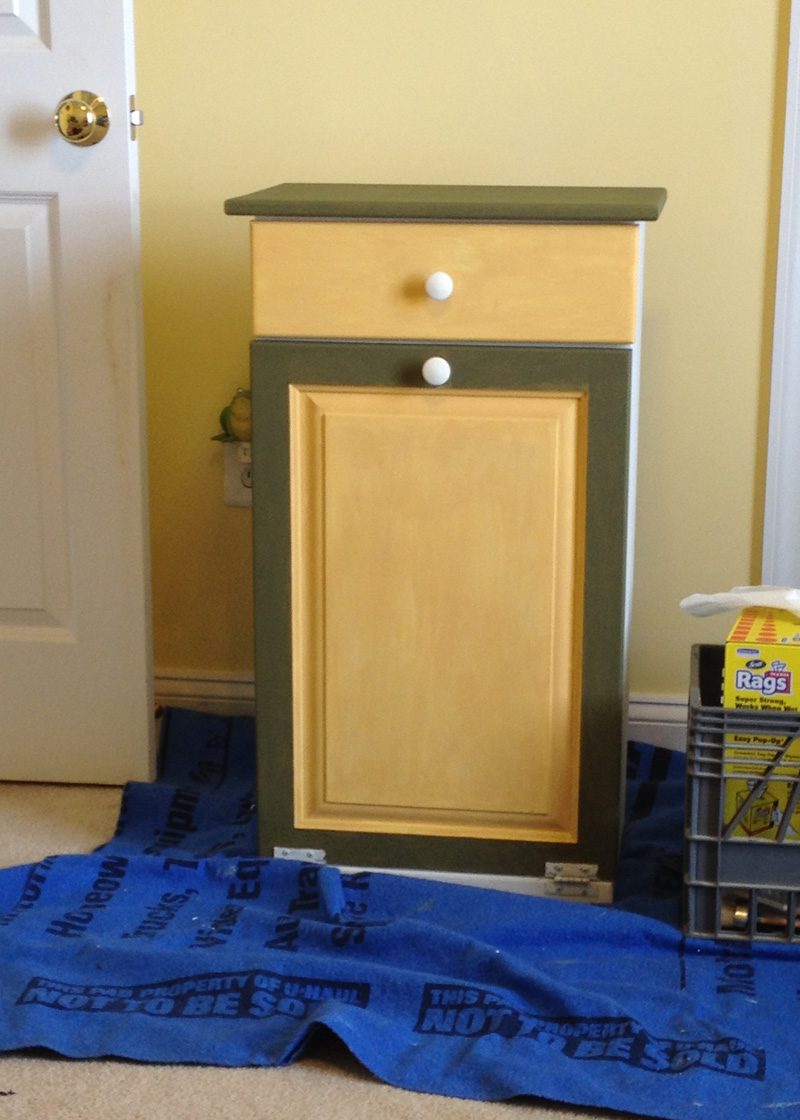
What do you think? Fun and functional? Or kinda ugly? You’re entitled to an opinion, too, you know.

Oh, and in case you’re wondering, I got the drawer pull (yes, they’re dog heads) from The Empty Nest. But it’s been a while, so she may no longer have them in stock.

Mint-Green Monstrosity… Gone

I’ve had an ugly-ass pie safe sitting in my dining room for a while. I did a post about the pie safe shortly after I bought the piece.

Mint-green Monstrosity

I never did like the color. The more I looked at it, the more I hated it.

This is not a valuable antique. (My Dad thinks anything old is valuable.)

I probably paid too much for the thing. But that’s okay. I wanted it. It spoke to me. The piece had character. And that’s exactly what sucked me in.

The old, rusty, original, stamped tins. The knot-holes. The wonky doors.

It’s not a very-well-constructed item. In fact, I think either a kid built the thing or some poor pioneer/farmer.

Not only was it clumsily made, upon close inspection I realized it had been built of scrap wood.

It wasn’t exactly square. And the joinery was some of the more amateurish work I’ve seen.

Adding insult to injury, someone removed the original hinges and replaced them with very basic, brass, surface-mounted hinges. If you click on the image and zoom in, you’ll see what I mean about the hinges.

So why did I buy the thing? I knew I’d give it new life one day.

It sat in my dining room for a little more than two years. I wanted to paint it, really. But it’s a big piece — at least five feet tall and about three feet wide — and I knew it would take a decent chunk of time. Large, uninterrupted chunks of time are a rare commodity around here.

Still, I can’t believe I left that thing sitting there looking ugly for so long!

Finally, I decided to get that thing done. With Hubby’s help, of course.

Step one was to empty-out the piece.

Where to put all of the stuff that we’d crammed in there? On the dining room table, of course.

1_IMG_8213
What a cluttered, claustrophobia-inducing mess!

Hubby and I carried the thing to the basement, where he removed and repaired the doors so he could install new, more-appropriate hinges. He actually had to cut a chunk of the old wood away and replace it with new wood to make the hinges work.

2_IMG_8160
Newly-repaired Door

I painted the cabinet before he replaced the doors. Remember, I liked the character of the piece. I wasn’t trying to make it look new. Just better. So I covered that minty (or sea-foam green) green paint with a single, not-so-neatly-applied layer of Old Ochre chalk paint. In some places, I used two layers. But not many.

Once the entire piece was covered, I realized it needed something else. Some sort of oomph. Something to make it “pop.”

So I added some color to the interior.

4_IMG_8152
A little bit of color.

There’s nothing symmetrical about this piece of furniture, so I applied the red (Primer Red) and blue (Napoleonic Blue) in an uneven pattern. I didn’t even use tape, I just eyeballed it. Tape would have made it too straight. Too perfect.

This is not a perfect-type piece.

I wasn’t sure if I was going to use dark wax on the piece, but that stuff really highlights imperfections. And since this pie safe is full of imperfections, I used both clear and dark wax.

Clear Wax vs Clear & Dark Wax

I just love the way the dark wax settles into all the nooks and crannies.

Then it was time for Hubby to hang the repaired doors.

5_IMG_8161
My Handy Hubby

Here’s another clear wax-only vs clear and dark wax comparison.

6_IMG_8200
The door on the left is Old Ochre with clear wax.

Some of you may hate this rustic look. I like it.

I decided to make the drawer face red.

One day, my kids will either be fighting over this piece or happily lugging it to the dump.

7_IMG_8210
It’s done! Maybe.

Sorry for the grainy pics. I used the phone camera.

I’m not crazy about those too-white knobs, so they’ll be replaced one day.

9_IMG_8212
In place and ready to be loaded.


8_IMG_8214
Cabinet Re-filled


10_IMG_8221
Old stuff (no priceless antiques here).


It’s great to have our dining room back.

11_IMG_8215
You can see the table again!

Here’s a reminder of what it looked like before.

Mint-green cabinet, stuffy crystal chandelier, and unpainted chairs.

It’s SOOOO nice to have our dining room back. I am not a neat freak, but all of that clutter made us both feel as if the walls were closing in on us.

13_IMG_8218
Now it matches.

Not only does the pie safe look better, it actually matches the table and chairs.

So, do you hate the old, rustic look? If that’s just not your style, I hope you can at least appreciate the new life I have given these old pieces of junk. 🙂


And in Other News…

Lots has been going on around here of late. And we had some excitement in the family, too.

I’ll share the family excitement first. I’ve dubbed the event…

A Proud Moment in Family History

image
Shannon on her first motorcycle.

Our eldest kid, Shannon, who lives in San Diego, just bought her first motorcycle. It’s a 2009 Honda Rebel. She passed her motorcycle safety course with flying colors and got her license within the last couple of weeks.

I think a trip to San Diego will be in order soon so we can do a family ride.

Under Contract

under_contract
After just 18 days on the MLS.

The WV Place is under contract. We got the offer exactly two weeks after it hit the market. It was a bit low, so we countered. The contract was accepted two days later. Now we just have to get through the home inspection. We don’t anticipate any major issues, but one never knows…

Another Furniture Makeover Done

I bought this piece at auction over a year ago. There was some termite damage to one of the back legs, but I loved the look of the old oak and the large glass front. After getting it home, we realized it stunk. Bad. The old-people-house smell was oozing out of its pores. Is that what “musty” means? It sat in our garage for a while, coated in baking soda. Finally, we took it down to the basement.

That handy Hubby of mine gave it a new back leg. The shelves were particularly stinky and quite banged-up. I covered the whole thing in a couple coats of Zinsser’s Shellac (per my friend Janet’s recommendation), sanded it lightly with very fine steel wool, cleaned it off with mineral spirits, then hit it with some paint. I wanted to preserve the look of the nicely-aged exterior, so I just painted the base of the interior and the shelves, using the Old Ochre color in Annie Sloan Chalk Paint.

glass_case
Display Cabinet Re-style

Now I’m in the process of finishing that ugly seafoam green pie safe…

He Just Can’t Sit Still

Hubby has been busy, too. After a long break post-Grandfather Clock, he’s back at doing some more home projects.

project1
Installing a Door

He’s been wanting to add a sound barrier between the family room and kitchen since shortly after we moved here. All those folks who just LOVE “open floor plans” must never have experienced trying to watch TV while someone else is doing something, anything, in the kitchen.

project2
Relocating a Light Fixture

The light in our breakfast room is centered on the ceiling, which is just dumb. It should have been centered over the area where the table can sit. The table can’t possibly sit in the middle of the room, or you would be able to get out the back door. Well, you could get out the door, but you’d have to squeeze past the table and chairs.

On the Road Again

Later this week, I’ll be heading back to Texas. It’s just another short work trip to Austin. Of course, I’ll try and squeeze in some fun, too. So, if you don’t hear from me for awhile, that’s why.

I can’t wait to re-visit Rudy’s BBQ…

Yum… Texas BBQ. Smoked Brisket.

I REALLY wish I could have some of that for breakfast… brisket and eggs. Yum.

Plasticene Horror to Cute Accent Piece

About a year ago, I bought an old end table for $12. It was in decent shape, but it wasn’t solid wood. I liked the detail on the front and thought it would be a fun experiment.

It sat in my basement since the day I brought it home.

While at our WV Place recently, we realized we needed a table about that size for the living room. So I figured I’d give it a quick makeover.

QUICK is the key word here.

Including dusting, painting, and waxing, I don’t think I spent more than an hour on this piece. It required very little paint (single coats of each color dry-brushed on) and only one quick coat of clear wax.

I love the end result.

new-to-me-table
Click on the image to see a larger version.

When I showed Hubby the table in its “before” state, he looked a bit skeptical and asked, with all the bias of a woodworker, what kind of wood it was. I told him parts were plasticene, and the rest was something else. I didn’t care. I didn’t want to burn it, just have something cute to look at for a bit.

Even he was shocked at the end result.

This Annie Sloan Chalk Paint® consistently amazes me.

No sanding was required. I removed the old handles (didn’t even need a screwdriver) and then added a very thin coat of Graphite on the top and Old White on the base. I covered the painted areas with a quick coat of clear wax. Finally, I added new knobs I’d purchased on clearance for $1.36 each.

Not a bad table for under $15 (not including the teeny bit of paint and wax I used) and an hour of my time. Do you agree?

end table

On a Creative Streak

I’m quite happy to report that I’ve been busy creating stuff again. For the longest time, my creative efforts were hampered by the mess in my craft area. The image below shows a bit of that. It got worse, however, shortly after that picture was taken as all of the boxes and other stuff that were in our storage area were moved into my crafting space after we had a water leak.

IMG_9536
Messy, messy, messy…

While I am still working on clearing out some stuff, I did manage to organize the space enough that I could start using the space again.

IMG_6407There are quite a few projects in my furniture-painting queue. But I had some sewing projects to tackle, too. The sewing projects were a bit more time-sensitive. A co-worker recently had a baby and a friend’s daughter is about to have a baby.

I could have just bought gifts, but I wanted to make something for both of them.

I was torn, though, because not everyone likes home-made items. The younger set, in particular, seems to be more choosy when it comes to stuff like that. And that’s fine. We all have different tastes, right? But I’ve always treasured items that were made for me. Because I know lots of thought and love goes into creating stuff, whether it’s a painting or baked goods, textile crafts, etc. And I figured I’d enjoy making the gifts even if the recipients ended up not really liking them. So I decided to make utilitarian baby play mats. Those things you put on the floor for immobile infants.

The first one was for my co-worker, who had a baby boy.

IMG_6524
Frog-themed Play Mat


IMG_6523
Frog-themed Play Mat

I went the more-traditional route with the frog-themed play may. I alternated some nine-patch blocks with blocks of frog fabric. The backing is flannel. I made and used a binding strip for the edges and did some simple machine quilting around the edges of each block. Once it was finished, I popped it into the mail.

I got an e-mail from her recently that made my day. It said…

I absolutely love the quilt you made for Ryder! Hand made gifts are the absolute best. Thank you so much for taking the time to quilt so much love in one blanket!

Wasn’t that a sweet message?

I really struggled, mentally, over the other play mat. I know for a fact the Mom-to-be isn’t a traditional girl. A baby-colored mat in pale pinks, blues, and yellows may have made her vomit. And I didn’t think she’d like traditional quilt blocks either. So I opted to use a free-form approach, randomly placing subway tile-shaped blocks in rows. As for colors, I thought back to her wedding. The invitation, attendant dresses, and reception decor used a very vivid color palette. I figured she wouldn’t have chosen those colors for the wedding if she didn’t like them.

The pink floral fabric is the girly touch I added, knowing the baby is a girl.

IMG_0511
Vivid Hand-tied Baby Play Mat

I used red flannel as a backing and self-binding (folded the backing material over and sewed it to the quilt top). I was quite pleased with the end result.

IMG_6626
Vivid Baby Play Mat


IMG_6625
Red Flannel Backing

When I showed it to Hubby, he even commented that the colors were awesome, just like the colors on her invitation, which he really loved.

Here’s a shot of the wedding dresses. I got all but the dark blue color. The reception was full of greens, not shown here.

dresses
Wedding Pic

Having no clue what else to get, I asked my friend Ashley, a young Mom, what would be a good shower gift. She gave me a whole list of essential supplies. She also said I should put them in a reusable basket or something.

Her basket suggestion made me laugh, as I’d already decided to decorate an old tin for that exact purpose.

IMG_0501
Painted tin with decoupaged angel and red flannel trim.

I painted the tin with Annie Sloan Chalk Paint. Of course. I added the angel using decoupage. The flannel trim is attached with glue.

IMG_0500
Image decoupaged onto the floor of the tin.

I used decoupage to affix the images (above and below) to the interior base and bottom of the tin.

IMG_6617
Base Quote

I thought the quote to be appropriate. Especially since the Mom-to-be is a teacher.

IMG_0519
The whole package.

Turned out pretty cute, right? I couldn’t resist adding the frog wash mitt. LOL.

The Mom’s reaction when she saw the play mat was priceless. She actually gasped and said, “Where did you find this?!?” She was shocked when I told her I’d made it and immediately ran off with it to show her Mom.

I think she likes it. 🙂

There was so much going on, I never got to ask if she recognized the wedding colors. Not that it really matters. I’m just happy that she likes it.

A Prettier Place for My Trash

Who says trash receptacles have to be dull, boring, and/or ugly?

I’ve been using a pine cabinet to house the trash can in my office since October 2011. That’s when we moved into our Virginia home.

This little cabinet used to sit in the kitchen at our Maryland house. The VA home has a trash can cabinet in the kitchen, so we no longer needed this little cabinet, which Meg-proofed our kitchen trash.

The cabinet, with its unfinished pine exterior, has been on my mental list of things to paint for a long time. It was boring. So I finally decided to add some color.

I actually painted it during my lunch hour and then waxed it last night.

While it may not be the most beautiful thing I’ve ever painted, at least it’s now a bit more interesting.

For those of you who might be pressed for time and/or don’t care about the whole reincarnation process, here’s a before and after pic.

Before (left) and After (right)

What do you think?

For those who like detail and seeing a painted piece as it evolves…

I used Annie Sloan Chalk Paint (ASCP) and wax. Of course.

My friend, Carol, asked if I’ve started working for “that company” yet. I guess I talk about the stuff too much?

Sorry, I can’t help myself. It’s so easy to use. And it’s fun transforming old stuff.

I snapped some pics of the piece in its various stages with my phone.

Plain Jane Trash Bin


After one coat of Old White


trashcan_3
With Arles added to the drawer and panel.


trashcan_4
After Olive was added to the frame.


trashcan_5
After Olive was added to the top.


trashcan_6
After applying one coat each of Clear Wax and Dark Wax.


trashcan_7
Face on shot of the finished product.

There you have it. A quick and easy project. Instead of disposing of that boring cabinet and replacing it with something new, I have given it new life.

Hey, does that make me a furniture God?

What do you think?

I’m not sure it fits perfectly with the yellow walls, but am planning on embellishing the front with some butterflies. After, um, I locate said butterflies. I’ll be sure to share another image once that part is done.