Old Town Warrenton [(c) Denise Schefer. All rights reserved.]I often tell people that Warrenton is the perfect spot for Hubby and me to live. It is away from the crowded, noisy, busy madness we left behind in Maryland. It’s big enough that most of the essentials are available right here in town. And it’s close enough to the densely populated area known as Northern Virginia (NoVA) that, with a 20-30 minute drive, we can pretty much obtain whatever it is we want or need.
According to the most recent Census data, Warrenton has a population of 9,803. The entire county only has ~67,000 people (that equates to 100.7 persons per square mile). The population of our Maryland county (Anne Arundel) was 555,743, which is 414.9 people per square mile. The town where we lived — Severn — by itself had a population of 44,231 in 2010, which equates to 2,497.1 people per square mile. That’s a lot of people.
Although the town of Warrenton has 2,136.3 people per square mile, it is surrounded by rural area. So it FEELS far less crowded. It is certainly more picturesque. Check out my Old Town Warrenton photo collection on FLICKR if you don’t believe me.
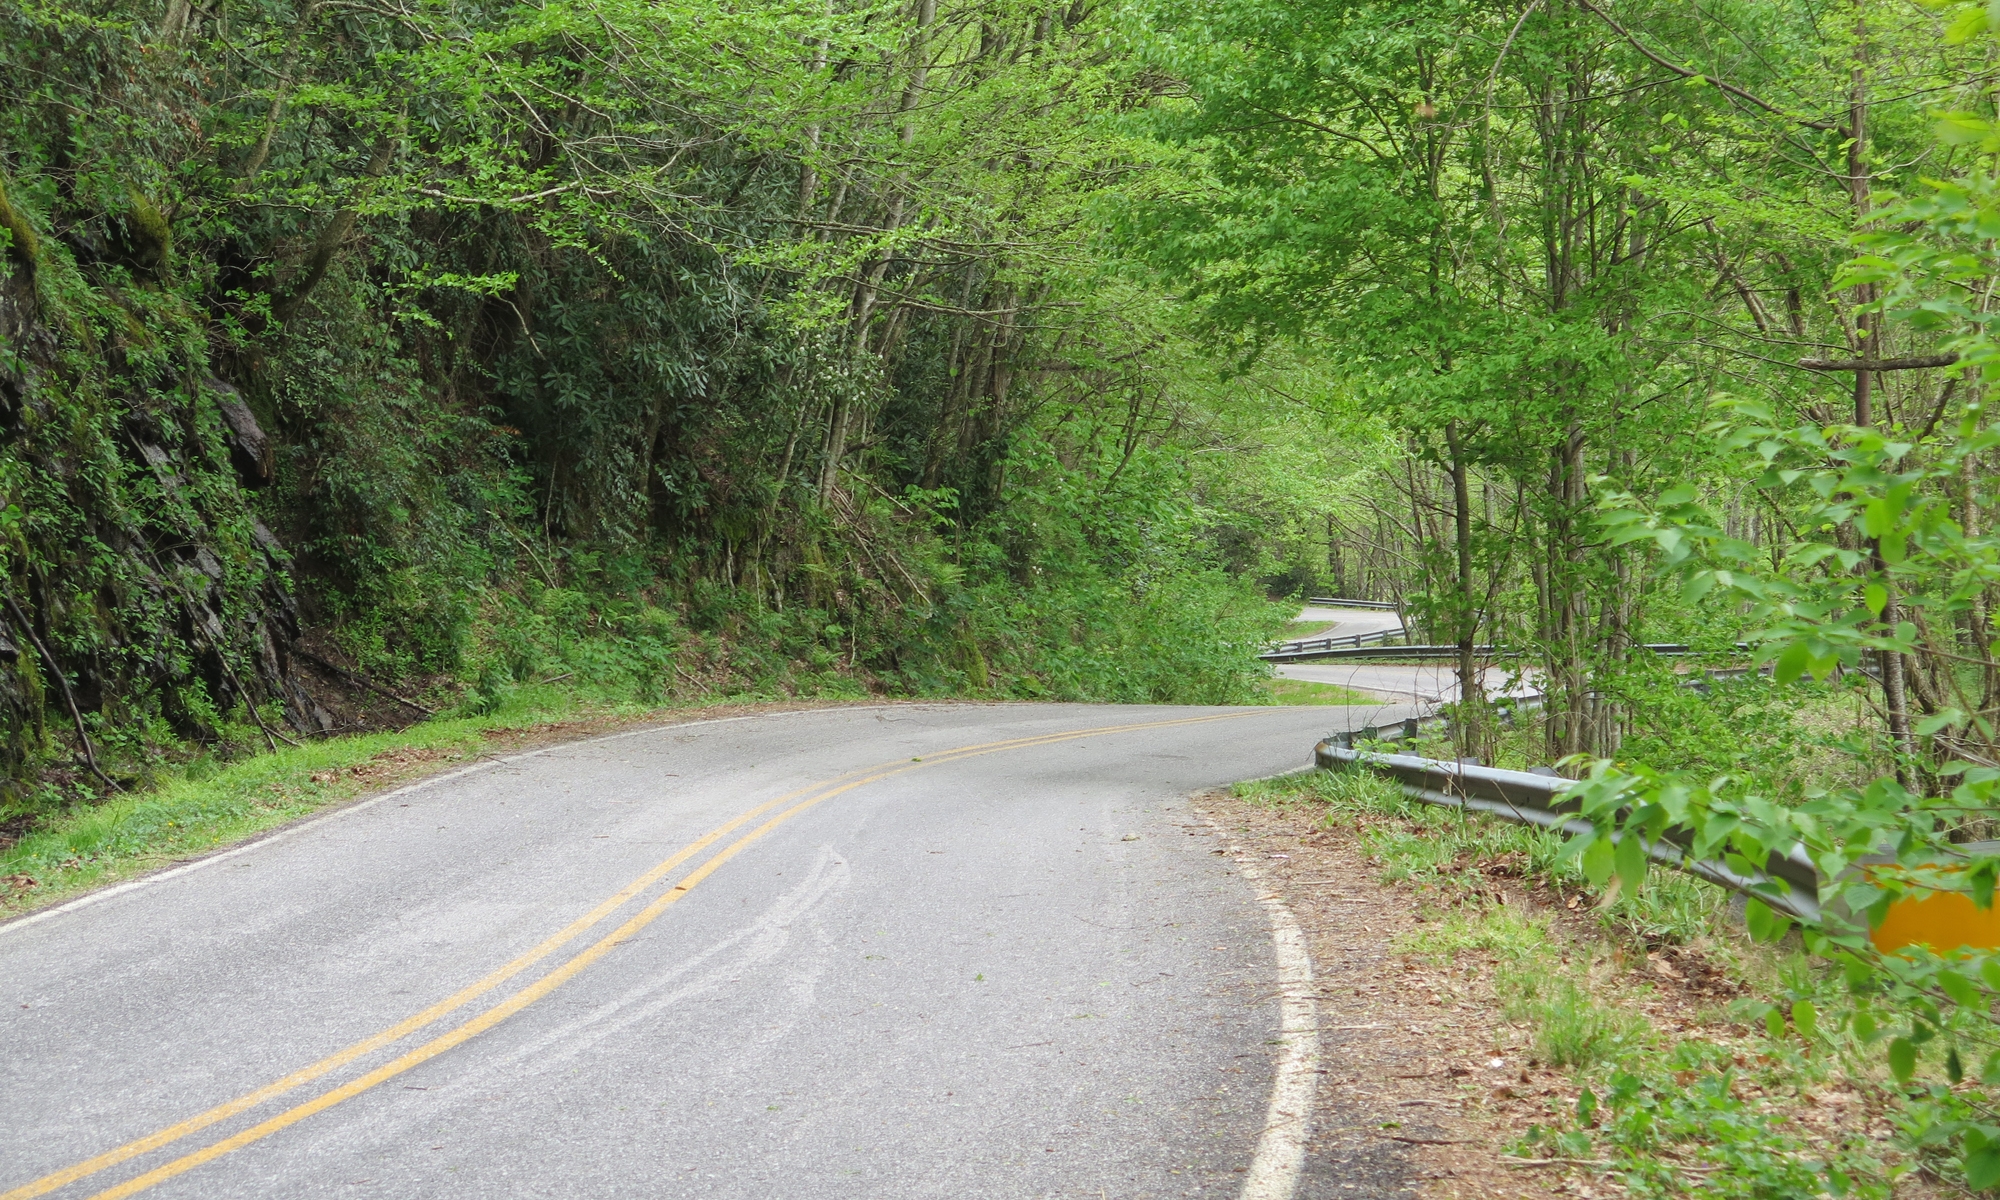
It is also surrounded by great motorcycle roads.
This past Saturday, my friend, Dottie, and I did a nice loop of just under 150 road miles. My last post features a nifty slideshow of the last part of the ride leading into town. There’s also a video of Dottie, who only recently got her motorcycle license, leading the way across Thornton Gap.
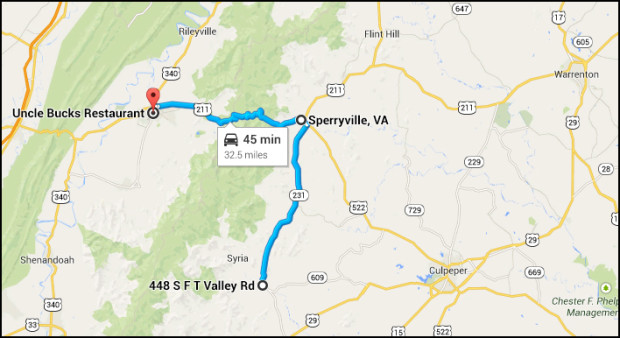
I just finished editing another video from that ride that I wanted to share. This Google MAP shows the route covered in my highlights video.
Snapshot of the Overview Map
Look closely, and you’ll see Warrenton on the right-hand side of the map. Hopefully this will help you appreciate just how close we are to the AMAZING roads featured in the video below.
There’s been some secret stuff going on around here for a while. Since January, to be exact.
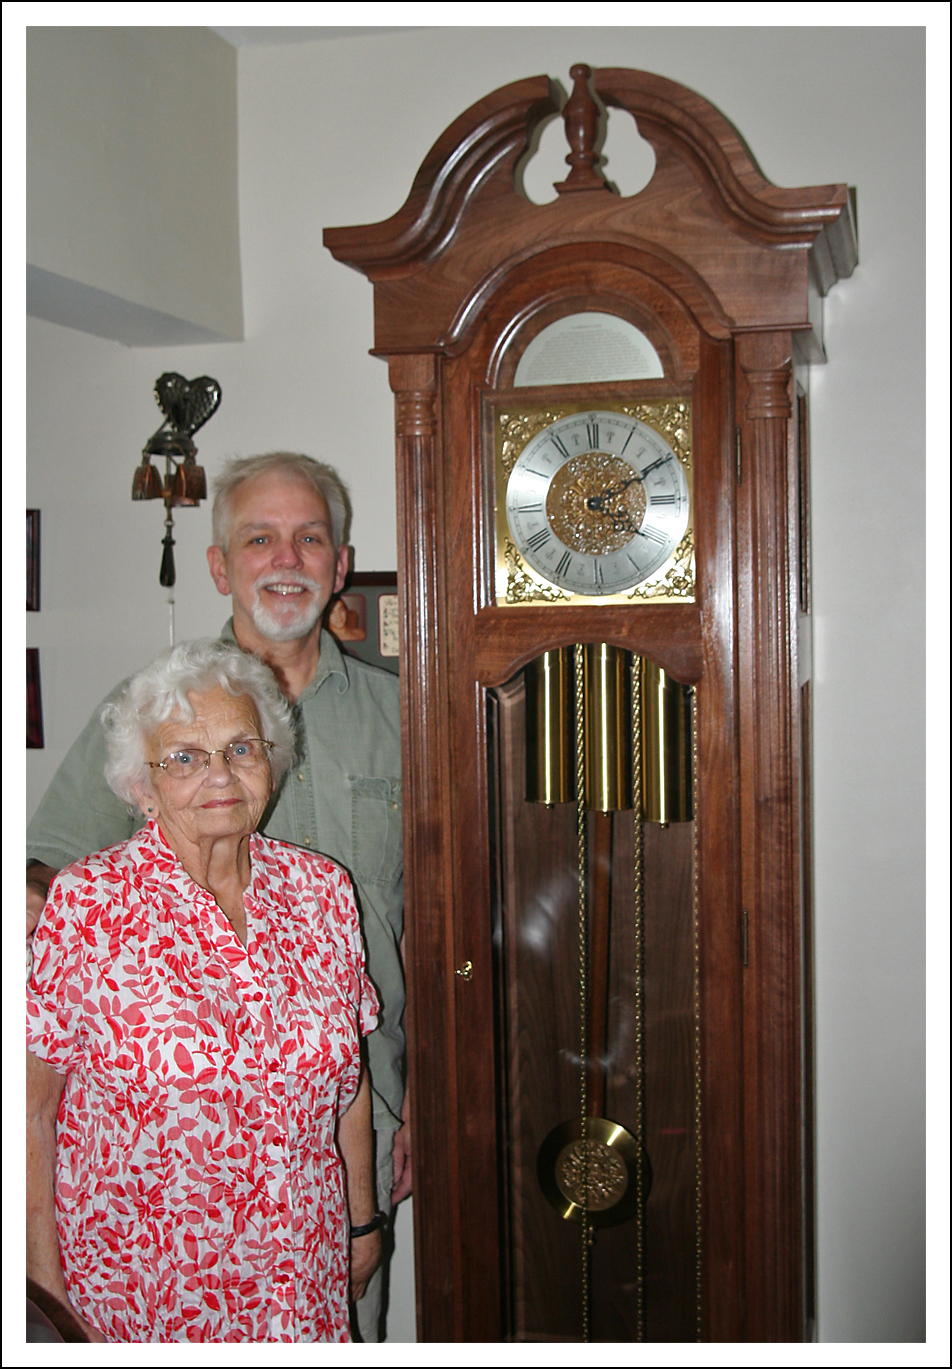
That husband of mine has been working on a very special gift for his Mom. A clock. But not just any clock. A grandfather clock with a very interesting back-story.
Grandfather’s Clock (click on the image for a closer look)
That talented Hubby of mine built this clock completely from scratch, using black walnut harvested by his grandfather.
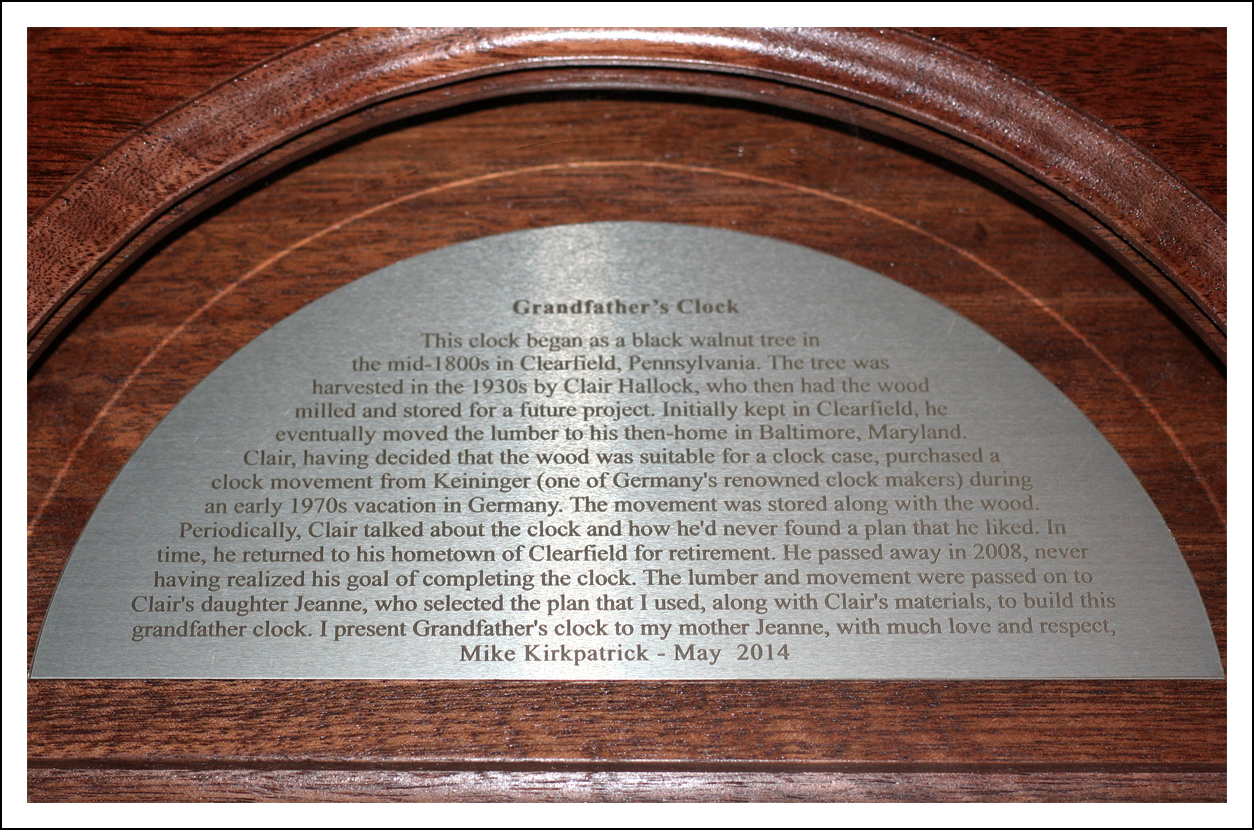
The story is inscribed on the plaque above the clock face.
I’ll tell you more about the process and share some other pics, and a video of the presentation, in a later post.
The Story (text added below in case that’s too hard to read)
This clock began as a black walnut tree in the mid-1800s in Clearfield, Pennsylvania. The tree was harvested in the 1930s by Clair Hallock, who then had the wood milled and stored for a future project. Initially kept in Clearfield, he eventually moved the lumber to his then-home in Baltimore, Maryland. Clair, having decided that the wood was suitable for a clock case, purchased a clock movement from Keininger (one of Germany’s renowned clock makers) during an early 1970s vacation in Germany. The movement was stored along with the wood. Periodically, Clair talked about the clock and how he’d never found a plan that he liked. In time, he returned to his hometown of Clearfield for retirement. He passed away in 2008, never having realized his goal of completing the clock. The lumber and movement were passed on to Clair’s daughter Jeanne, who selected the plan that I used, along with Clair’s materials, to build this grandfather clock. I present Grandfather’s clock to my mother Jeanne, with much love and respect, Mike Kirkpatrick – May 2014.
We’re not religious people. And we don’t have family close by. So, to us, Easter weekend was just another weekend.
Killjoy
The weather was nice, though. In my mind, it was a perfect Spring weekend. Temps in the mid-60s. Sunny. Relatively cloudless.
It would have been a nice riding weekend. But I had a bunch of yard work to get done. And since the weather was perfect for working in the yard, that’s what I did.
I spent Saturday morning procuring plants. Saturday afternoon and Sunday were dedicated to weeding, digging, and planting.
Trust me when I tell you I was dead on my feet by Sunday night. I’m just not as fit as I used to be. All of that bending, stooping, digging, crawling around and such really took its toll. My brain was mush by Sunday evening. I was still quite sore yesterday, too.
The good news is, the flower beds are just about ready for mulching. The even better news is that we hired a nice young man to do the mulching for us.
Last year, Hubby and I spread 65, 2 cubic foot bags of shredded hardwood mulch around. It took a whole weekend to prep the beds (clean-out, weeding, and planting). It wiped us out. Since we both have other stuff going on (personal household projects), we decided to hire someone to help this year. I’ll post pics once the mulch has been installed.
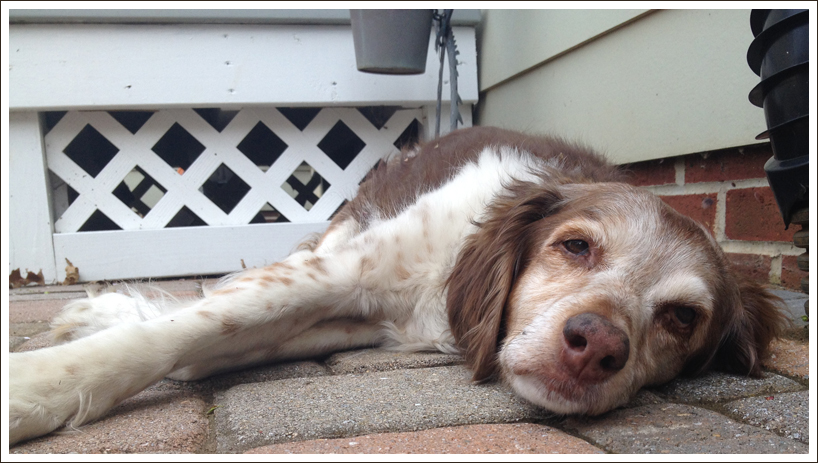
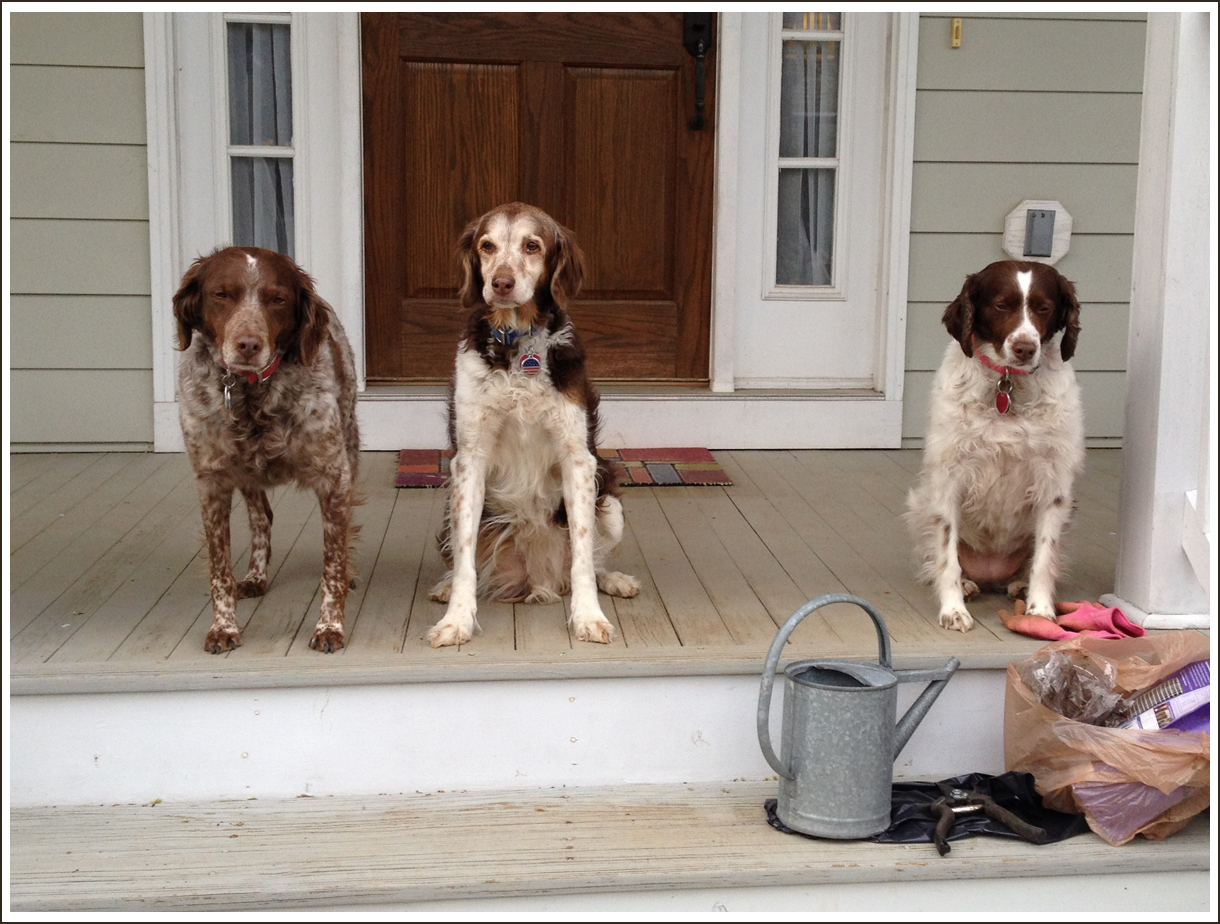
Even though I’m whining about the after-effects, I enjoyed being outside. So did the girls.
Mama’s little helpers.
I’m not sure if it’s true of all dog breeds, but these Brittanys LOVE to be with their people. They were never far from my side. In the images above, left to right, you can see Meg snoozing in the warm sun, K hunting bees, and Belle watching me work. That was on Saturday.
On Sunday morning, while I was weeding, Belle and K were watching me very closely. I had to back up several steps to capture this next shot.
Supervisors
Meg napped off and on most of the day. Sometimes inside, but mostly outdoors with me.
Meg sorta snoozing.
Not very cooperative dogs.
These dogs always make me smile. (If you want to learn more about this breed, here’s a short Brittany video you can watch.)
—– —– —– —– —–
I wish I could remember what this shrub/bush is called. It has very dark-red leaves and, in Spring, is covered with the most beautiful little flowers.
Pretty flowering plant.
—– —– —– —– —–
That was my “holiday” weekend. I must admit, I did enjoy having the day off on Friday. Relaxation would have been nice, but I figured it would be better to get the bulk of the yard work done so that when riding weather finally settles in, I’ll have time to enjoy it.
This post is long overdue. The bed part, anyway. Don’t worry… it’s not X-rated.
Our house has two bedrooms (master and guest) and two offices (Hubby’s and mine). If more than one person or couple visits, they’d either get stuck on the sofabed in the living room (no privacy) or in the basement on an air mattress. (The only problem with the basement, besides the air mattress, is having to walk through Hubby’s workshop to reach the bathroom.)
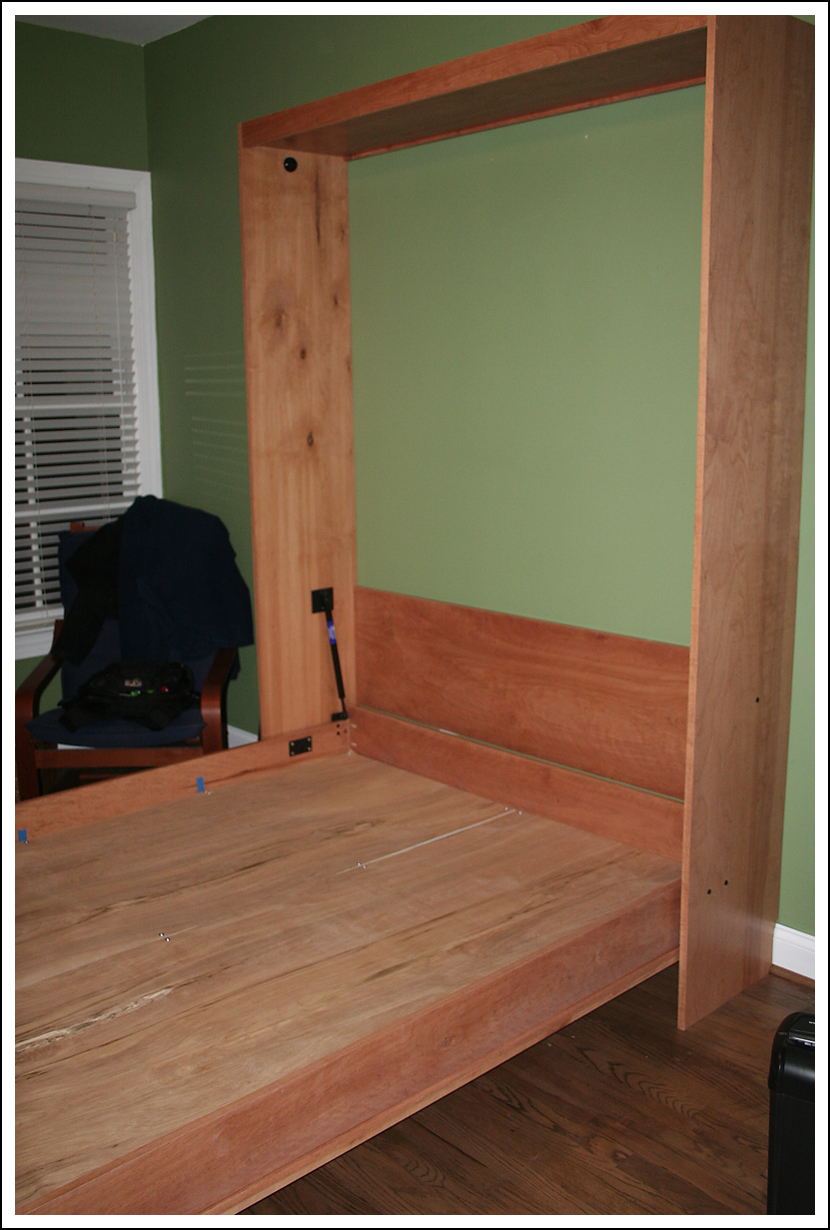
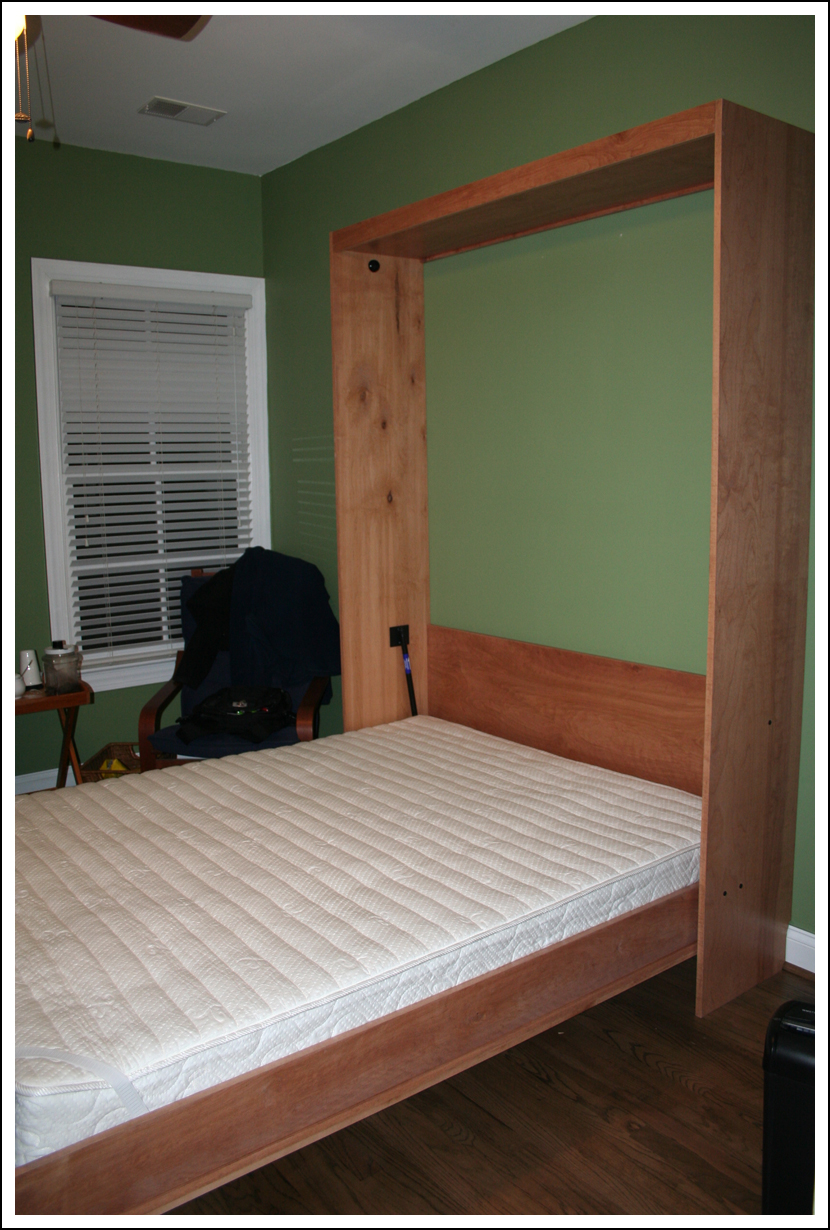
We though our guests would appreciate having a real bed, but we both need our offices. So Hubby decided to make a Murphy Bed.
Since not everyone is familiar with the Murphy Bed, and because I thought it was interesting, here’s a video for you that explains the history of the Murphy Bed.
As for our Murphy Bed, we decided it would go in Hubby’s office, because that’s a bigger space. I didn’t take a “before” picture, so you’ll just have to imagine a blank wall.
Keep in mind, Hubby buys rough, unplaned lumber. That’s REALLY starting from scratch. (If you don’t know the difference between rough, unplaned lumber and the stuff you buy ready-to-use, check out this past post of mine.)
For this project, Hubby chose Birch plywood and Cherry trim.
Murphy Bed Frame
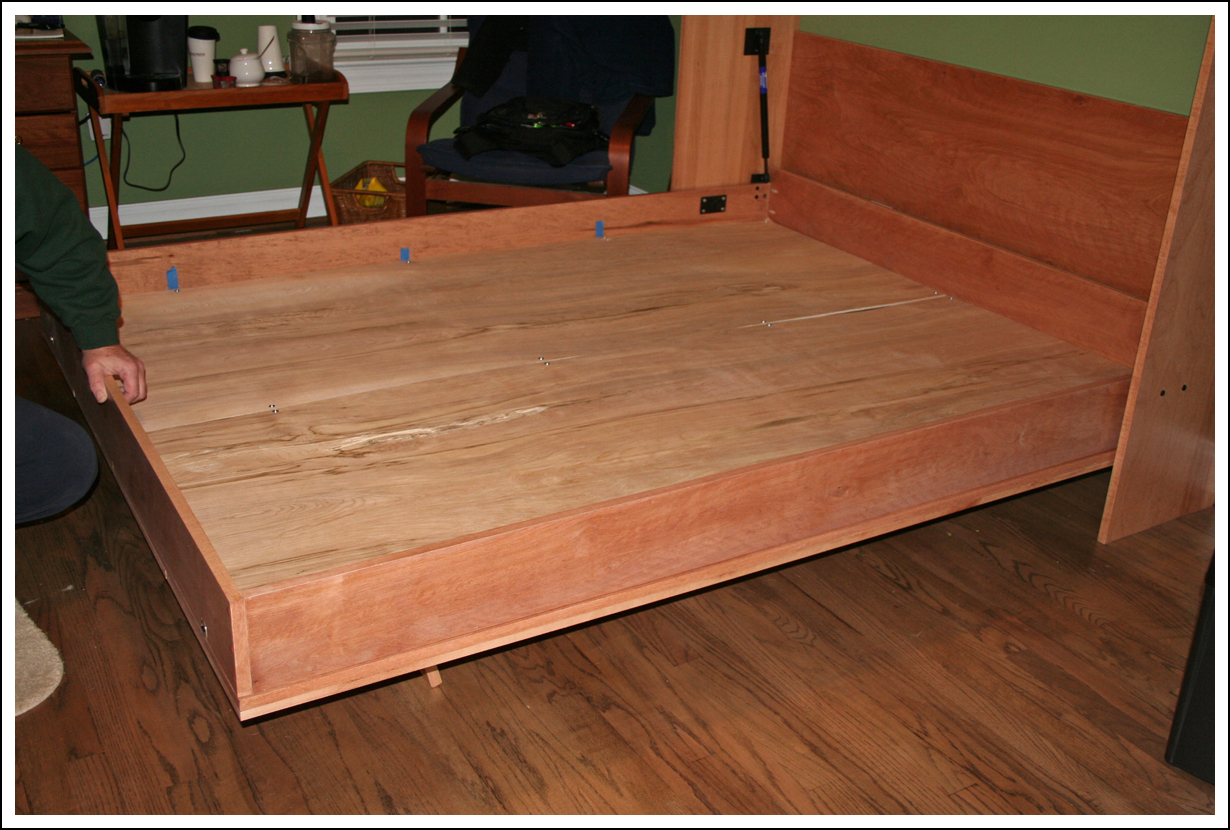
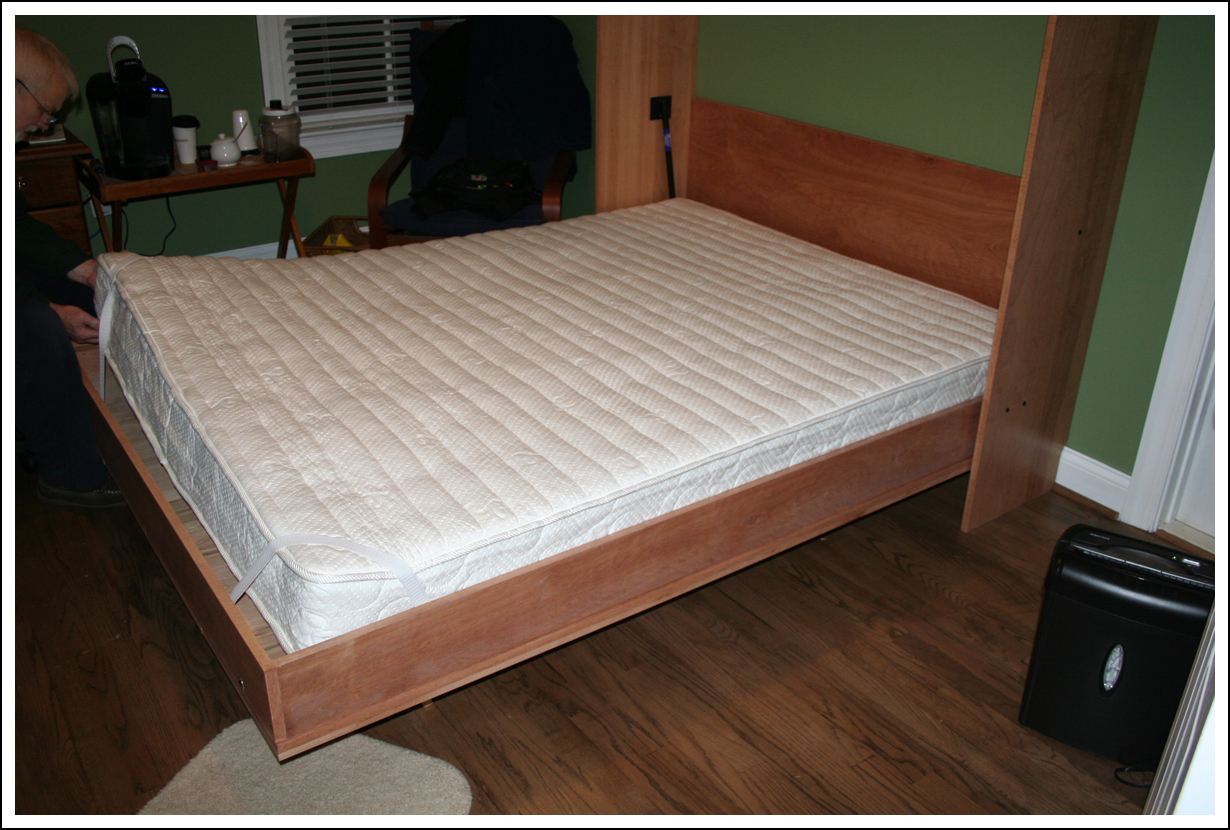
Murphy Bed Mattress Platform
With mattress in place.
With mattress in place.
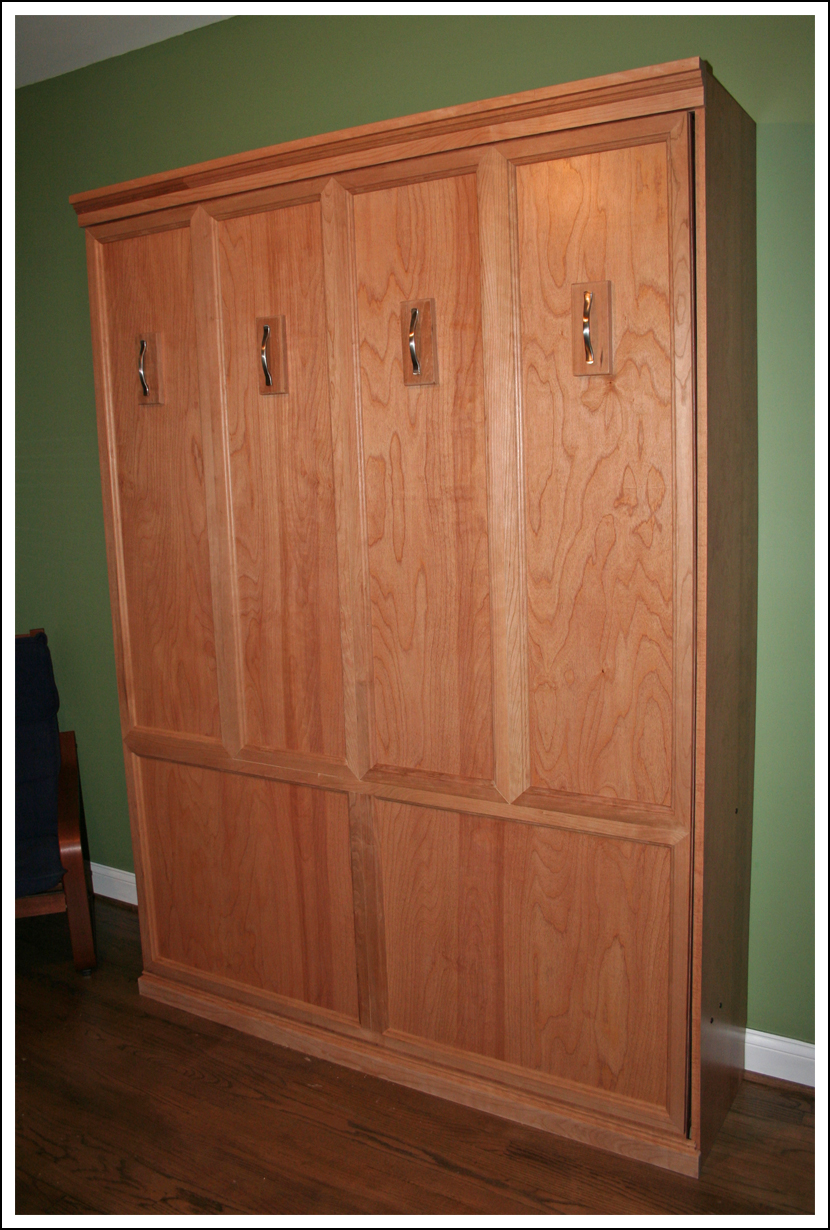
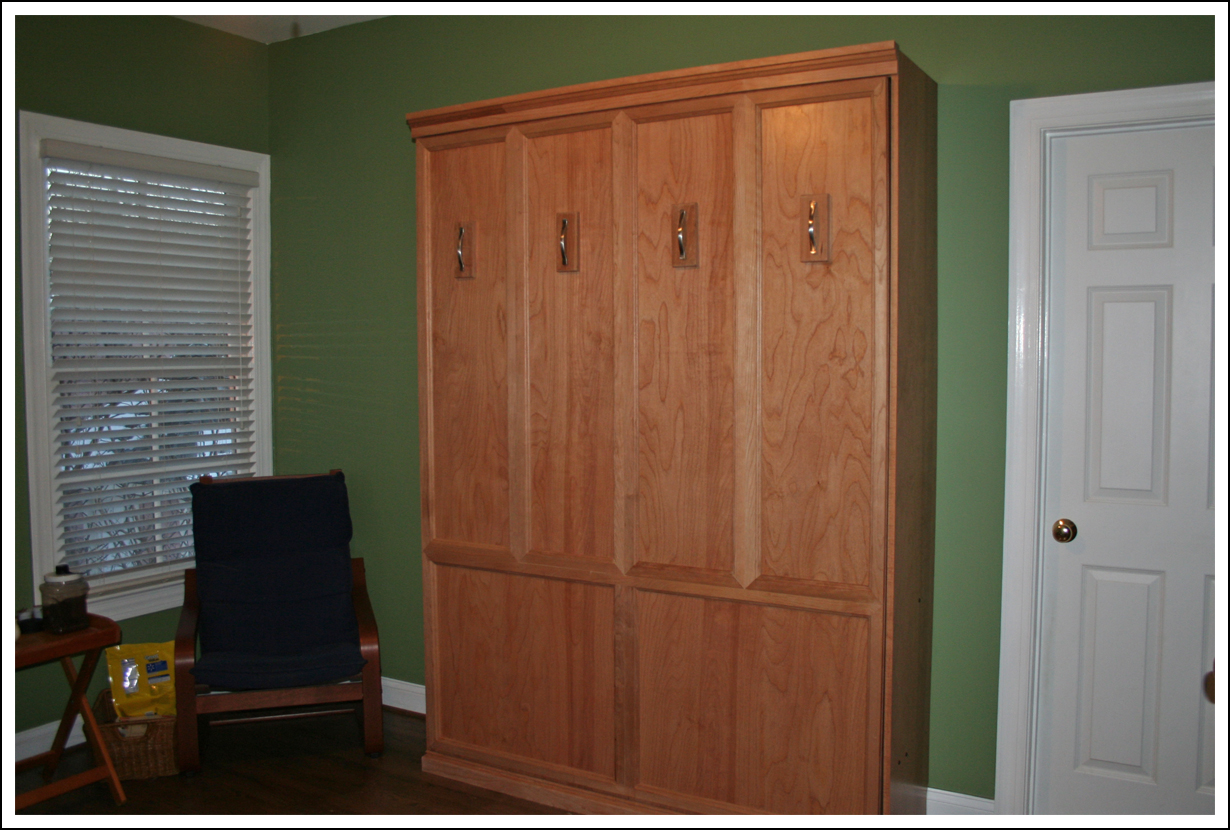
Murphy Bed Cabinet
Murphy Bed Cabinet
Pretty cool, eh? The bed was completed before Christmas (I told you this was overdue).
I always tell people that Hubby of mine is handy. He has a vast array of skills. Think of him as the king of DIY.
Guess what he did on Sunday afternoon. Heck, you’ll never guess, so I’ll just show you.
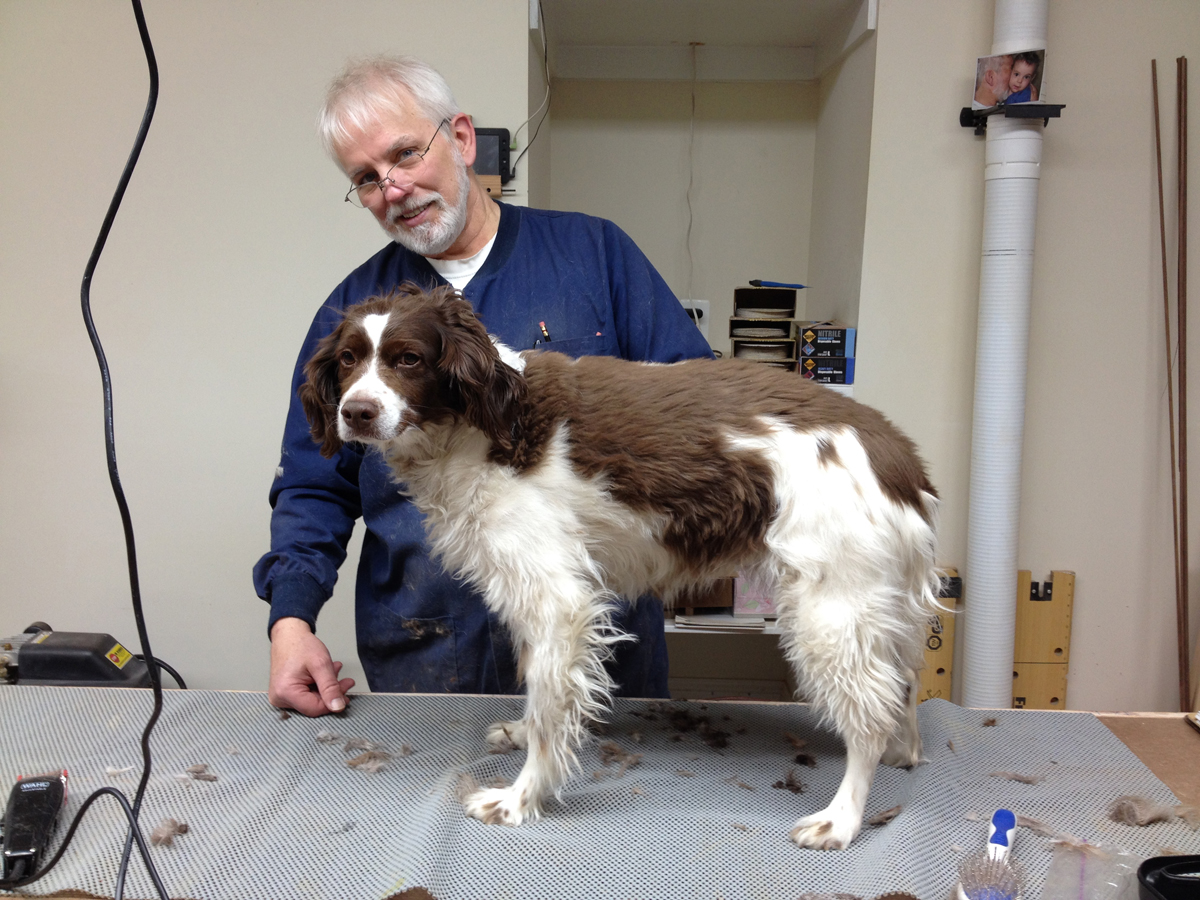
It was beauty day for the Bitches. Also long overdue…
Hubby’s multi-purpose workbench comes in handy for all kinds of tasks.
She looks thrilled, right?
Belle “before,” dreading what she knew was coming.
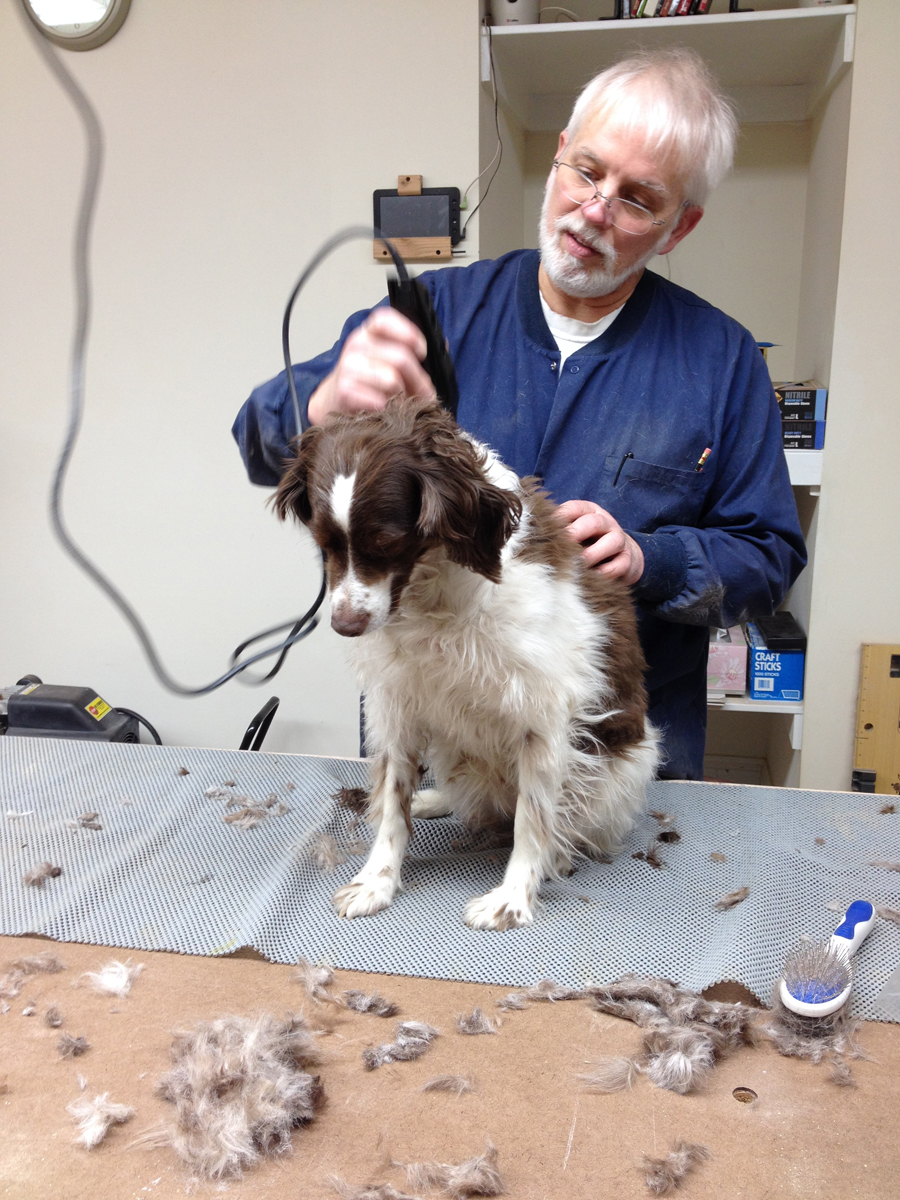
She also looks thrilled, doesn’t she?
She enjoys this more than she’d have you believe.
K and Belle both submit to grooming.
Hi, Mama.
K, after.
Belle, after. Note Meg’s “don’t even think about it” look.
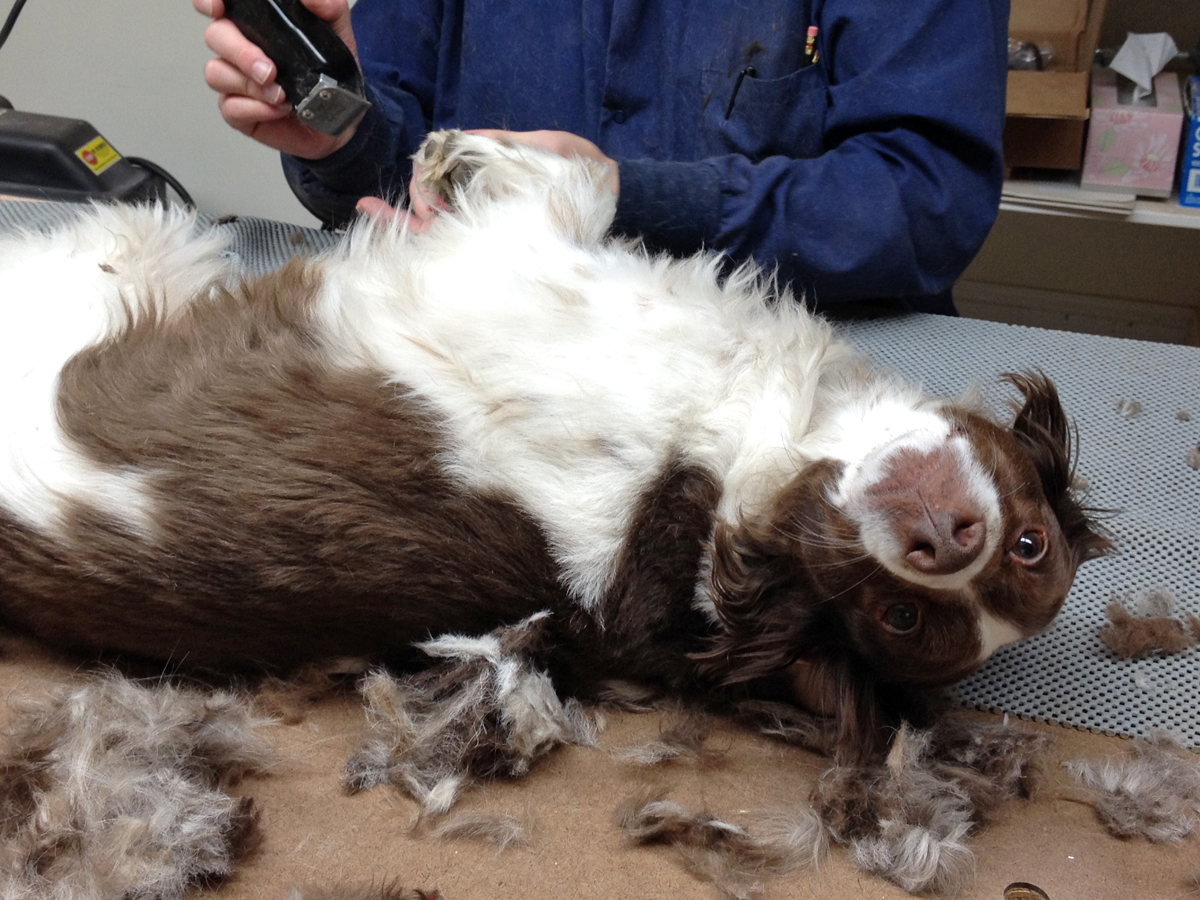
Meg is the most stubborn, head-strong dog I have ever met. She doesn’t like to be groomed. It takes two of us to give Meg a trim. And even then it’s a challenge. She fights it the whole way.
So she is still a bit shaggy. We may just leave her to the professionals.
We had a much-needed break in the weather yesterday. Temps climbed into the 40s. Can you believe it? It was fabulous.
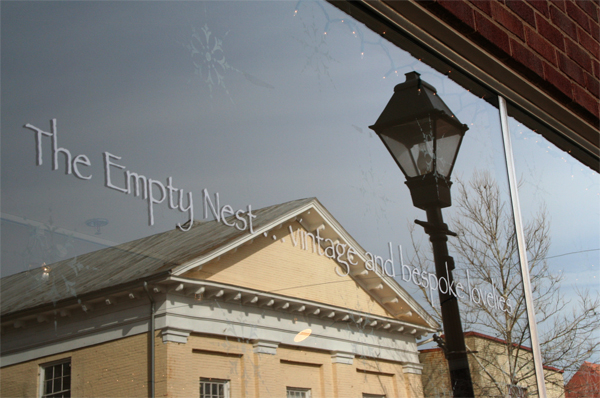
Beautiful Day for an Empty Nest Visit
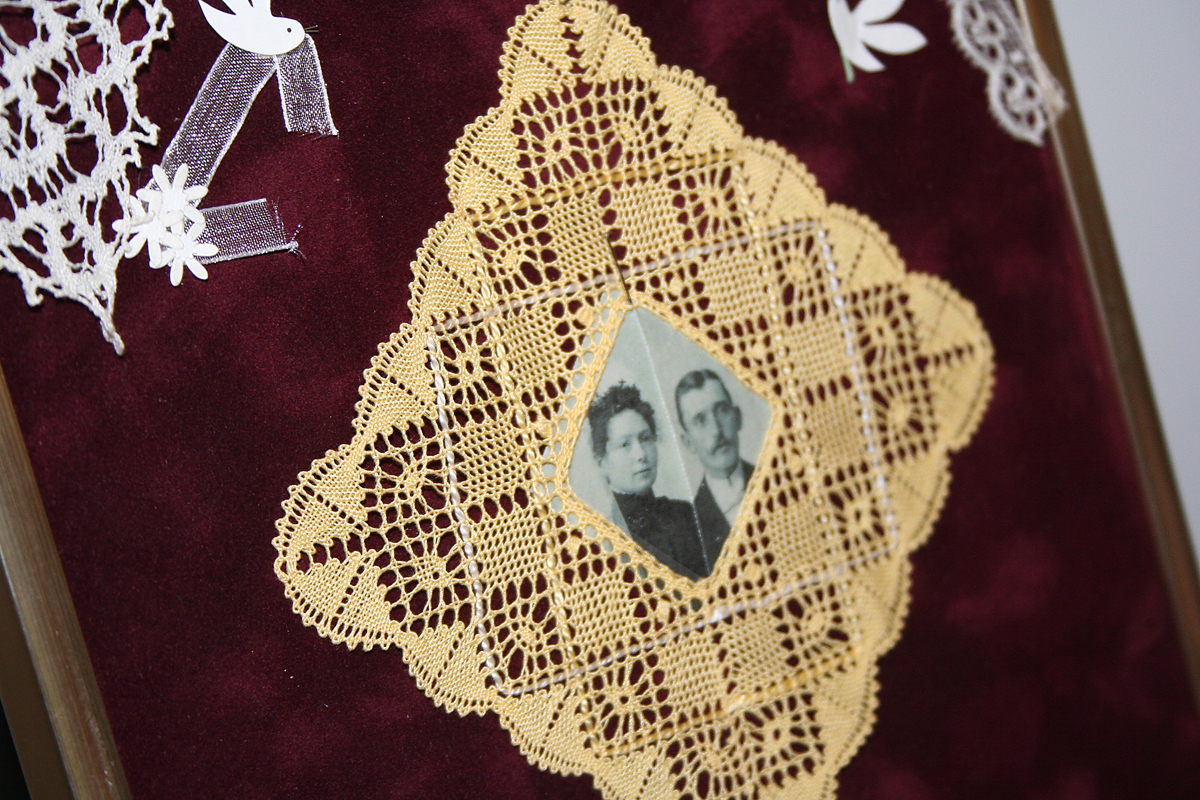
It was a great day to be out and about. And thanks to my friend Janet, who owns The Empty Nest in Old Town Warrenton, I got to see something really cool yesterday. Lacemaking! Demonstrated by five members of the Piedmont Lace Guild of Virginia .
In addition to paint, Janet loves vintage textiles. She LOVES them. Really.
I’m not sure how Janet met/discovered this group of ladies, but she invited them to do a demonstration at The Empty Nest.
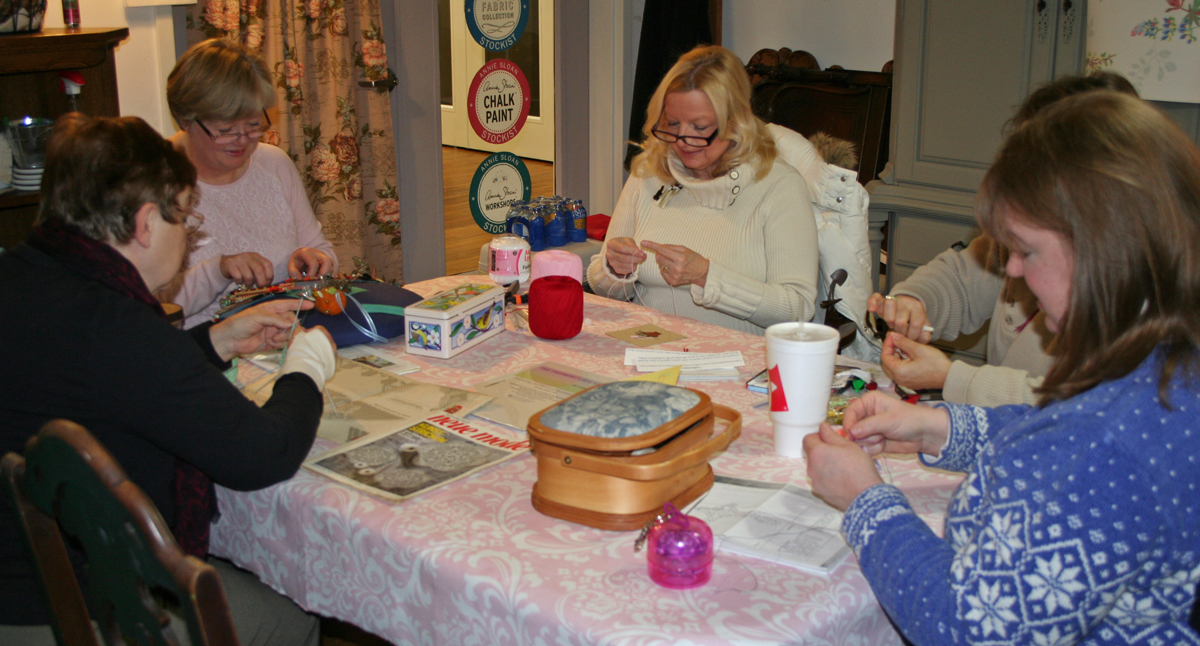
Piedmont Lace Guild of Virginia’s Lacemaking Demonstration
The image above shows the ladies. Clockwise, starting on the left: Elke Roeschke (Knitted Lace), Birgitte Tessier (Bobbin Lace), Joy Schaya (Needle Tatting), Anita Barry (Shuttle Tatting), and Bonnie Swank (Needle Tatting).
I’ve seen lacemaking before. Both of my grandmothers used to crochet doilies, Christmas ornaments, and such. But I never thought of their work as lace. It was, though. As I learned yesterday, lace can be made with various widths of thread. And crochet is only one of the techniques used.
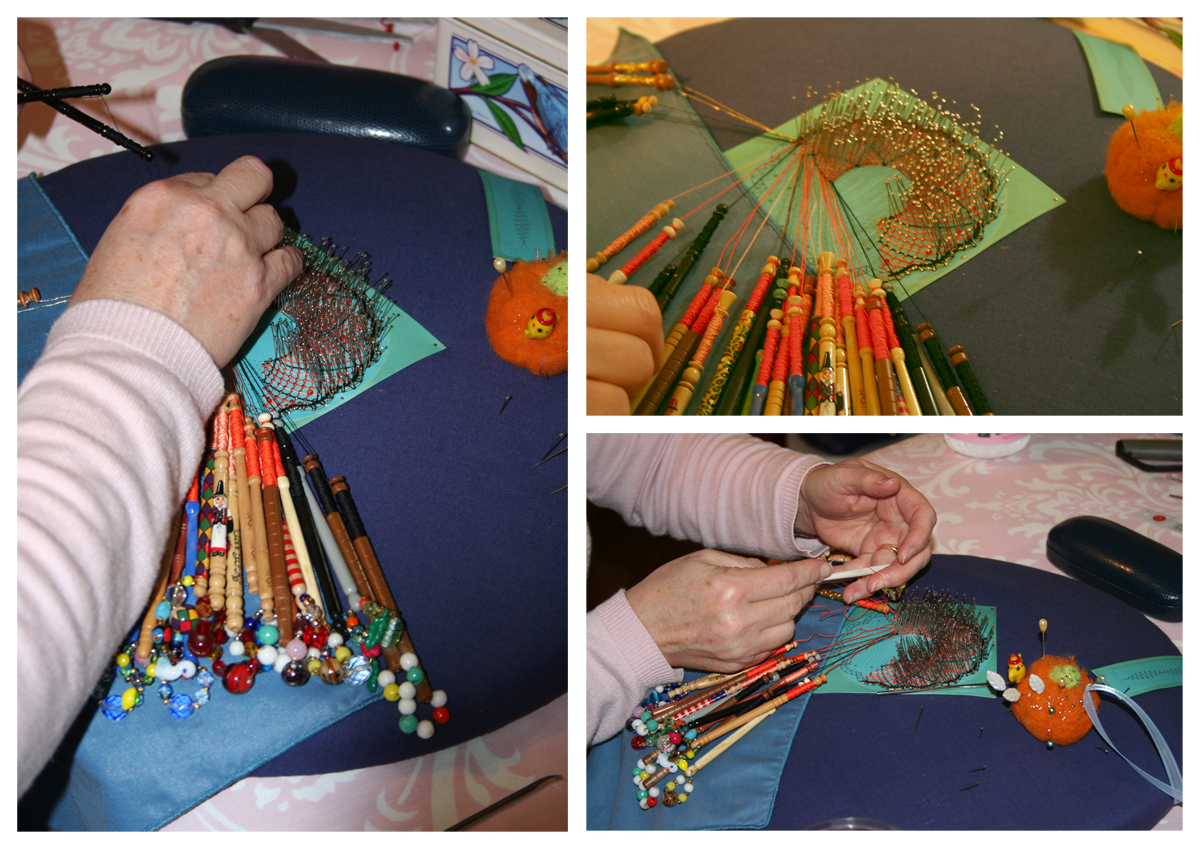
Bobbin Lace
Seeing images of bobbin lacemaking Janet shared on her site is what made me want to see the demo.
Birgitte Tessier Making Bobbin Lace
Look at all of those bobbins! Click on the image for a larger pic so you can see more of the detail.
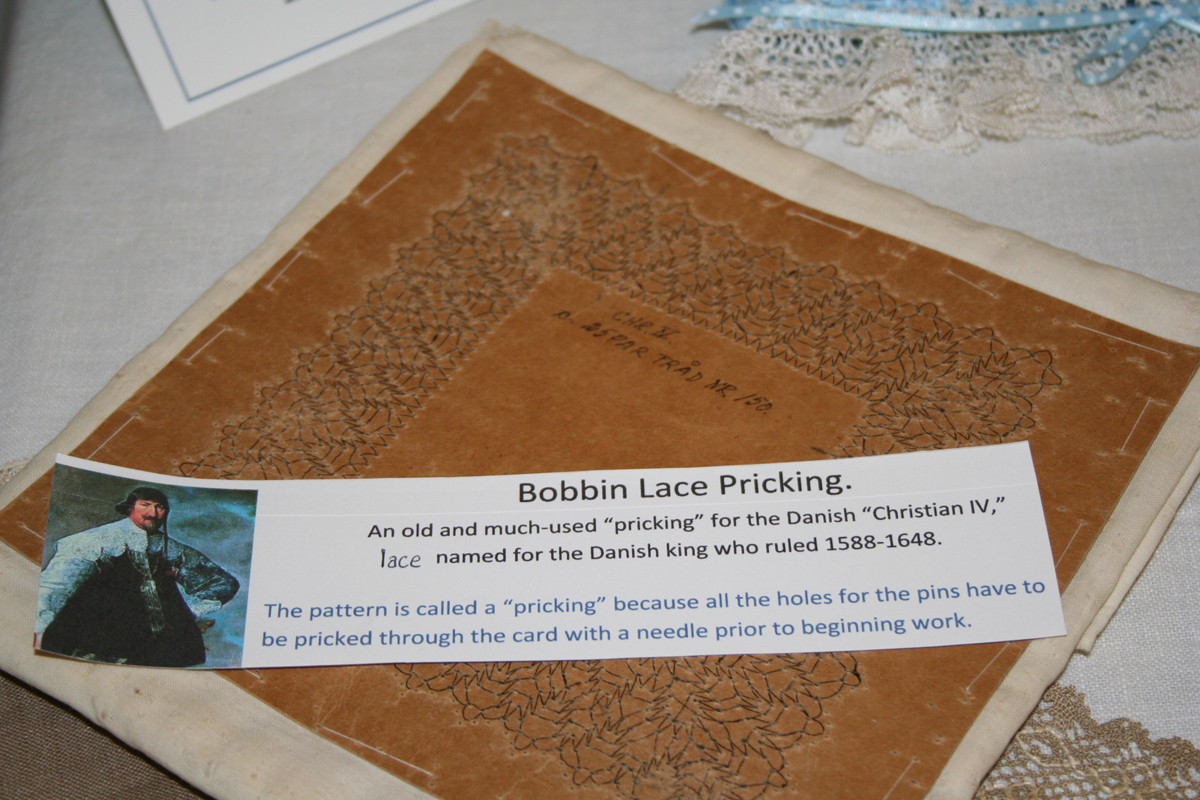
Antique Bobbin Lace Pattern
The pattern shown in the image above belonged to Birgitte’s Aunt in Denmark.
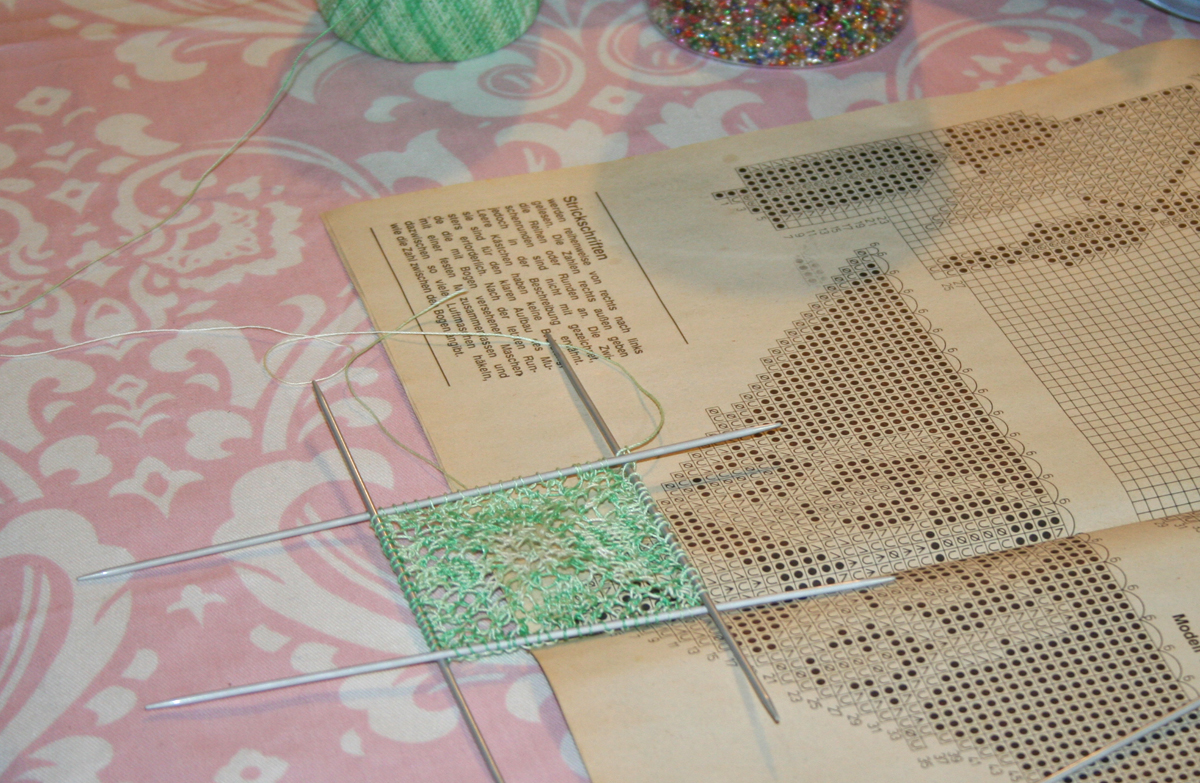
Knitted Lace
It was quite interesting to see the various techniques.
Elke Roeschke was demonstrating Knitted Lace, but she crochets, too.
Note the fine-ness of the thread. Knitting isn’t only for yarn!
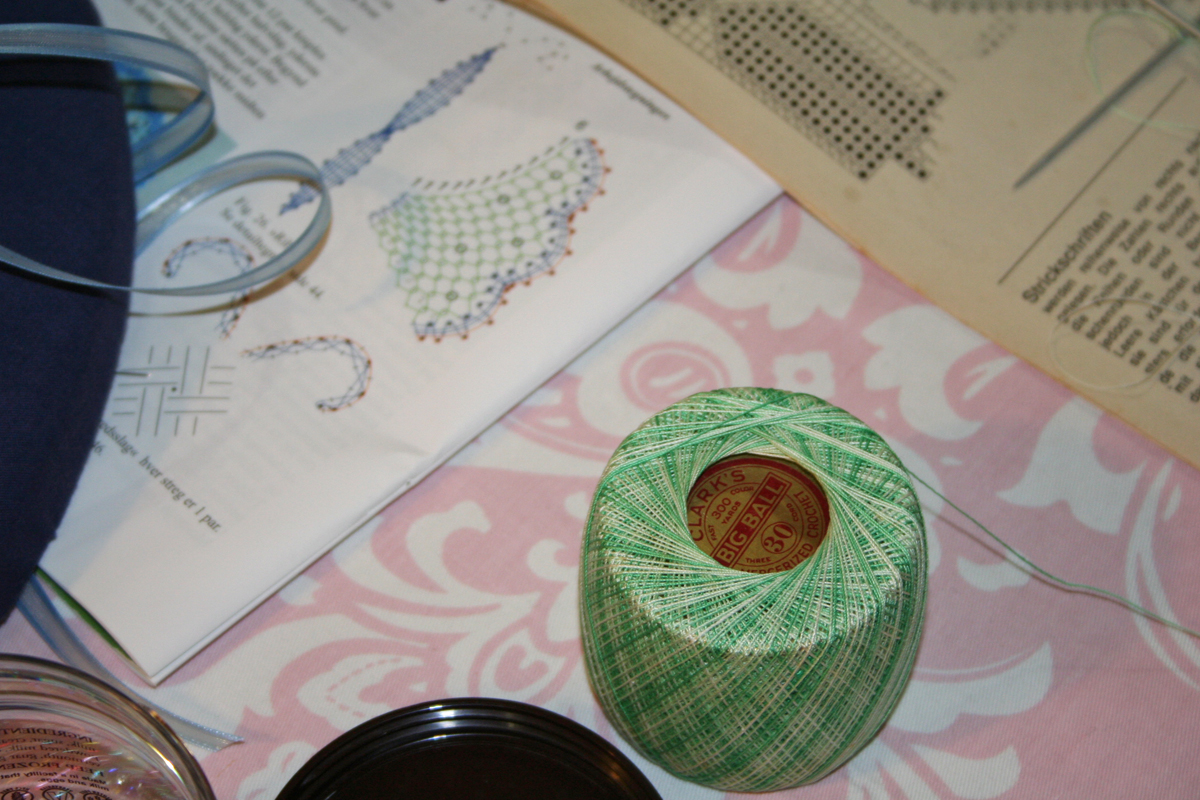
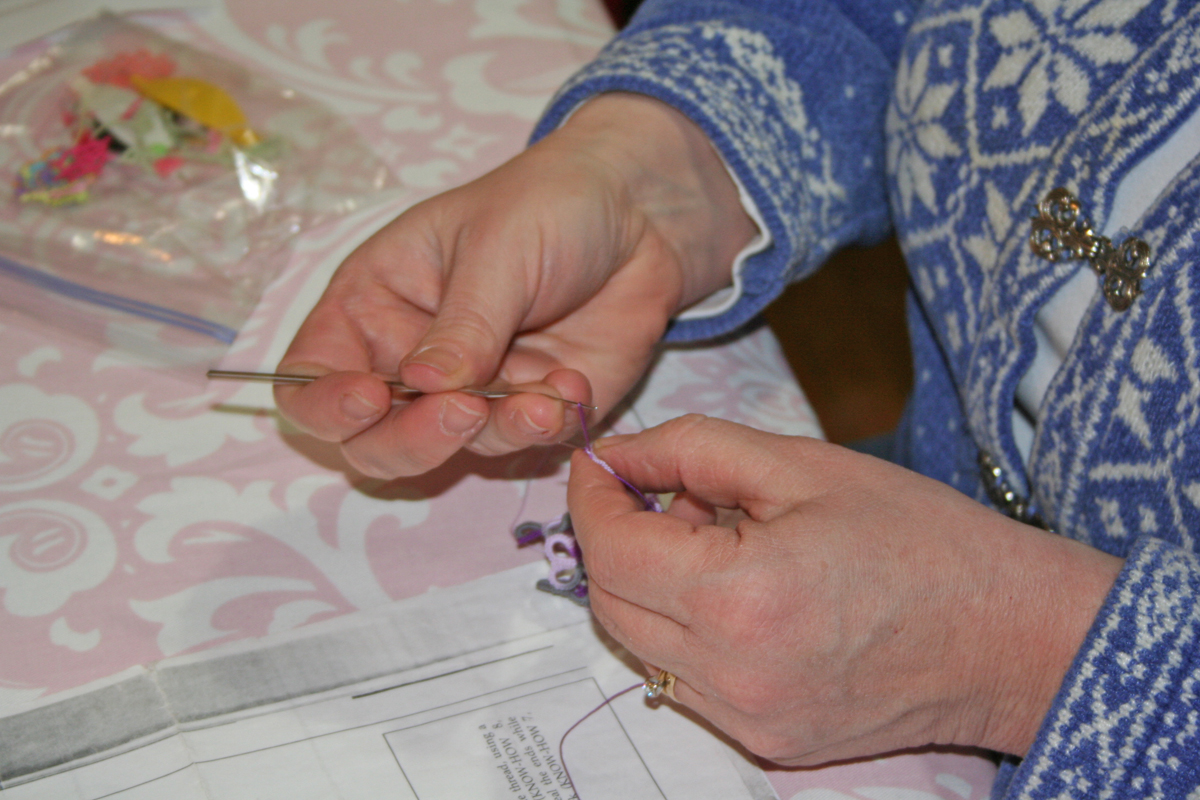
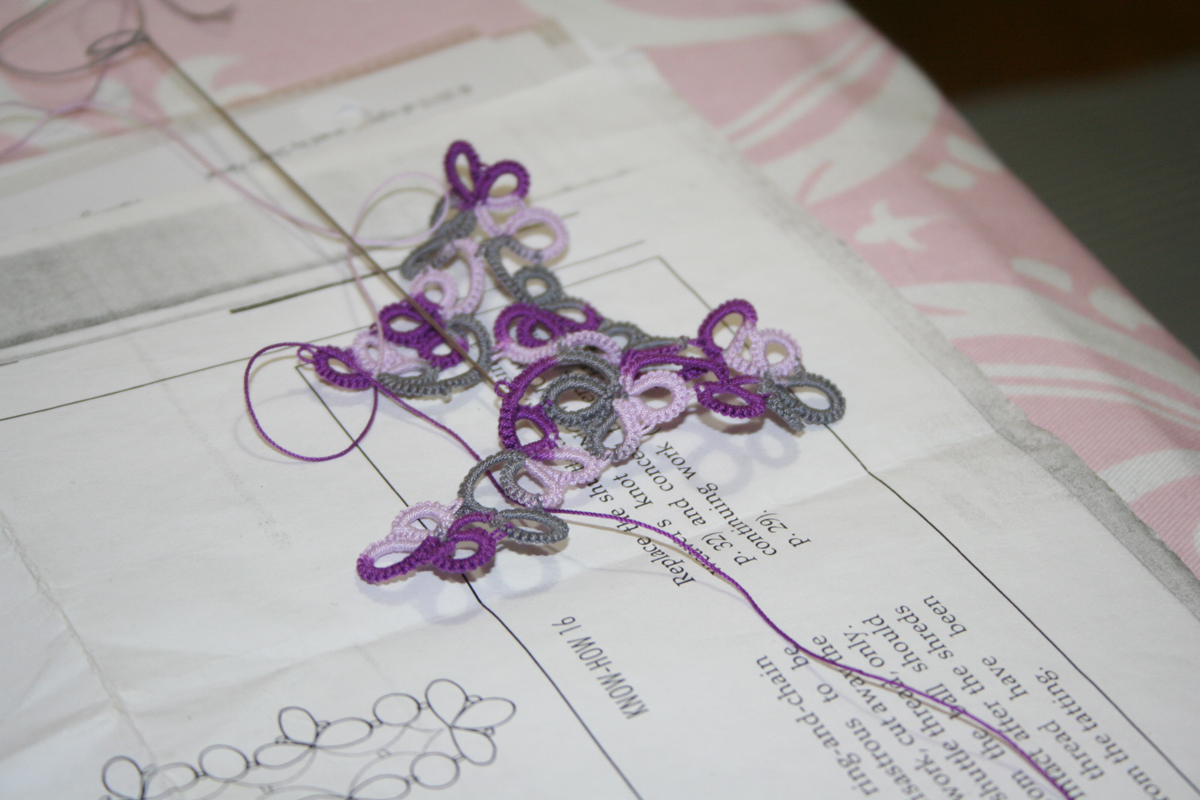
Needle Tatting
Bonnie Swank and Joy Schaya were both demonstrating needle tatting.
Needle Tatting Demonstration by Bonnie Swank
Bonnie very kindly and patiently explained needle tatting to me. It was fascinating to watch.
Needle Tatting in progress.
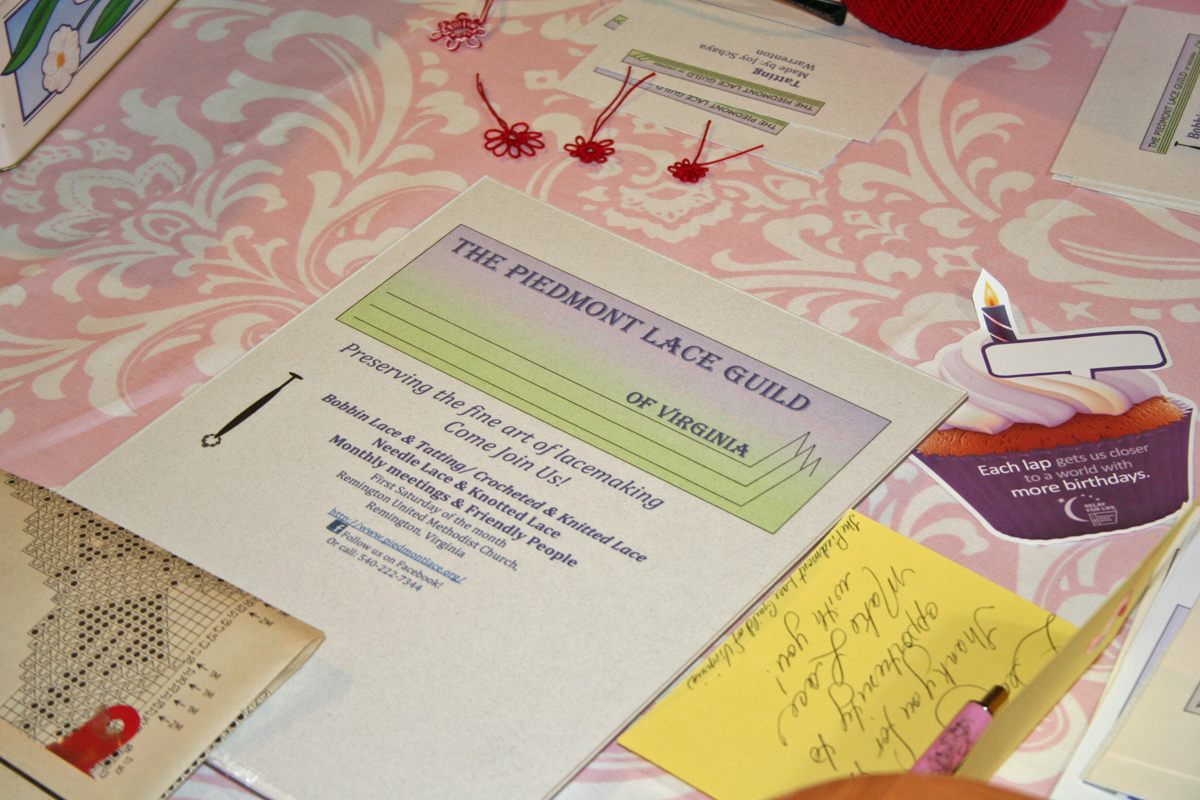
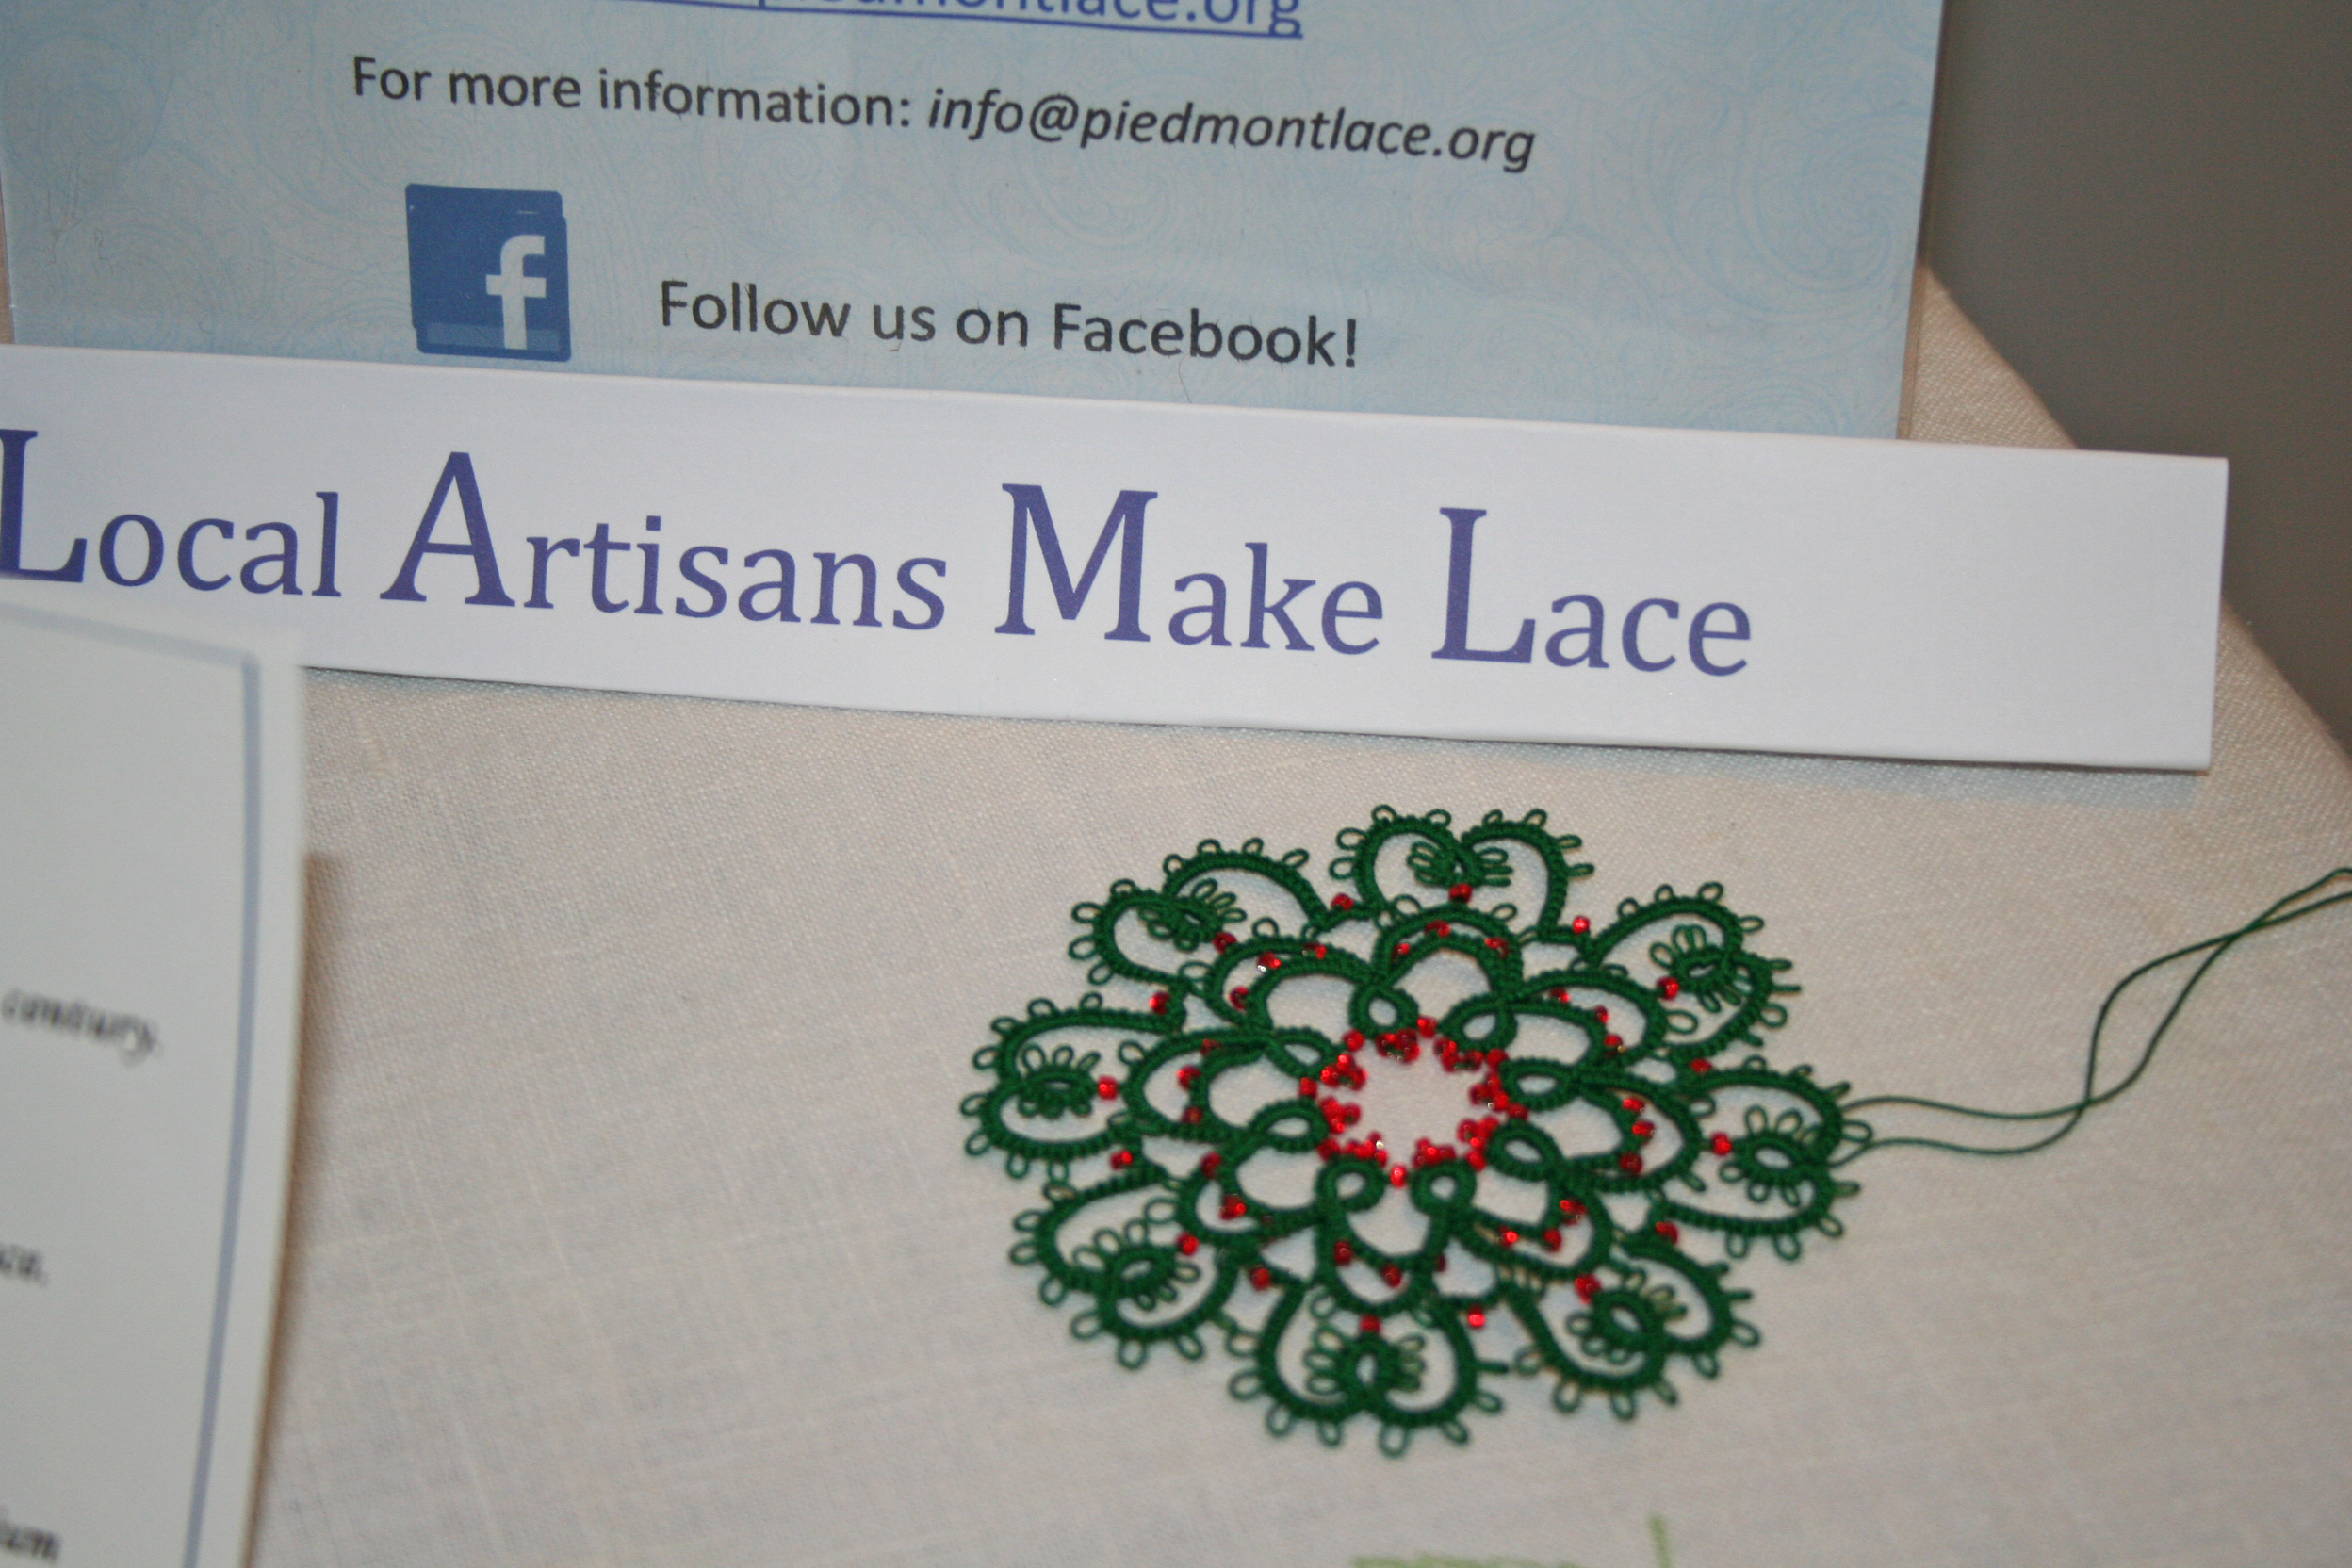
Joy Schaya was making little florets in case any children wanted an example to keep.
Needle Tatting (red florets at top of image)
I was tickled to learn that the snowflake ornament I’d been admiring, shown in the image below, was made by Bonnie.
Snowflake Ornament by Bonnie Swank
She said the ornament was an easy project (for her) and took about two to two-and-a-half hours.
Shuttle Tatting
Anita Barry was doing the shuttle tatting demo.
Shuttle Tatting Demonstration by Anita Barry
The ladies had brought a number of items for display, too.
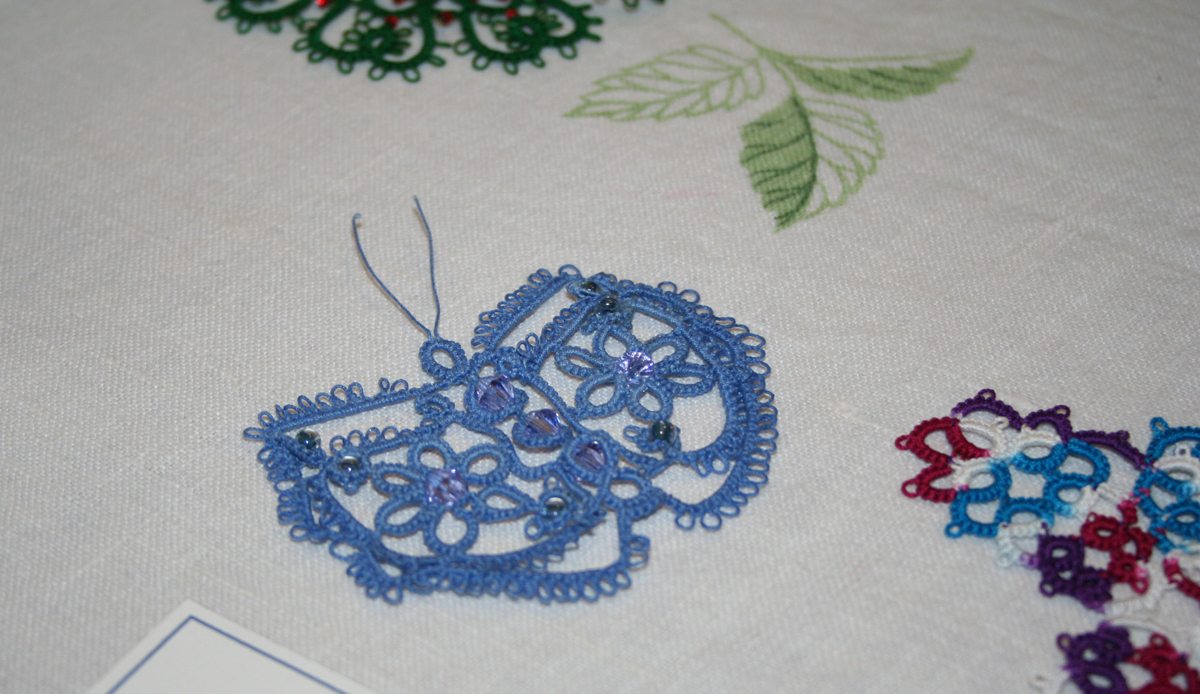
Lace Adornments
Butterfly
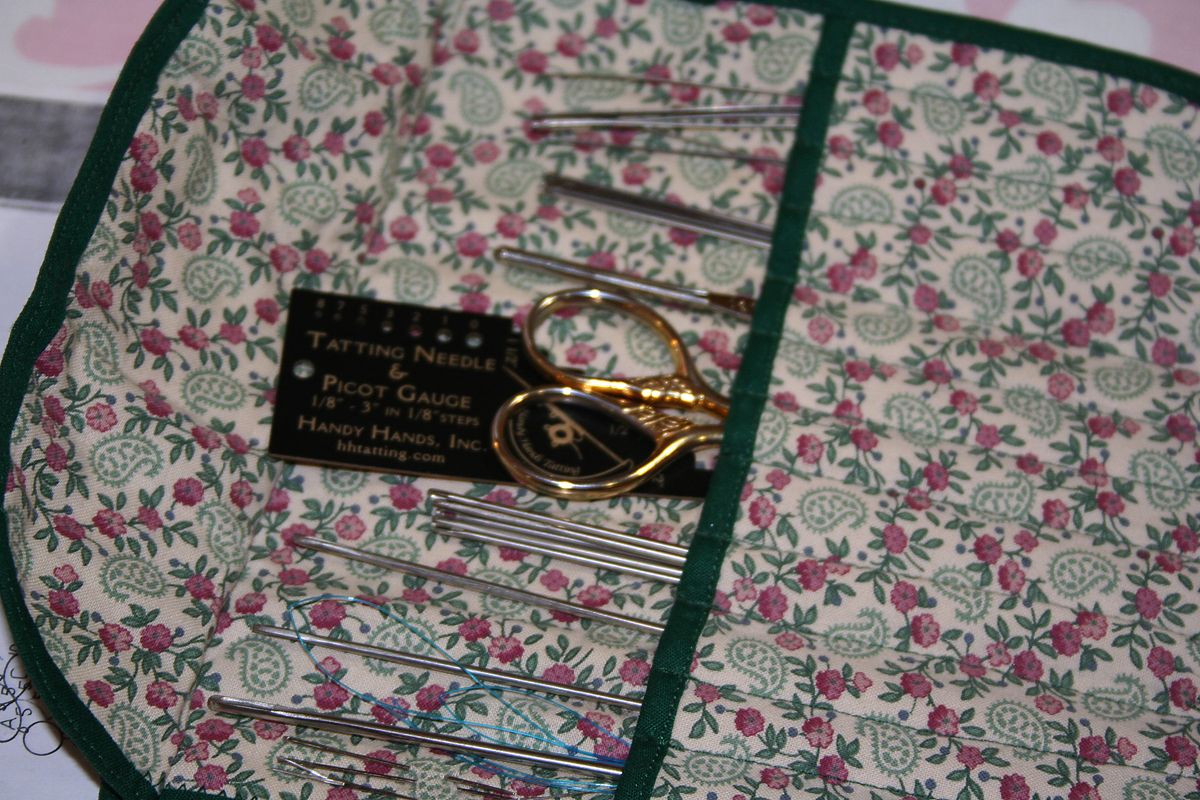
Bonnie’s Needle-tatting Toolkit
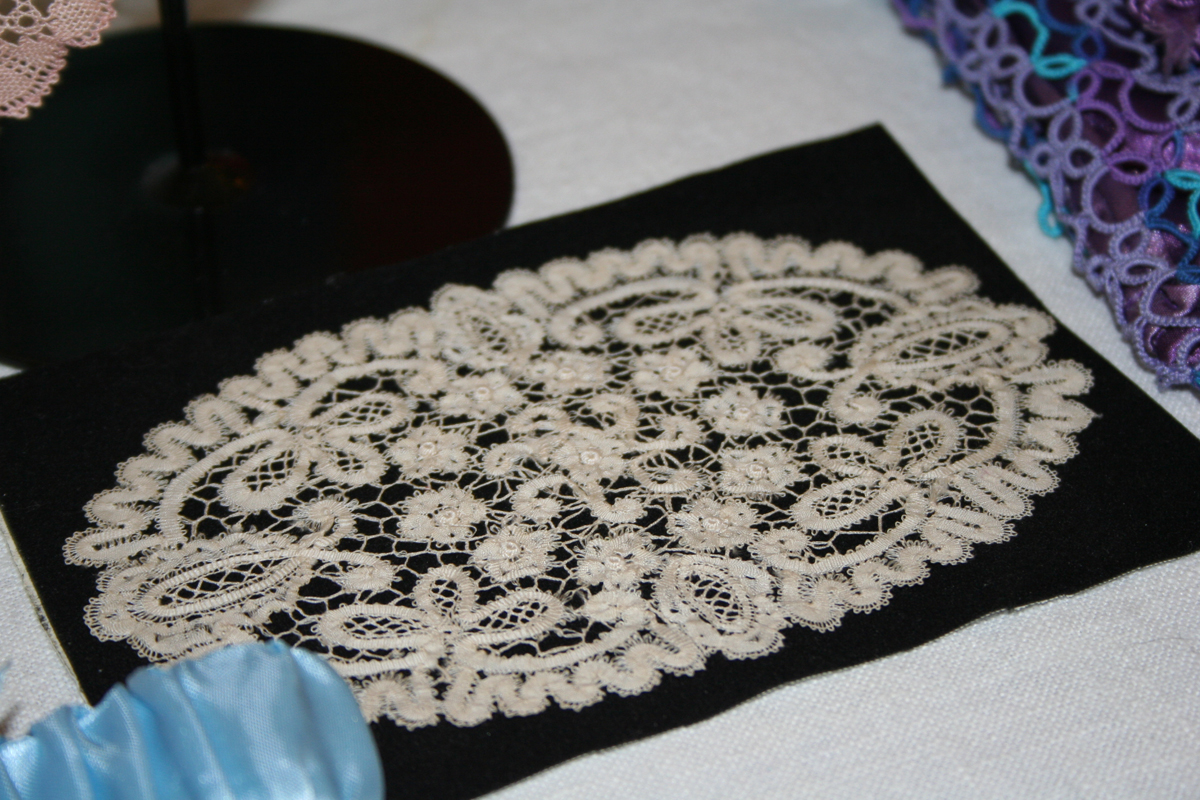
Vintage Lace
Lace Frame
It really was something to see. Thanks again, Janet, for hosting them. And a huge thanks to The Piedmont Lace Guild of Virginia for the very interesting demo.
To learn more about the guild, visit their website — http://piedmontlace.org/. New members are welcome at any time. If you sign up, let me know. If I didn’t already have so many hobbies, which I don’t have enough time for, I’d join in a heartbeat. I think making lace would be awesome. How about you? Help keep a dying art alive!
In a recent post, I told you we had some pipes freeze and break at the WV Place. This past Saturday, Hubby (Mike) and I went to the WV Place to better assess the damage he discovered last weekend. Oh, and get some subcontractor bids.
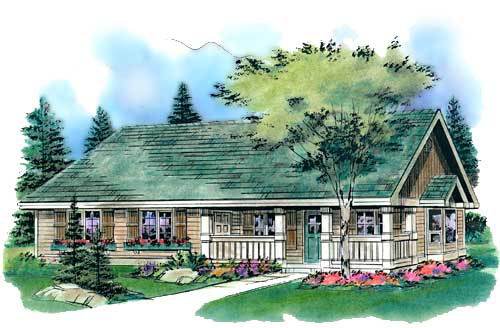
Those of you new to this blog, or have only gotten to know me recently, may not know that Hubby and I built the WV Place ourselves. From scratch. Mostly during weekends over the course of four years (2005 to 2009). We did hire folks to do major stuff like clearing, grading, installing the septic system, and finishing the concrete slab, but we did most of the work. With some help from friends and family along the way. It’s all documented here.
We’re no strangers to construction-type stuff. But we’ve had our fill. That’s why seeing the damage was disheartening, but not completely overwhelming. And Hubby had a really, REALLY cool tool to make the labor easier. Stay tuned…
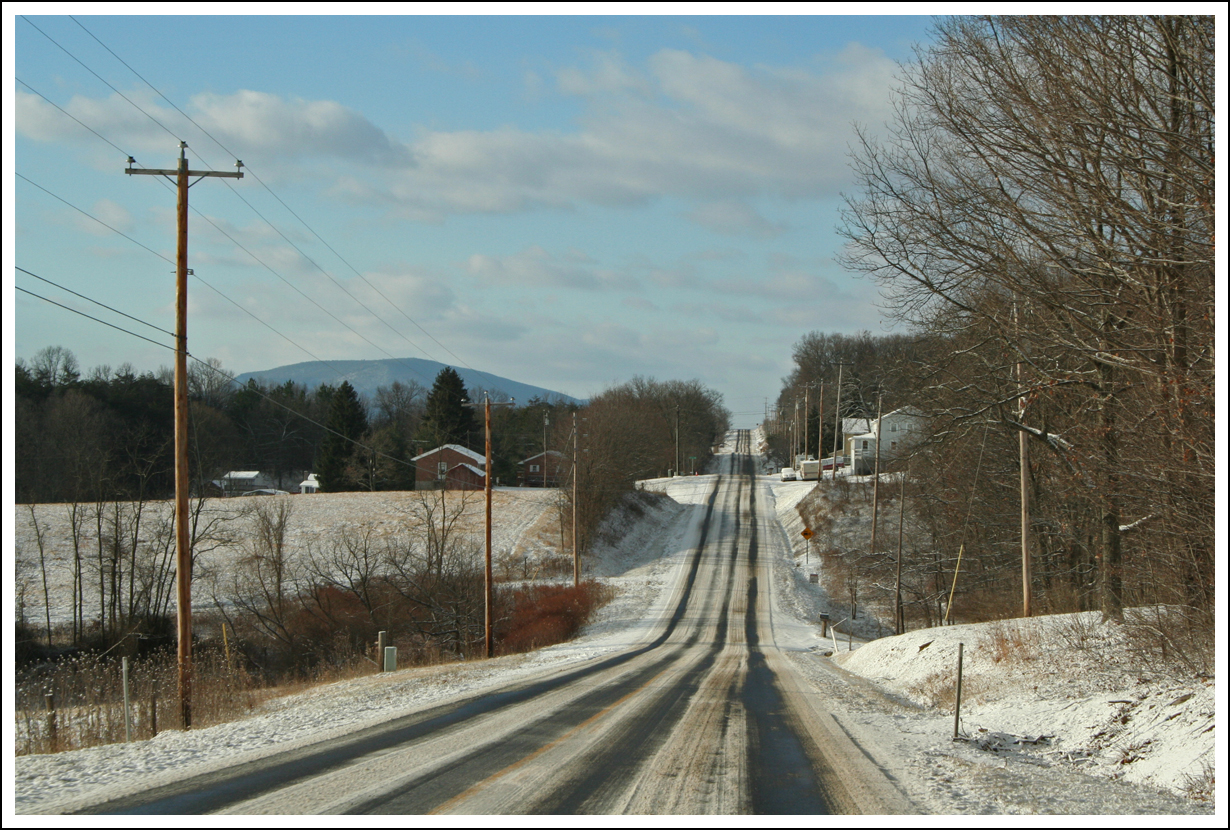
The drive up on Saturday was actually pretty…
Dramatic Winter Sky
…but also a bit slick.
WV-29, South of Slanesville
I’m a sucker for wintry skies.
The ride was uneventful. We arrived safely, unloaded all of our stuff, and started work.
Step one, for me, was taking pictures to share with you. There are a lot of them. It felt like old times when, during the construction process, I pretty much documented the whole adventure.
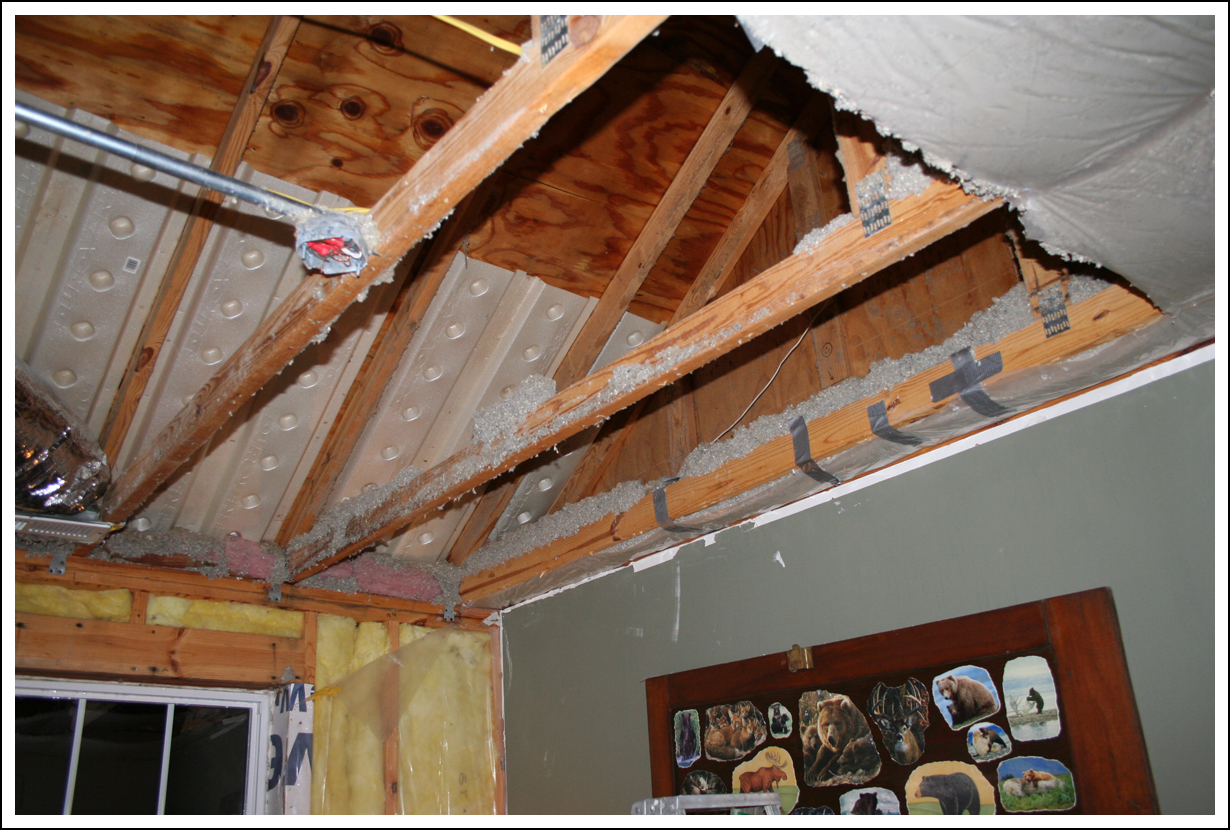
Here’s what the place looked like when we arrived.
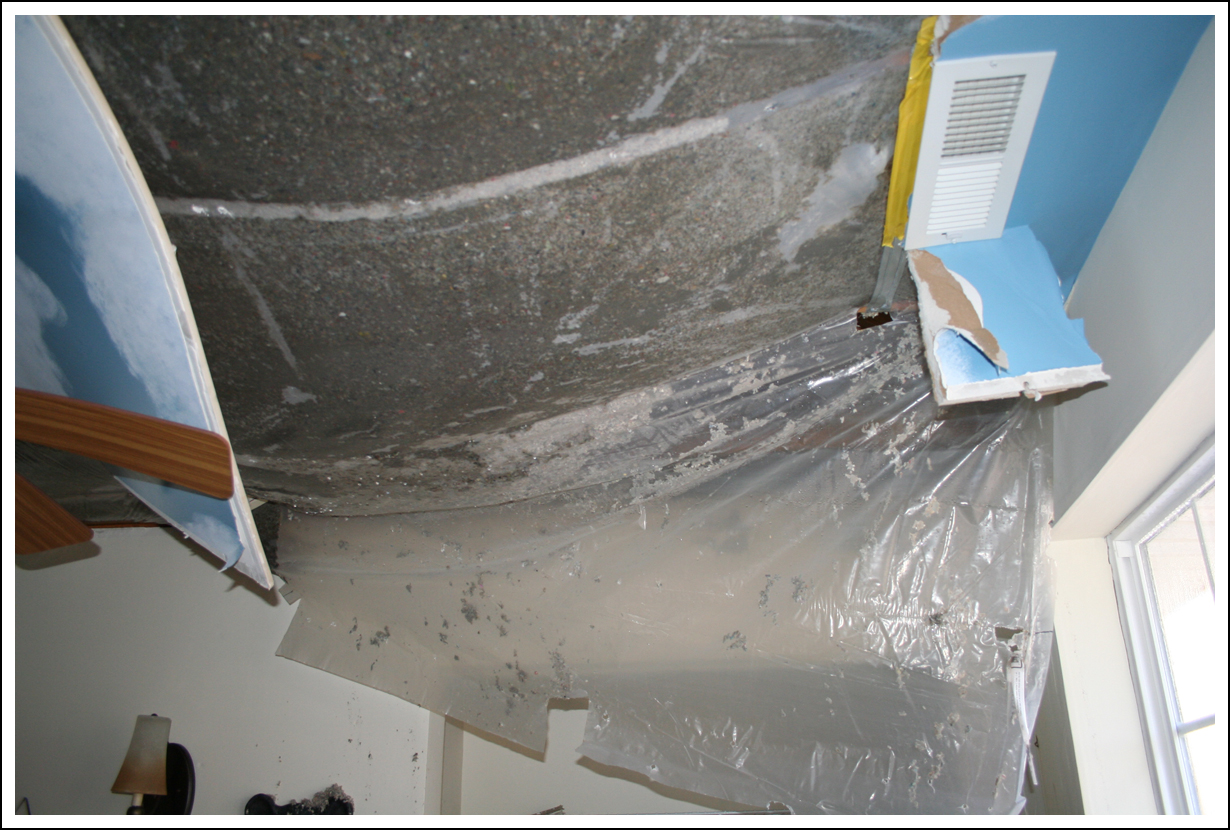
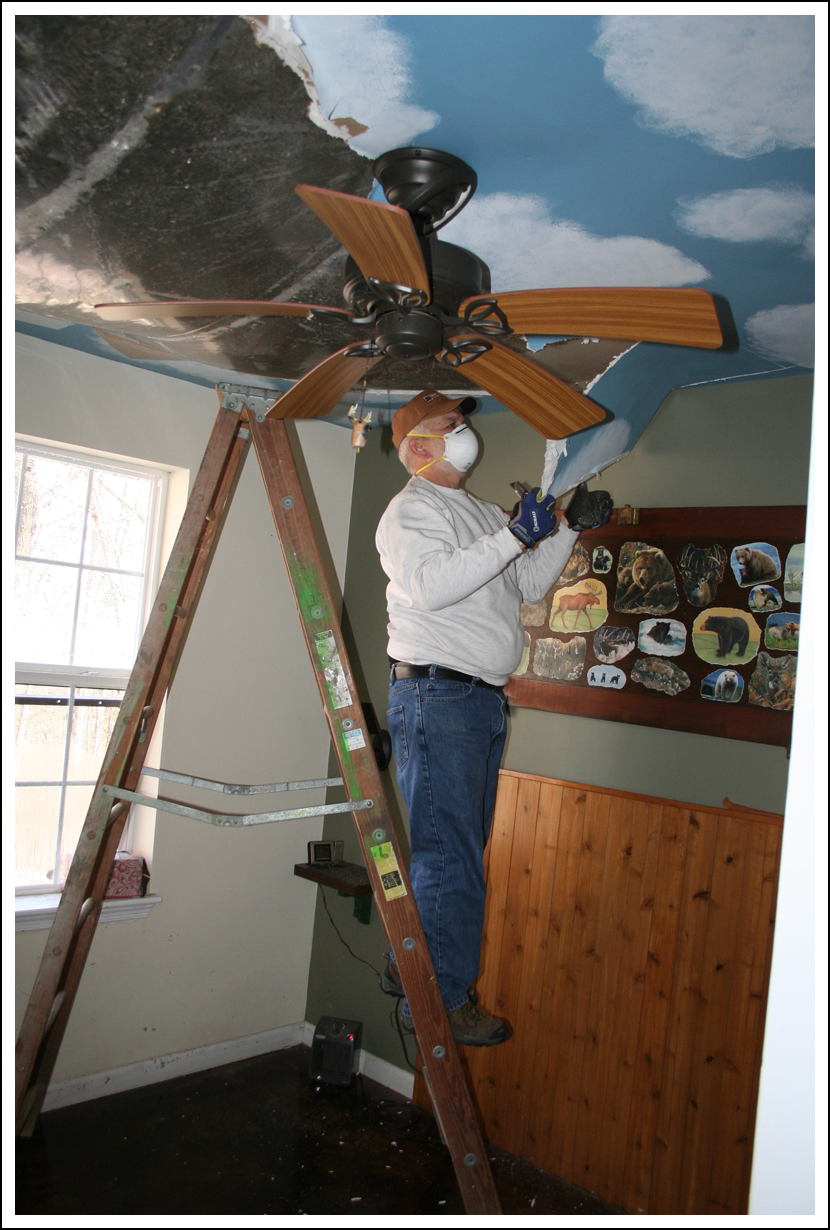
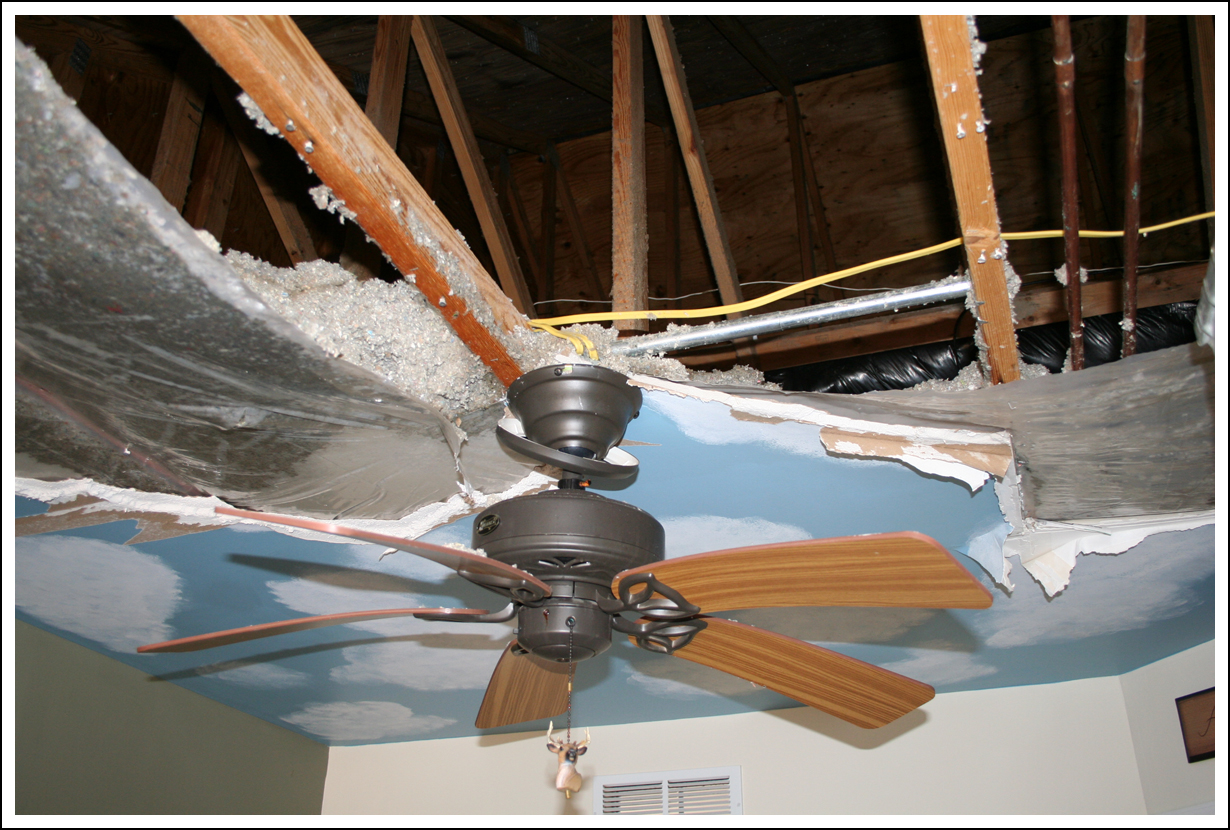
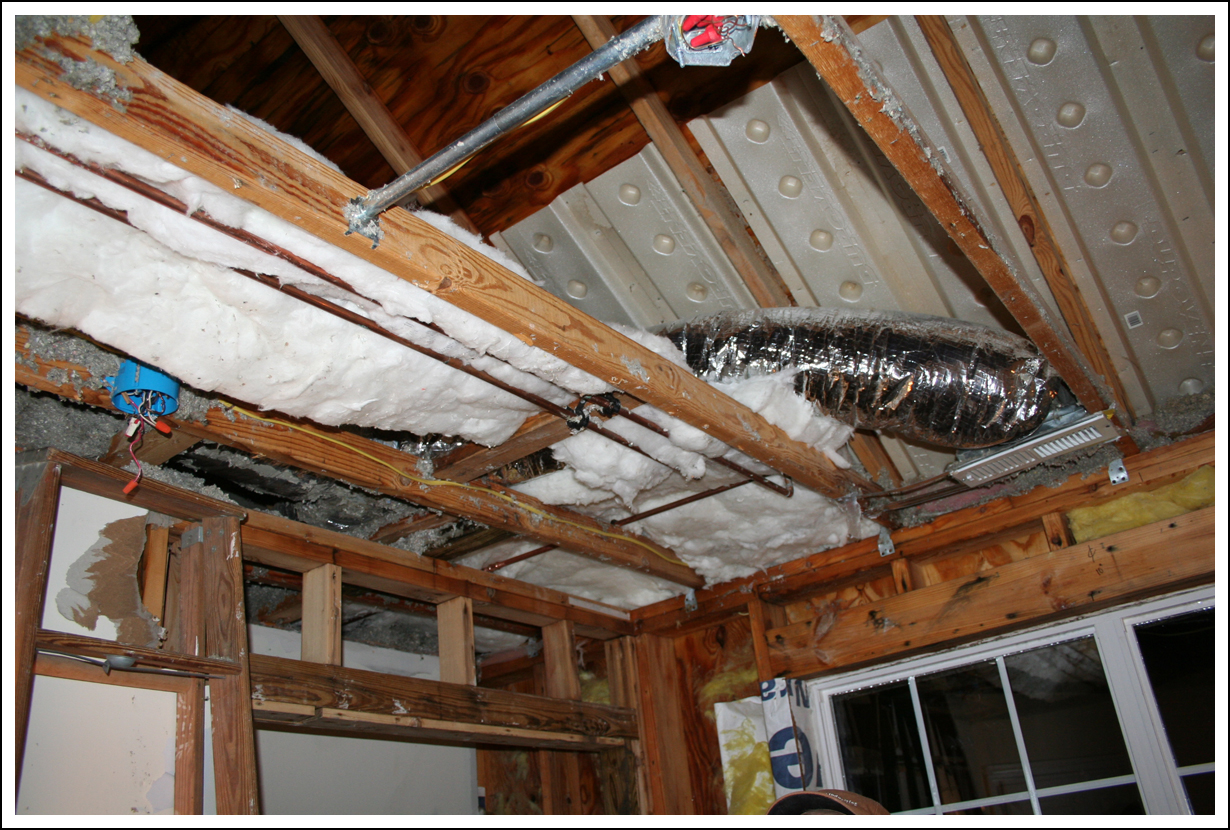
Bedroom Ceiling
Some of the sheetrock was already down. What you see missing in these first pics is what fell during the leak and the couple danglers Hubby removed during his previous visit.
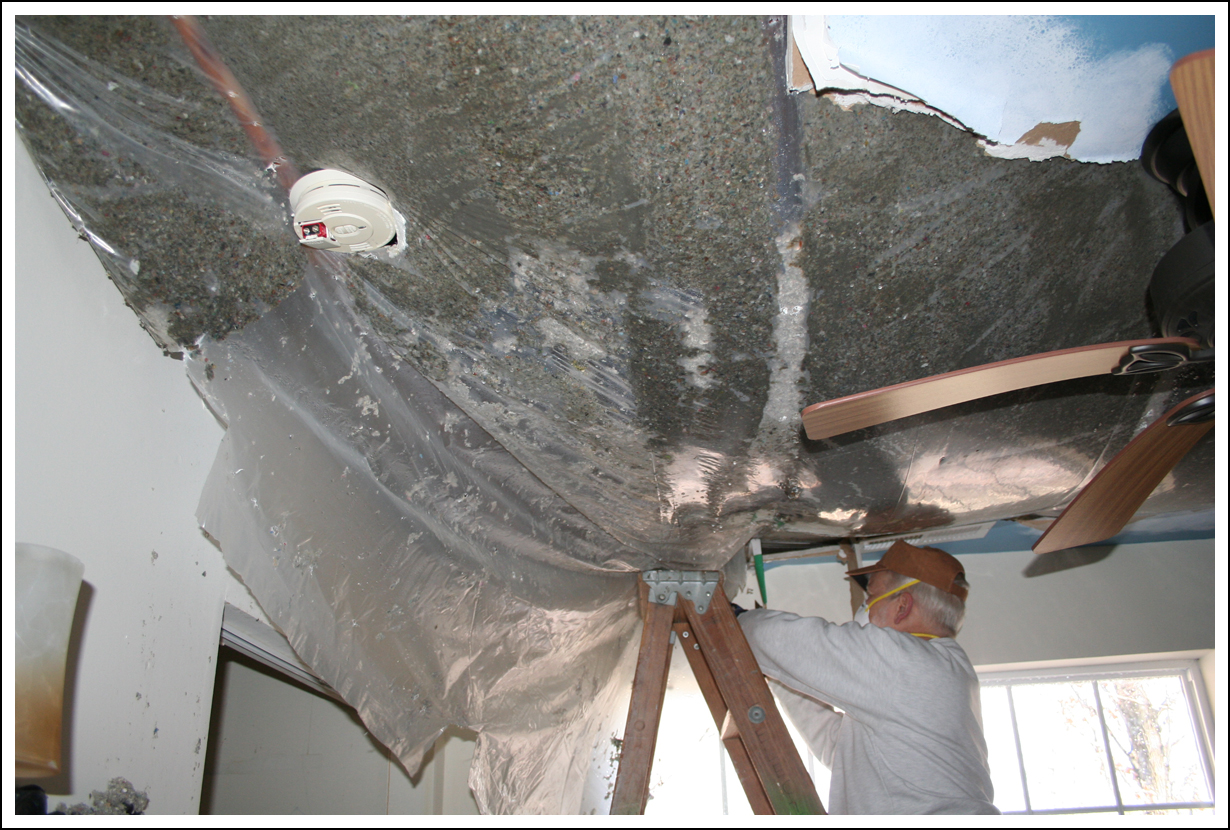
Plastic vapor barrier bulging under wet cellulose insulation.
If there were still a bed in the room and I was laying on Mike’s side, that would be my view.
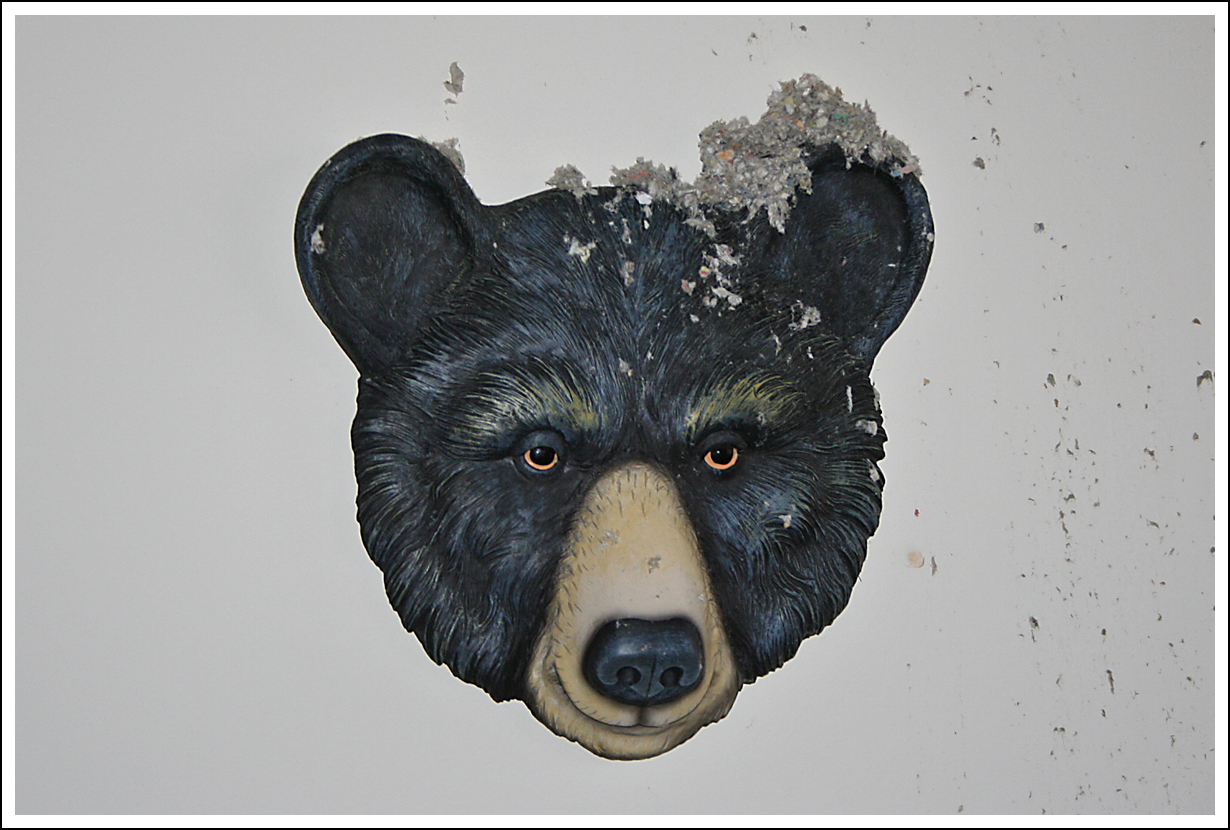
I can’t believe this guy was still on the wall.
Water damage just outside of bedroom.
Our first objective was to find the location of the actual leak(s).
Removing more drywall.
Ruined closet doors that Hubby removed during previous visit.
The entire bedroom ceiling had to come down.
The really messy part is coming soon…
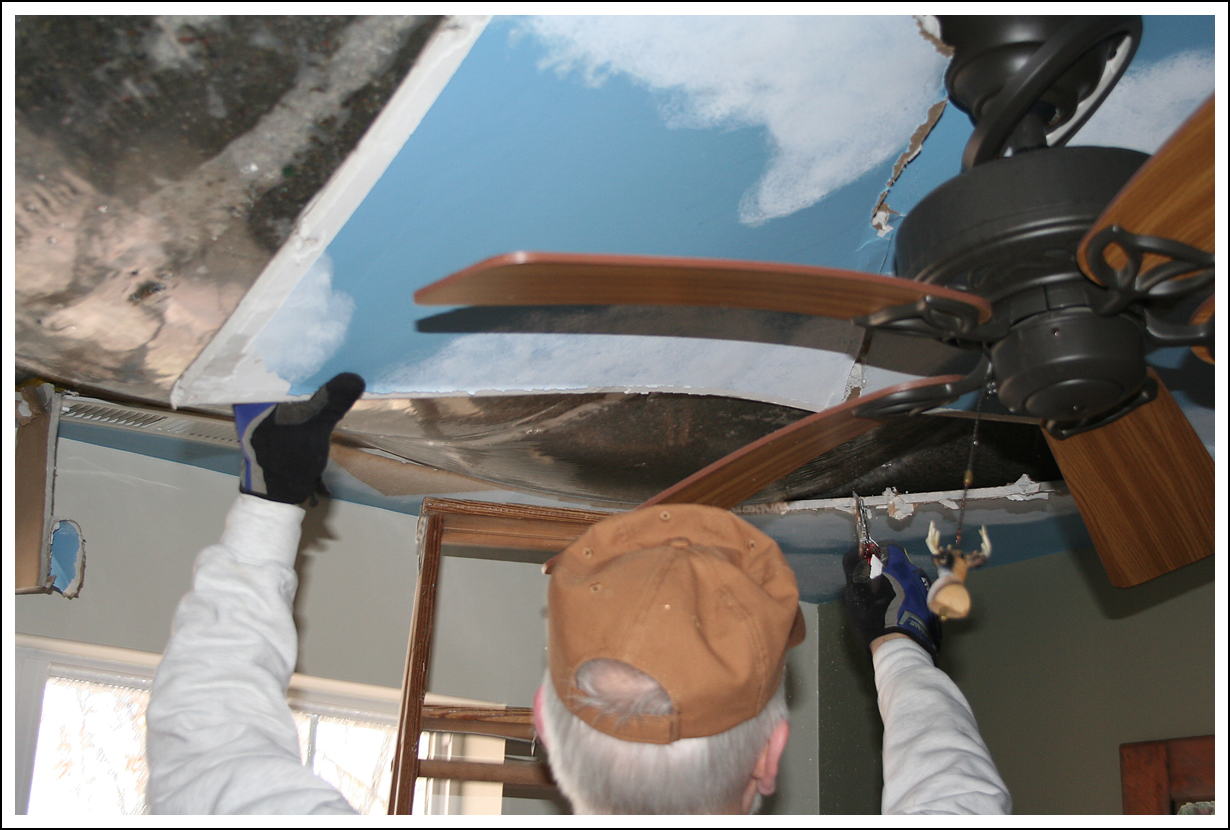
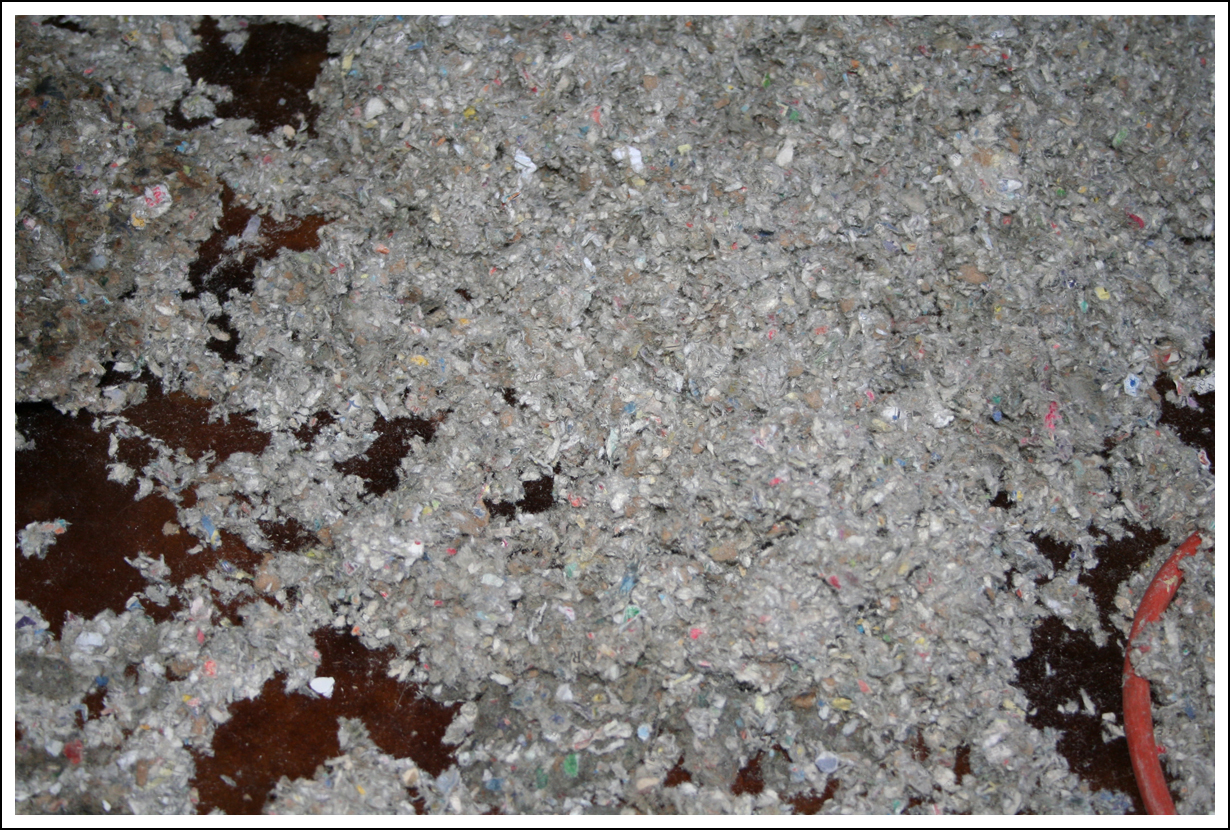
Removing the saturated sheetrock wasn’t very hard. And only a little messy. Cutting the plastic to release the insulation was the REAL mess. It’s blown-in cellulose, which is essentially pulverized newspaper. Messy, but non-toxic. And very dusty.
Hubby: Action Photo
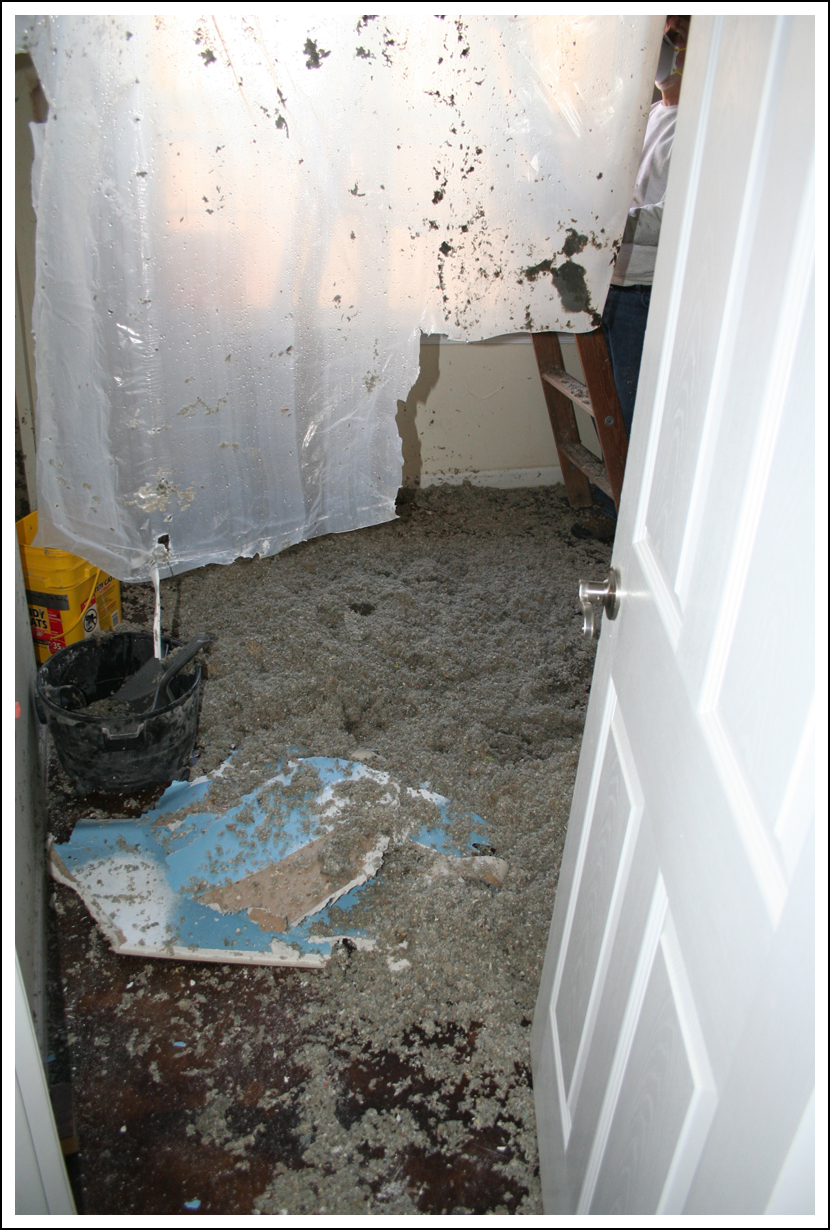
That’s what it looked like coming down.
After the first small cut.
Messy, messy, messy. But we were prepared…
That’s me. I am known as The Unskilled Laborer.
Hubby does the hard work, I do the simple stuff. Which usually means clean-up, acting as go-fer, providing moral support, fetching stuff, etc. All very important, of course, just not real glamorous.
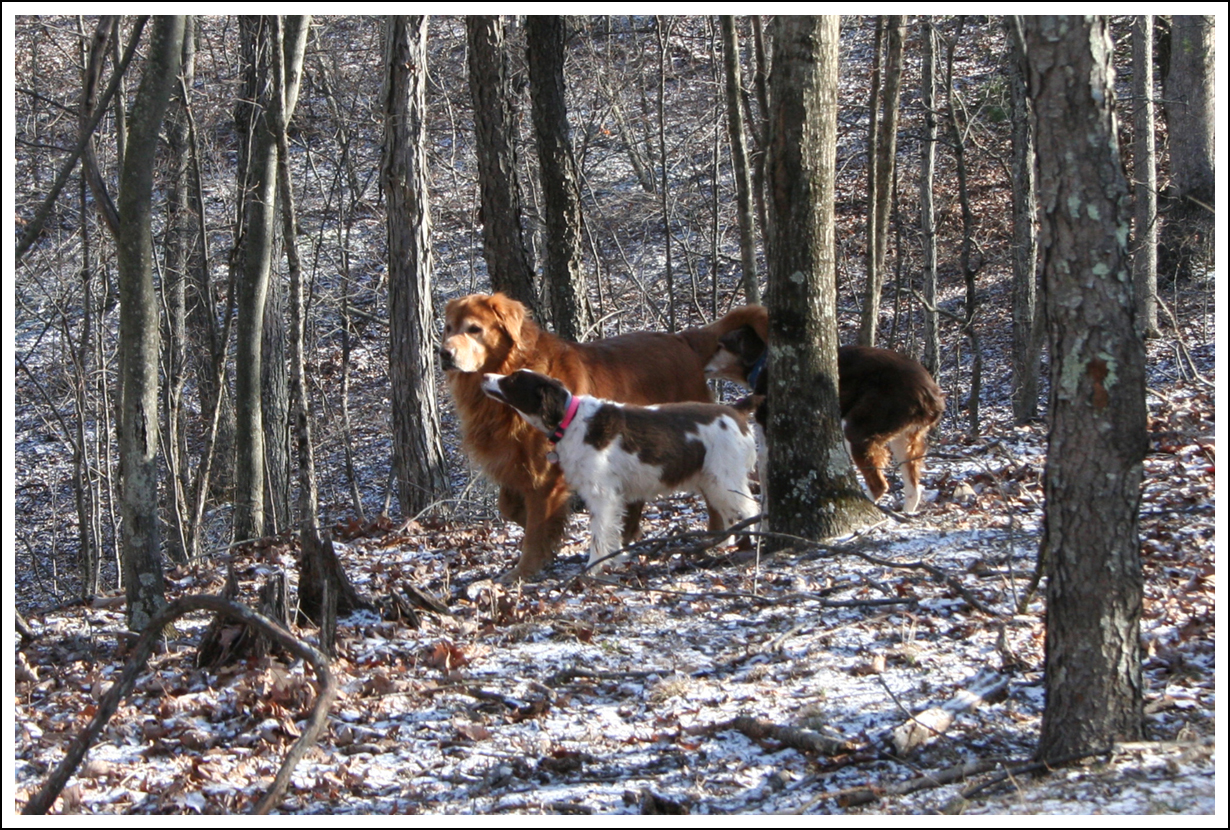
Visitor
While we were working, the girls were having their fun outside. Meg went and got her friend, Buddy. We hadn’t seen him in a long time and were all happy he came by to visit.
K found a treasure, too, which I promptly took away from her.
Deer Foot
Treasures like that are usually very stinky (this one was quite frozen), so I hate putting them in the trash. So I usually just hang them out of the girls’ reach.
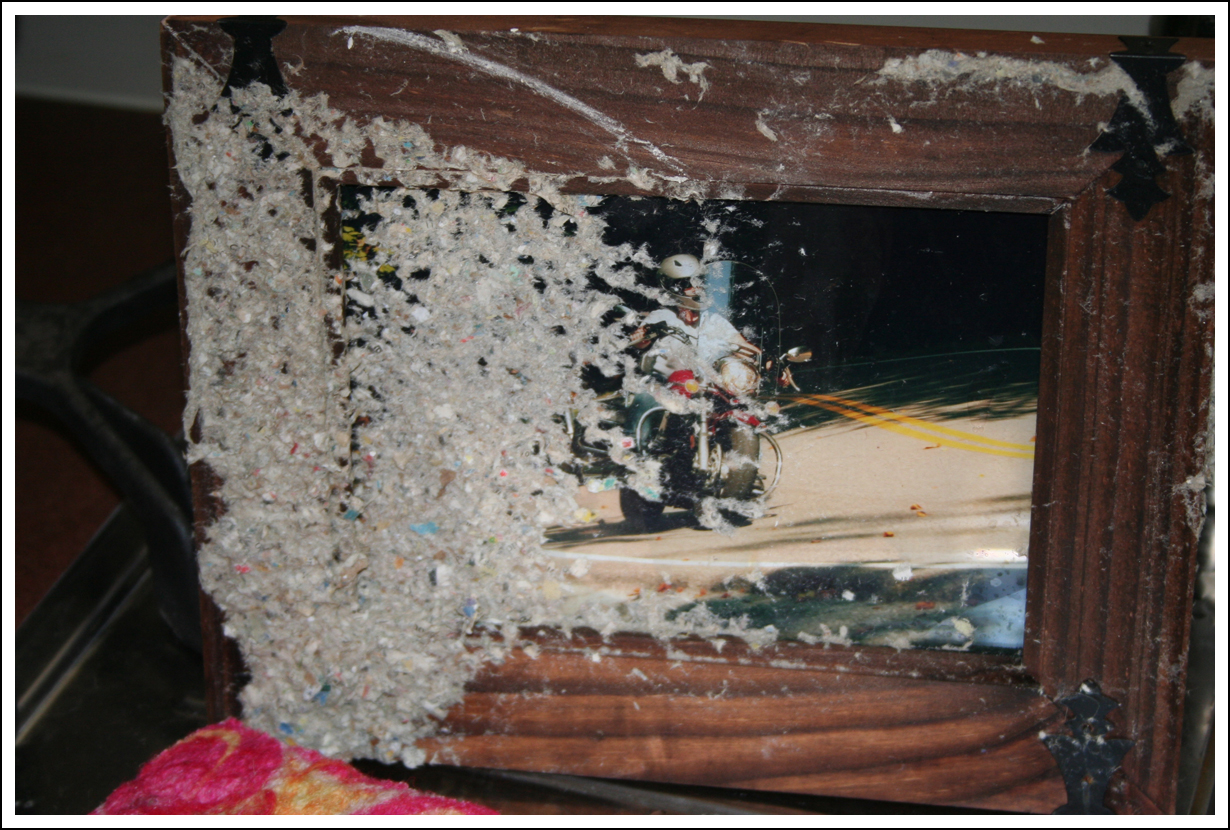
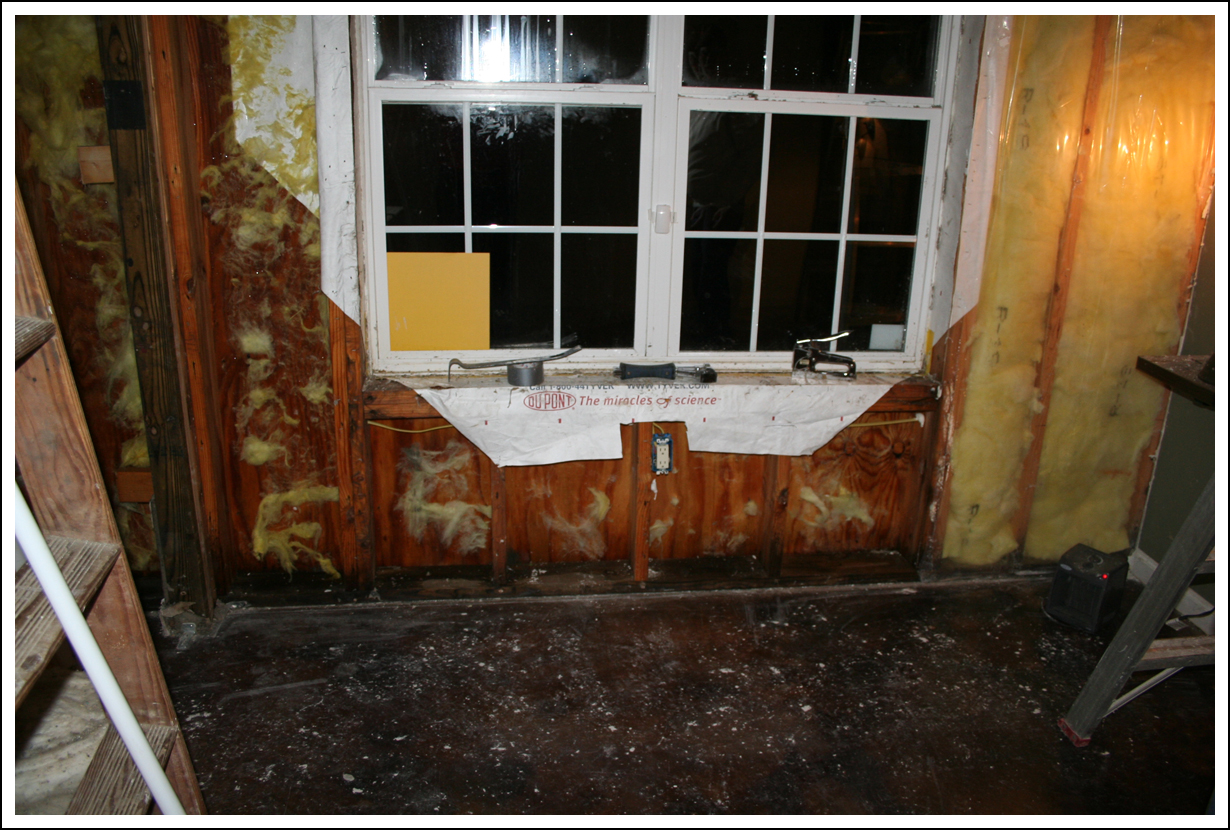
This picture had been on the bedroom windowsill.
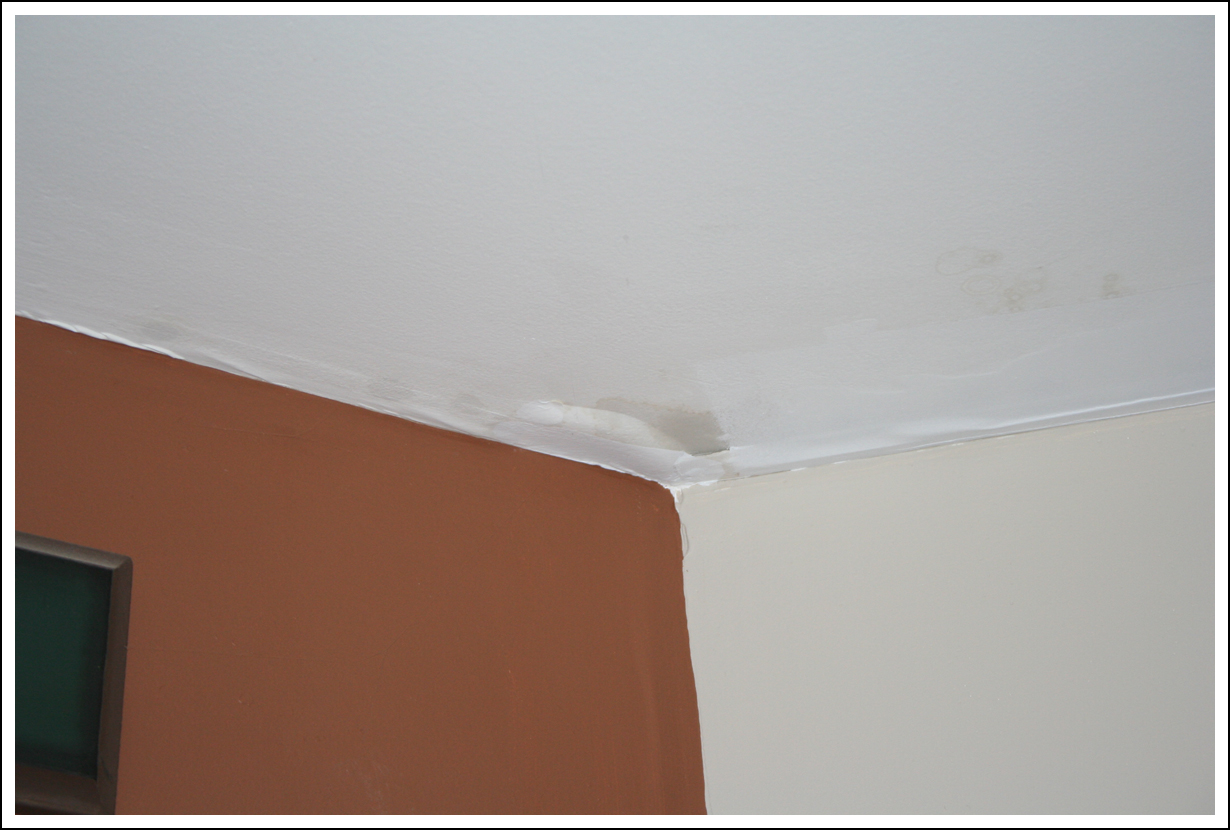
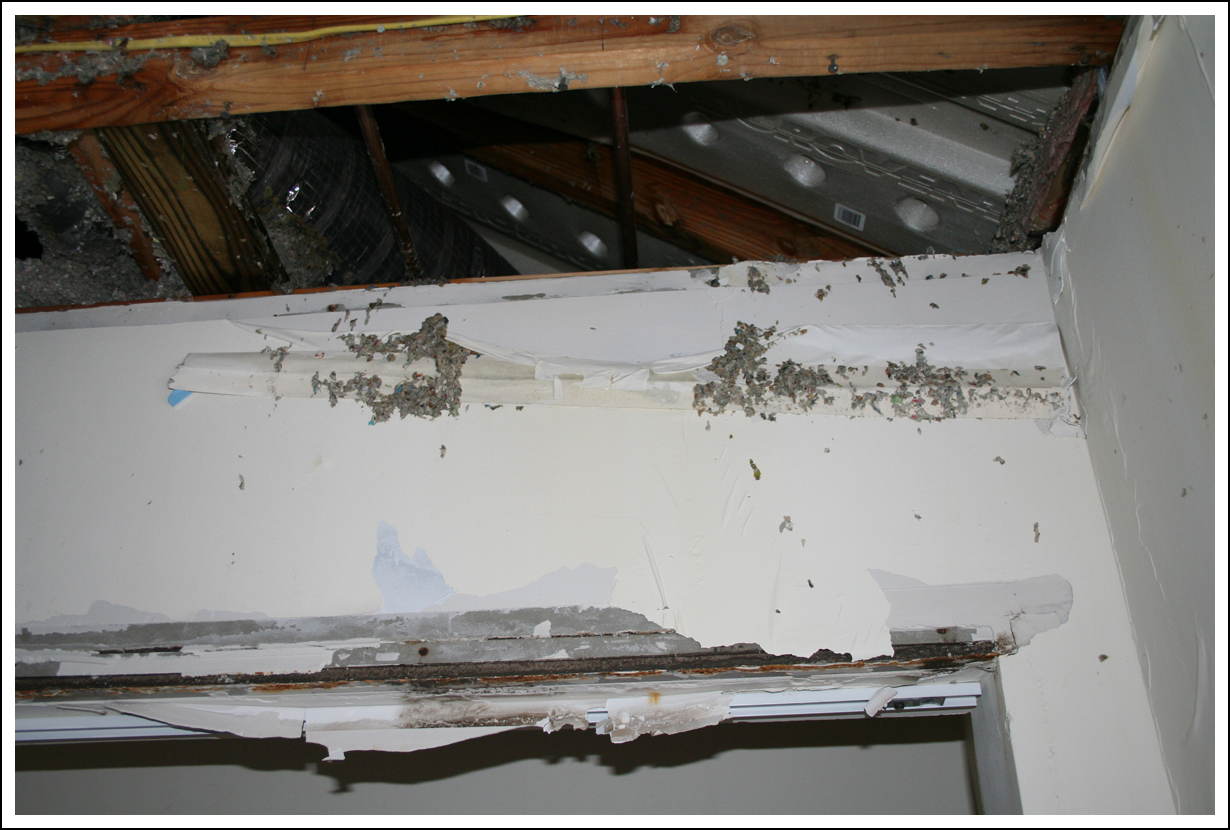
Wall above closet.
We knew about where the leak(s) was/were. It’s pretty clear when seeing the paint on that wall. Sure enough, the break (only one!!!) was right above the closet. Which would explain the ruined closet doors.
Pipes headed toward kitchen.
During Hubby’s previous visit, he noted that every hard surface in the place was covered with lots of condensation. We were quite relieved to find that it had all dried out. We thought for sure we’d be drying everything off before we could do anything else. There was still a lot of humidity in the air, just no surface wetness to mop up.
The leak was in the hot water line, which explained the condensation. You know how steamy the bathroom gets after a long, hot shower, right? Imagine an hours-long shower…
Close-up of the cellulose.
Hubby had a stroke of pure genius when he decided to take our electric leaf vac along. Sucking that stuff up into a bag was SOOOO much easier than having to use a shovel.
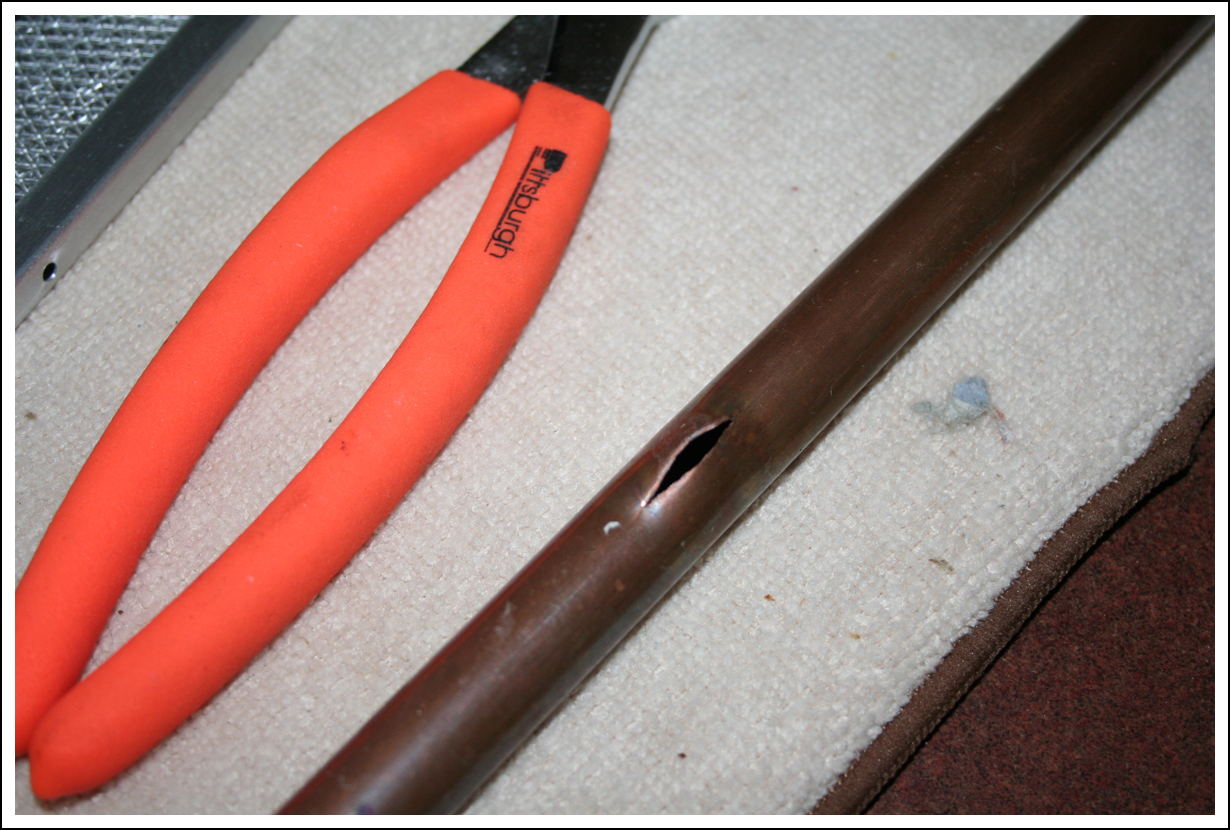
Failed section of pipe removed.
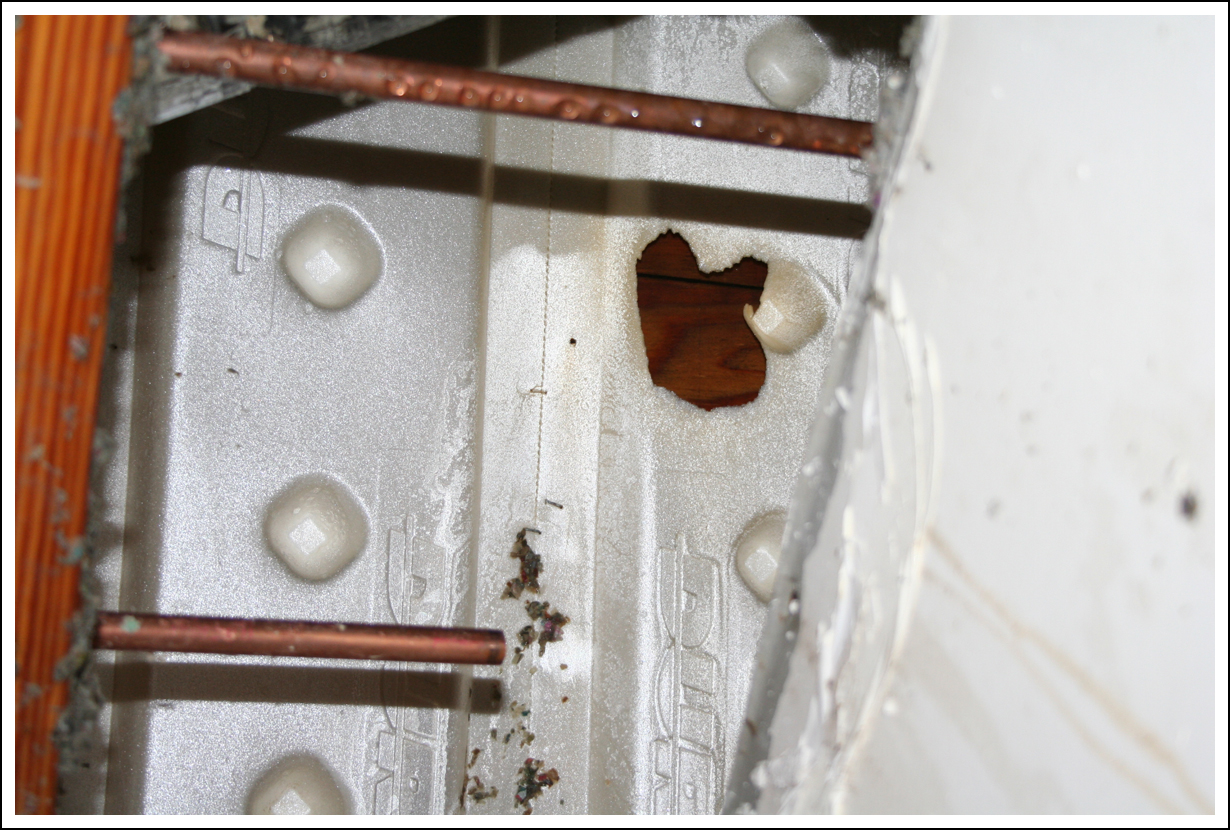
See that hole in the foam stuff (extruded foam rafter vent)? That’s from where the very hot water was shooting upward (about two feet/two-thirds of a meter) and hitting the roof.
Now here’s where the really cool tool comes into play. Replacing broken sections of copper piping is never easy. Soldering is typically required. And if not done EXACTLY right, the joints will leak. Hubby is pretty good at soldering, but says it’s a huge PIA. I have never actually done any soldering of pipes, but I have witnessed a lot. (Remember, we plumbed the entire house.)
Why is it such a pain? Used pipes still hold water, which makes soldering much more difficult. It’s harder to work overhead. The temperature in that space was about 20 degrees F (roughly -7 C). Four separate solders would have been needed. It’s dangerous to use a propane torch around insulation. Etc., etc.
Effecting the Repair
The damaged pipe.
After removing the damaged section of pipe, which was right above the closet, Hubby had to install new pipe.
Are you ready to see the cool tool Hubby borrowed?
Ridgid Pro Press
Enter the Ridgid Pro Press, a fast, reliable way to join copper piping. This is not something your average home-owner would buy, since it costs about $1,600. You may be able to rent one, but Hubby was able to borrow this one from his employer.
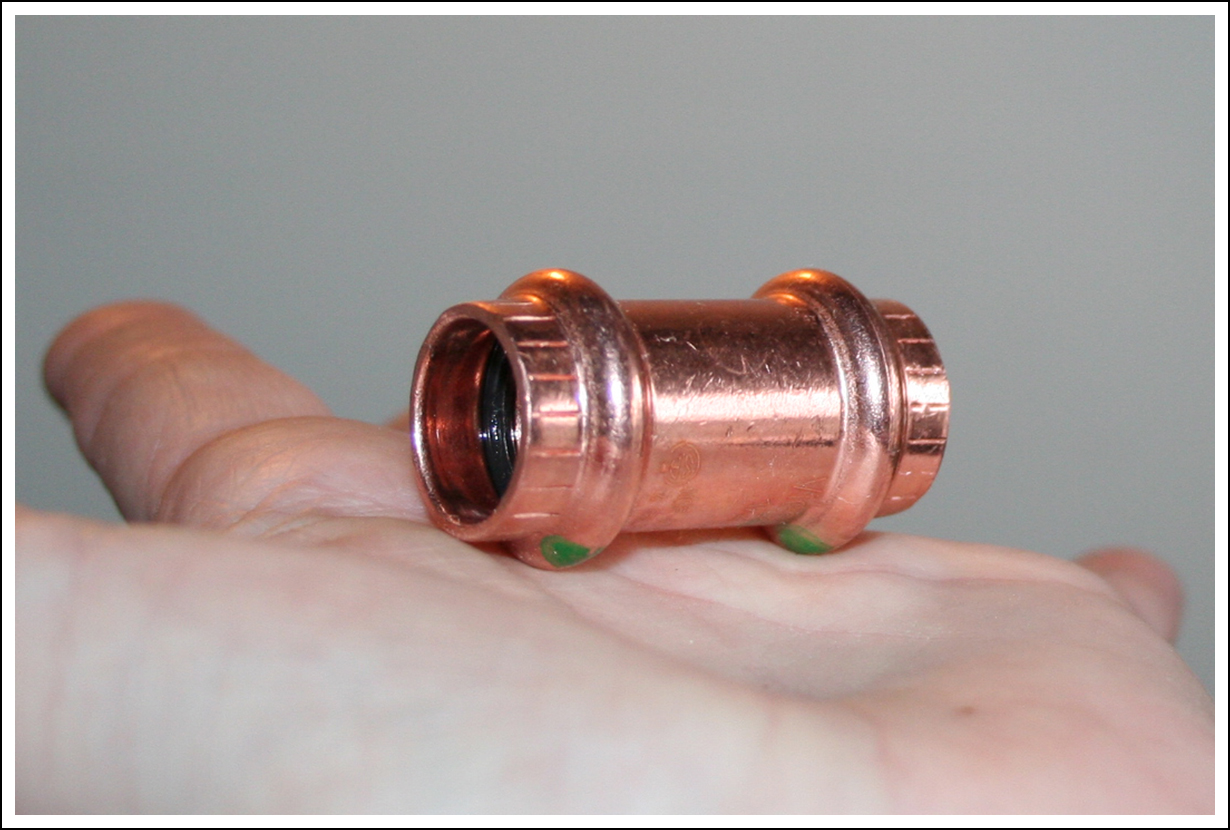
Using special fittings…
Special Fitting
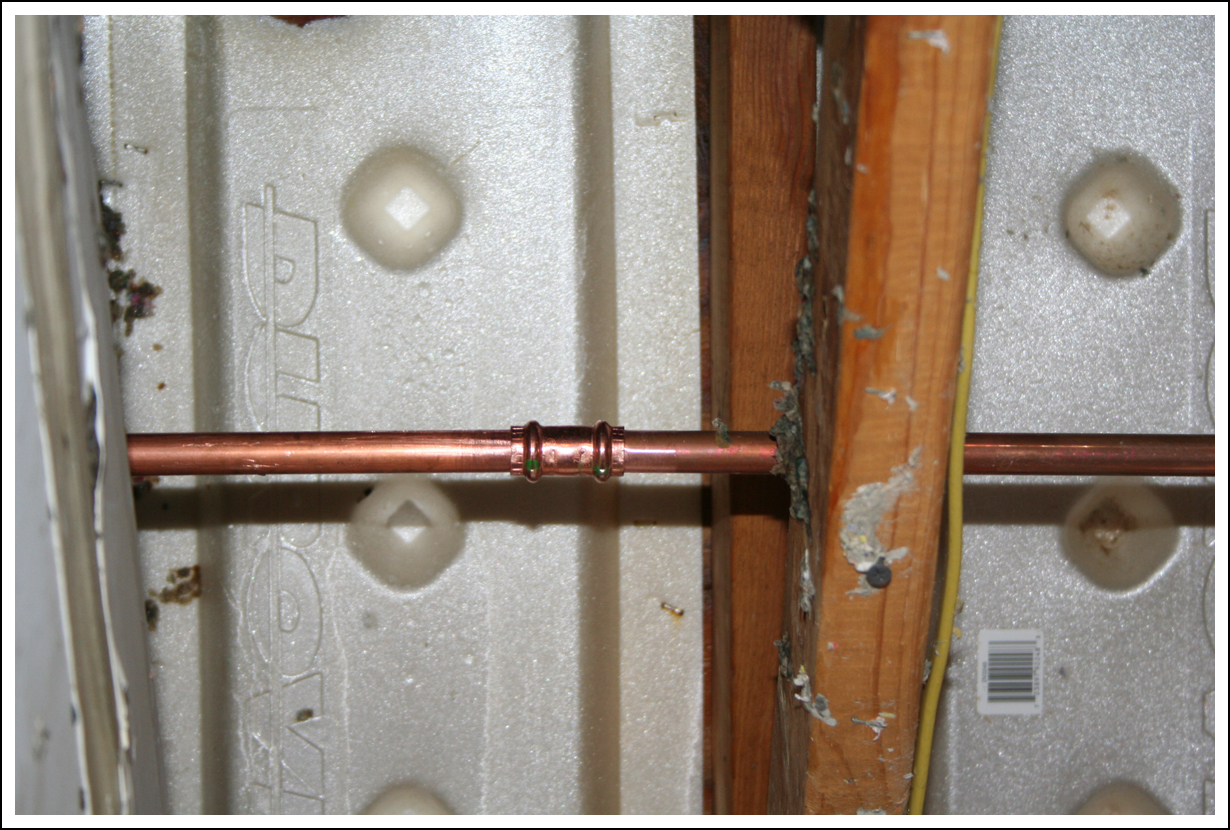
…each join literally takes five seconds.
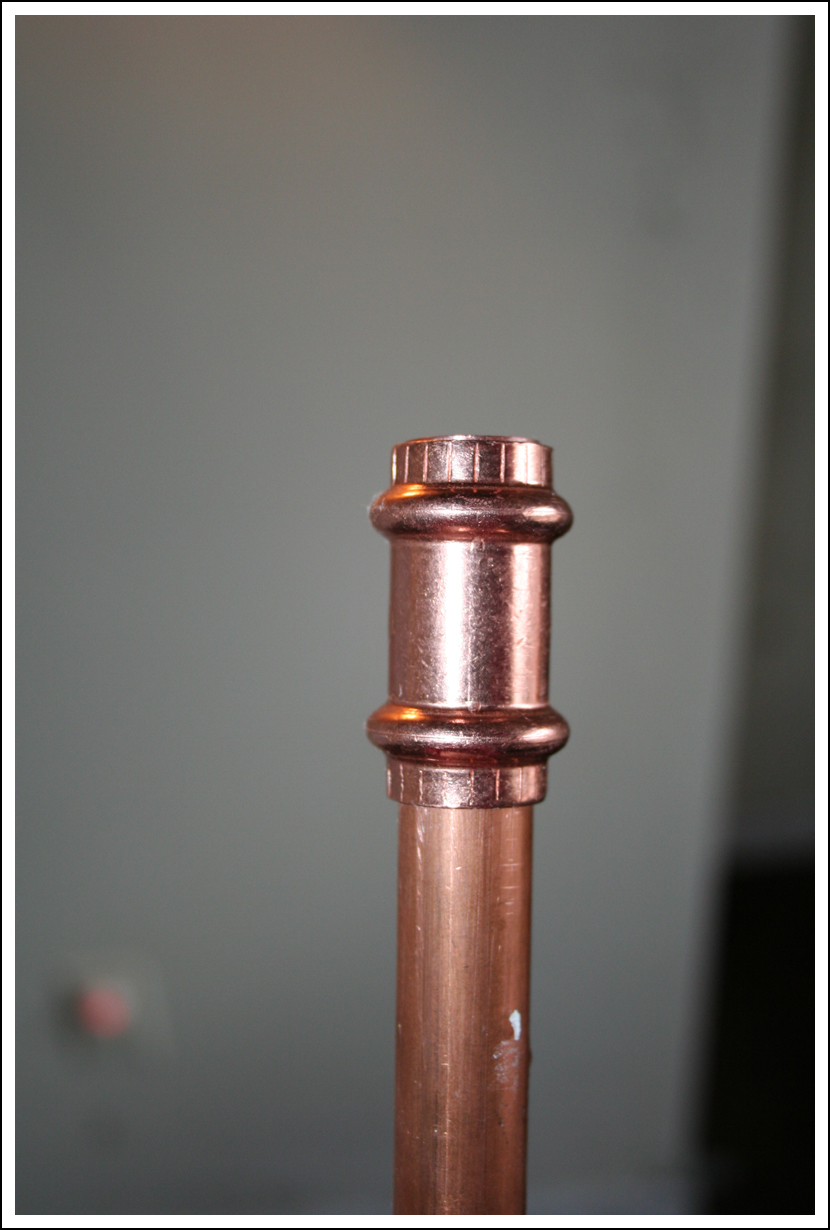
The Ready-to-Be-Installed Patch
The Patch Installed
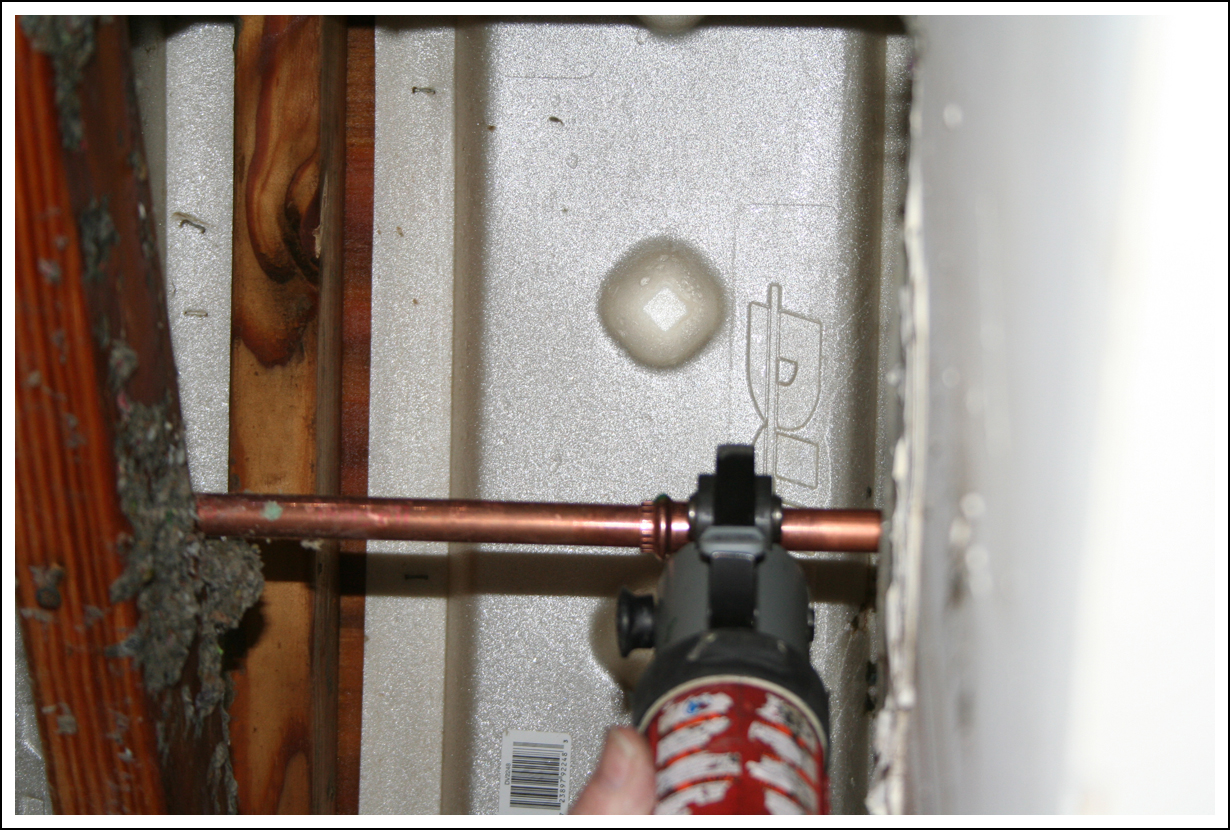
Pro Press in Action
Easy-peasy. Really. It made the job so much more bearable.
Once it was in, the scary part was turning the water back on. We were both ecstatic to find NO MORE LEAKS. Woo hoo!
After the leak was isolated and repaired, we could get back to ripping out the damaged sheetrock.
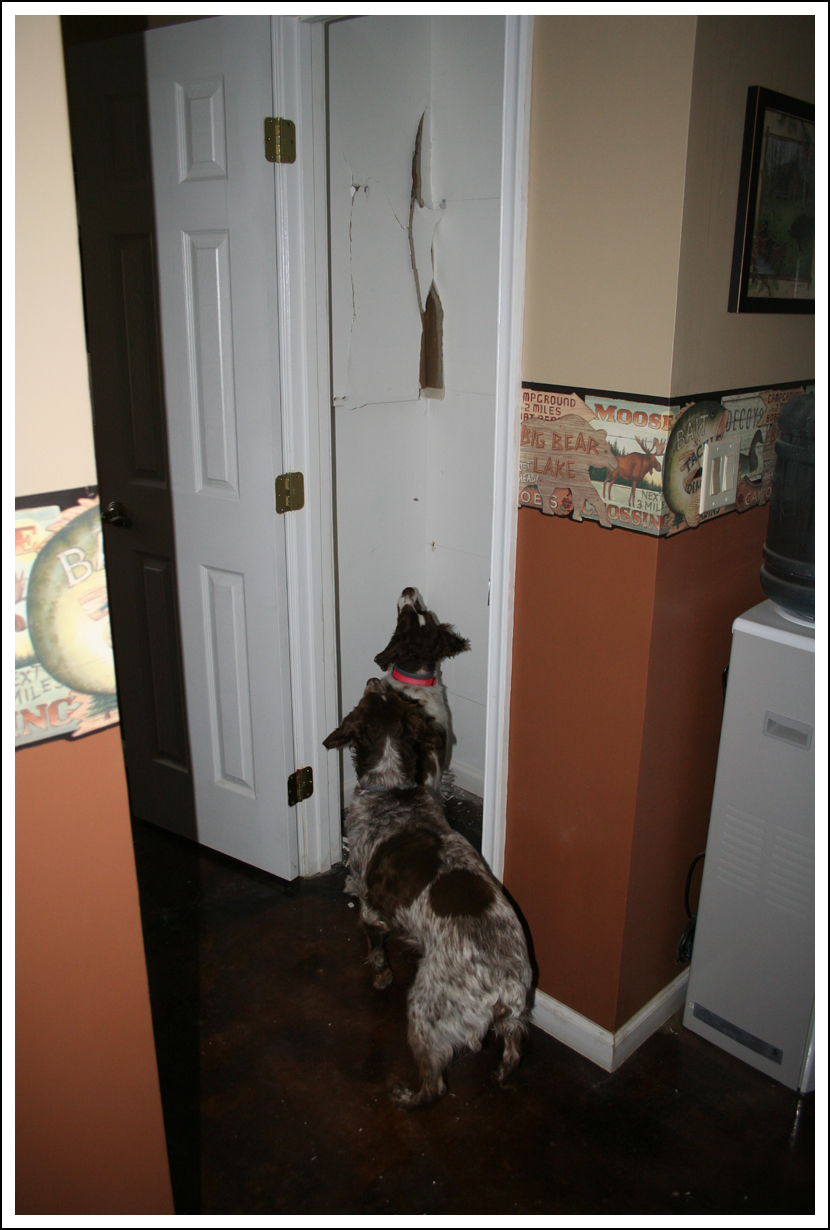
This coat closet, which open in the hallway, backs to the bedroom wall and closet. It needs to be replaced. Hubby barely leaned on the closet wall from inside the bedroom, causing this hole, which really weirded the younguns out.
Damaged Closet
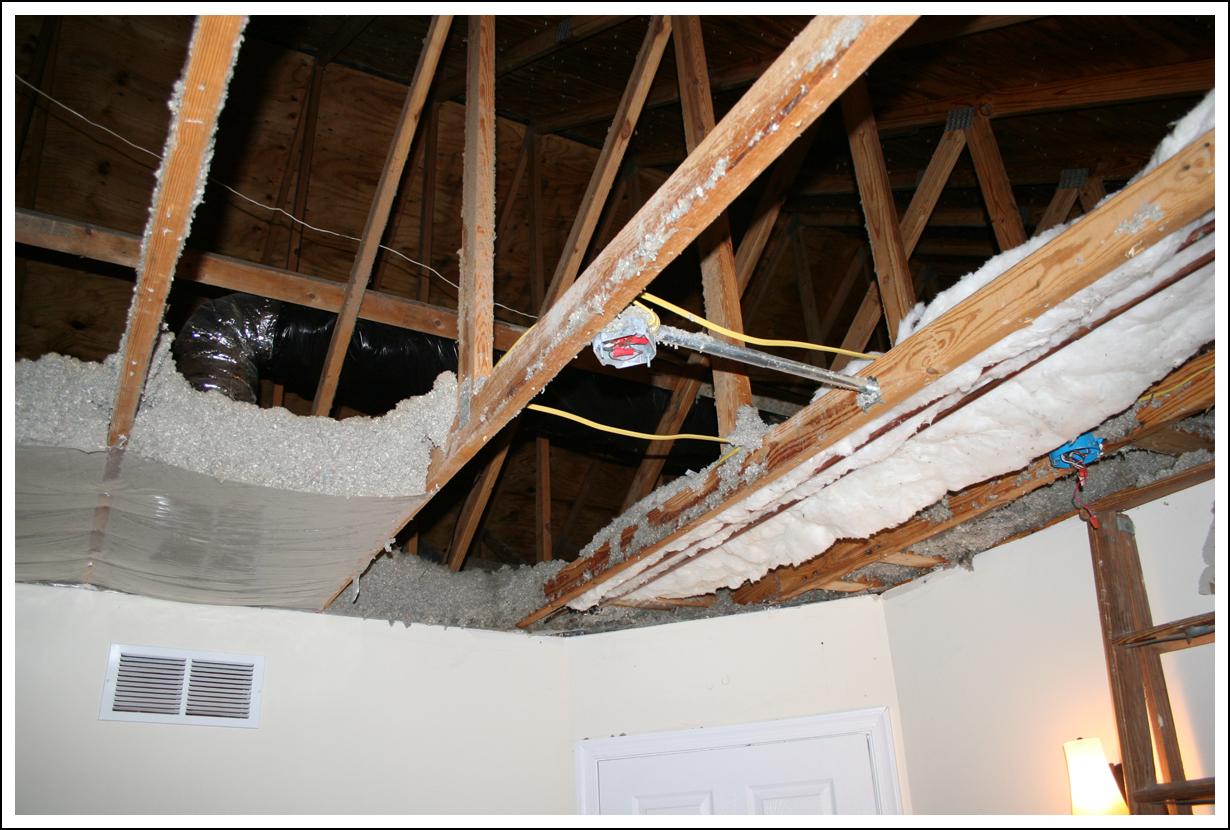
View into the attic.
Newly insulated pipes.
Another attic view.
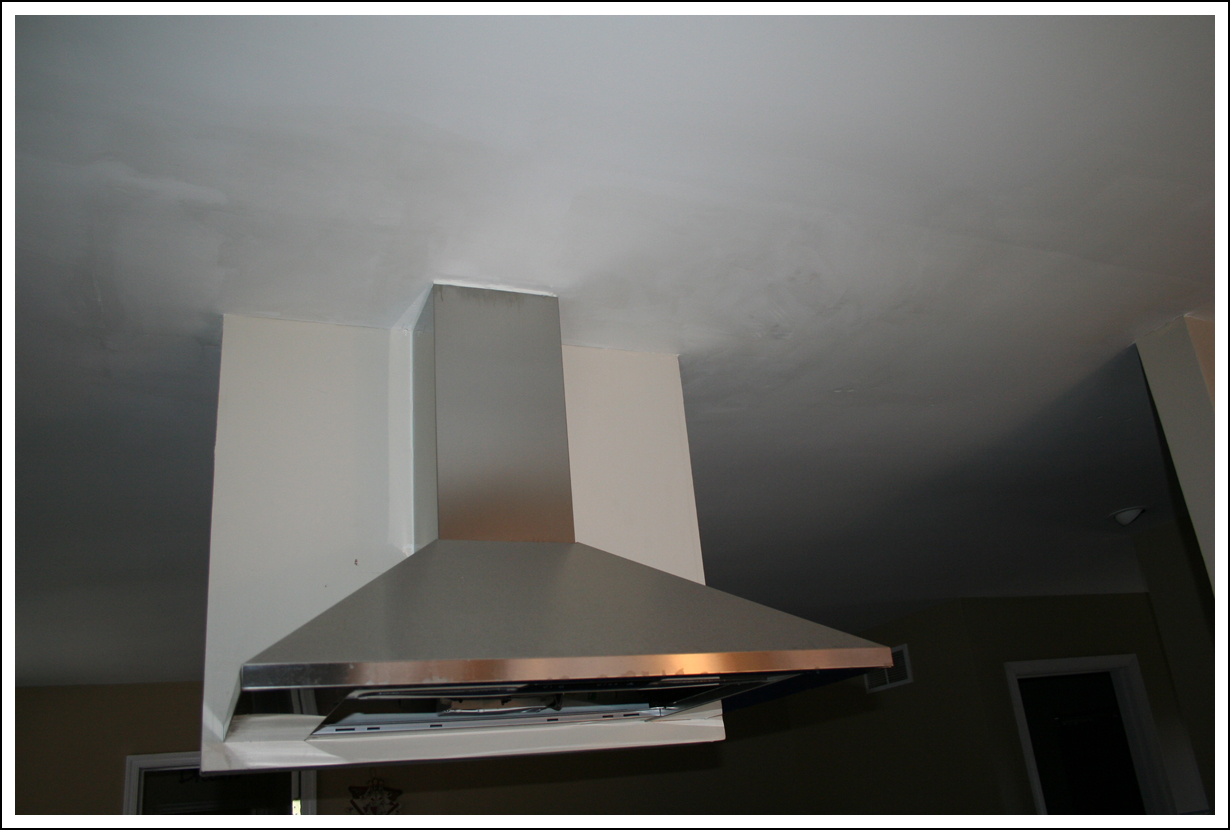
Those pipes lead into the kitchen. Some of the water followed those pipes, which is what damaged the kitchen ceiling. But damage is mostly isolated to the area below those pipes as the overflow drained out through the rangehood.
Wet Exterior Wall
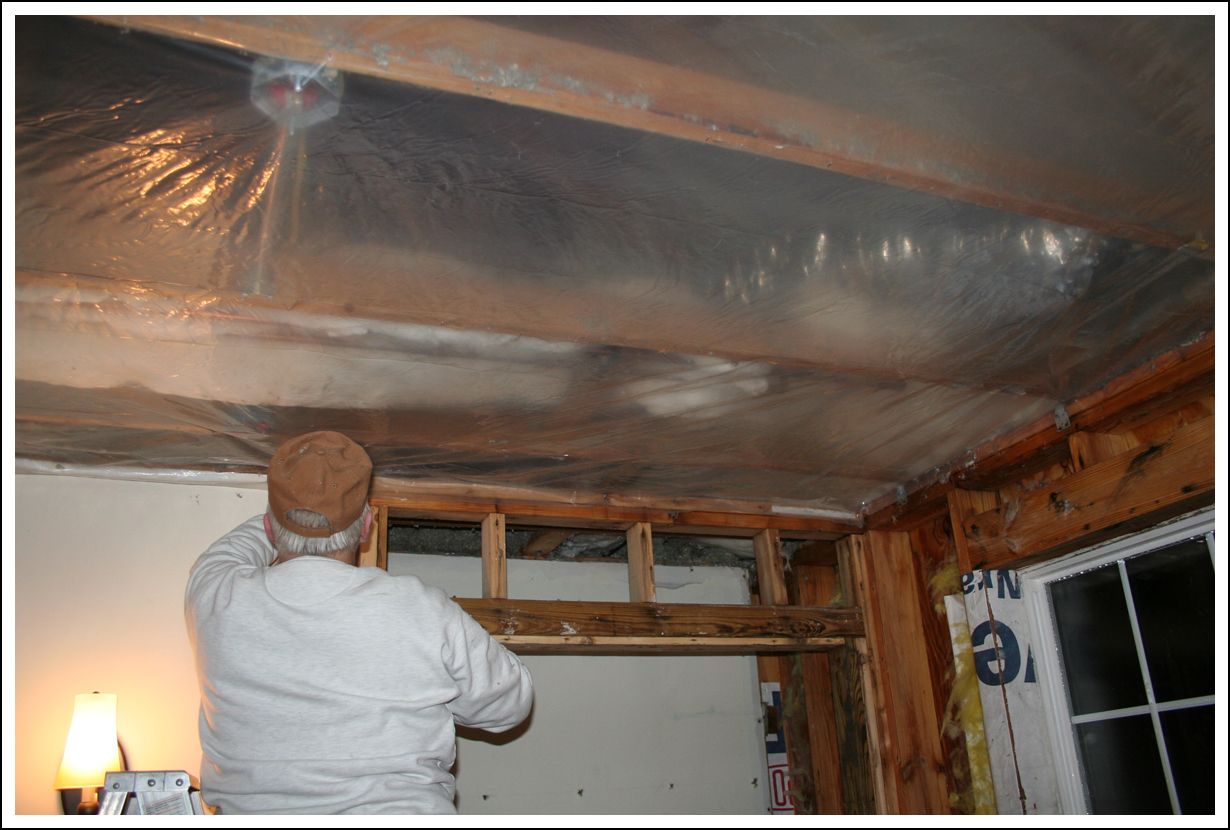
One of the reasons we had to remove so much sheetrock and insulation is so stuff can dry out. It can’t be replaced until the wood has dried. Another big reason was so we could reinstall some vapor barrier to seal the house off from the attic.
Vapor barrier going up.
Vapor barrier in place.
The plastic was necessary to prevent the heat from escaping into the attic. Once it was in place, the house warmed-up considerably.
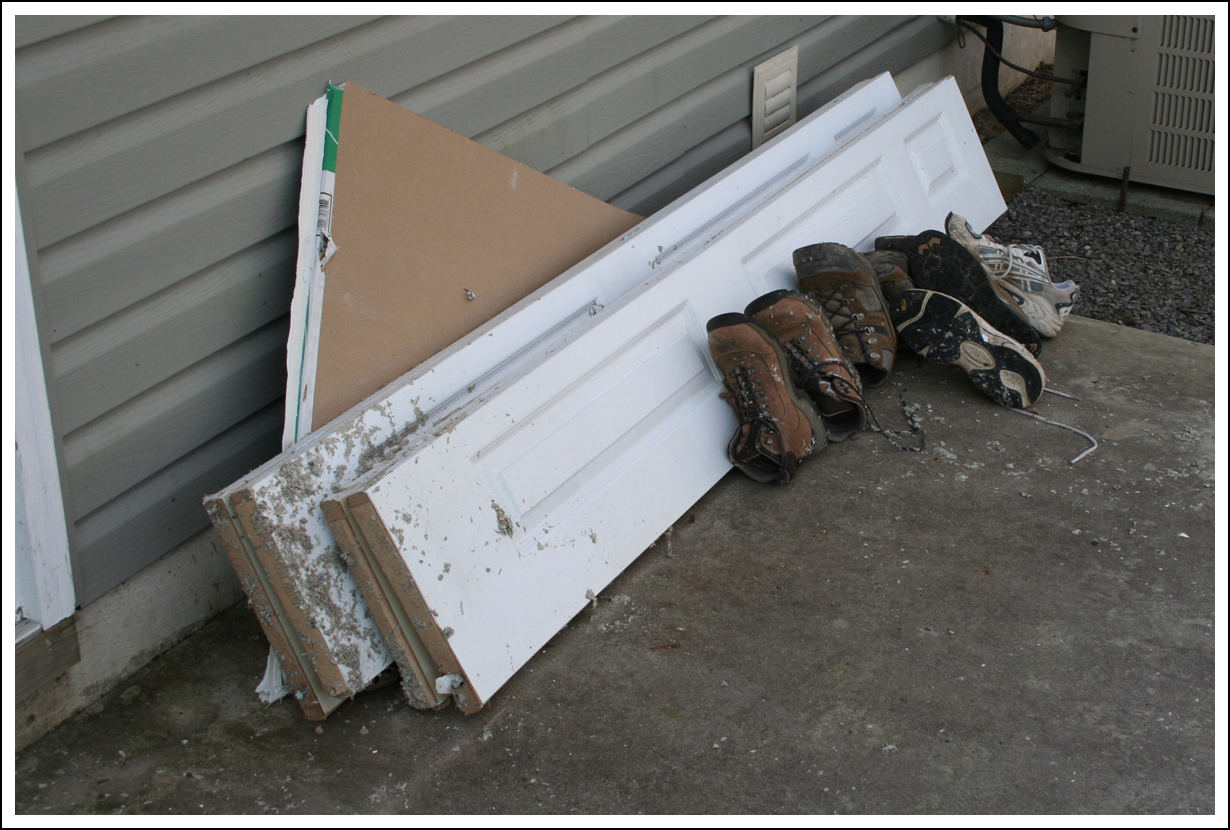
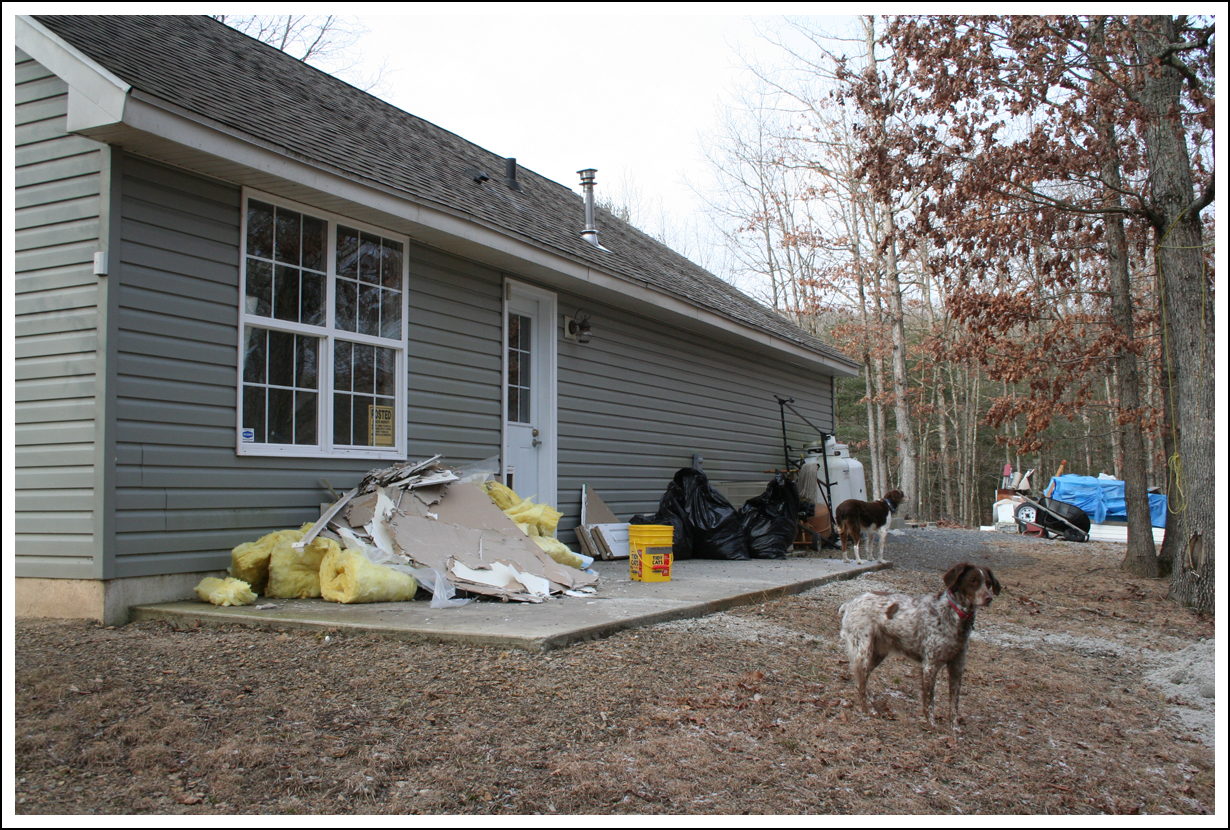
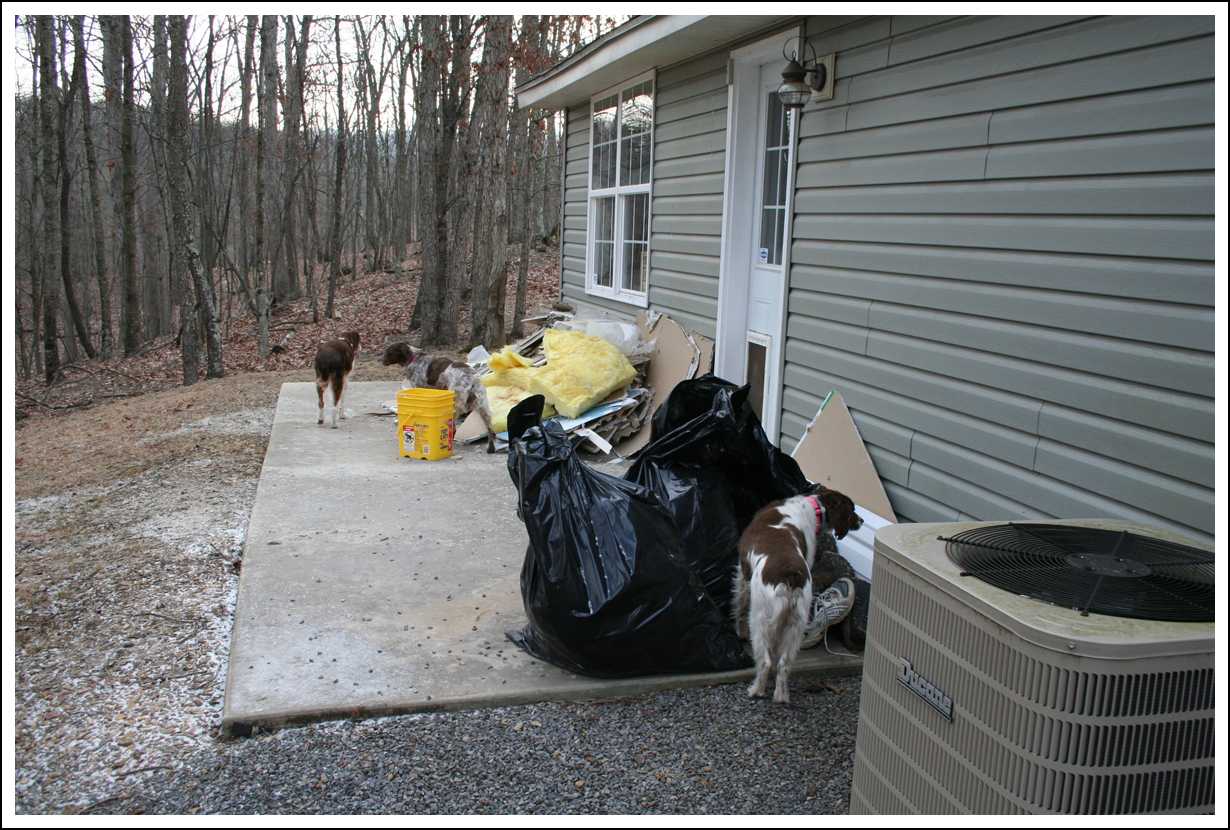
Backyard Mess
There’s some of the construction debris. The contractor will remove that along with whatever trash they have to take.
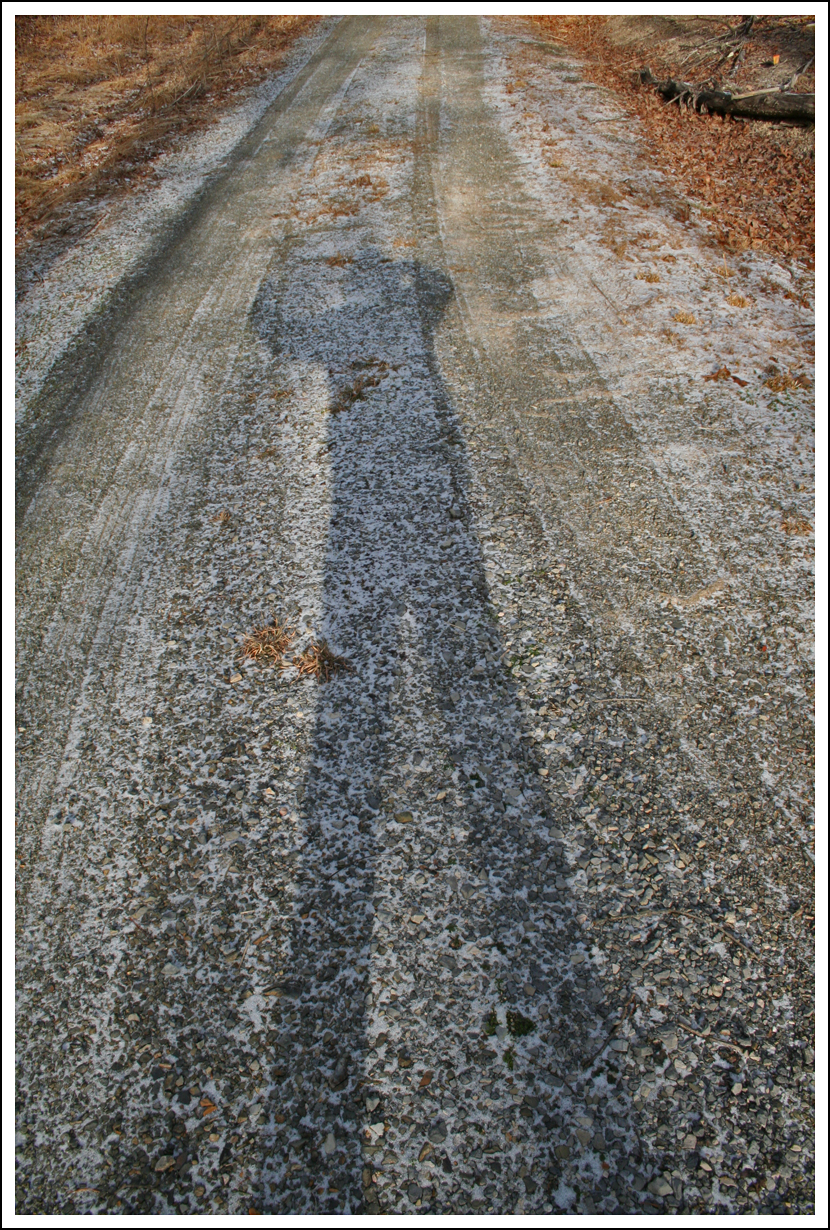
These pics were taken during my morning walk with the girls.
Only the Shadow Knows
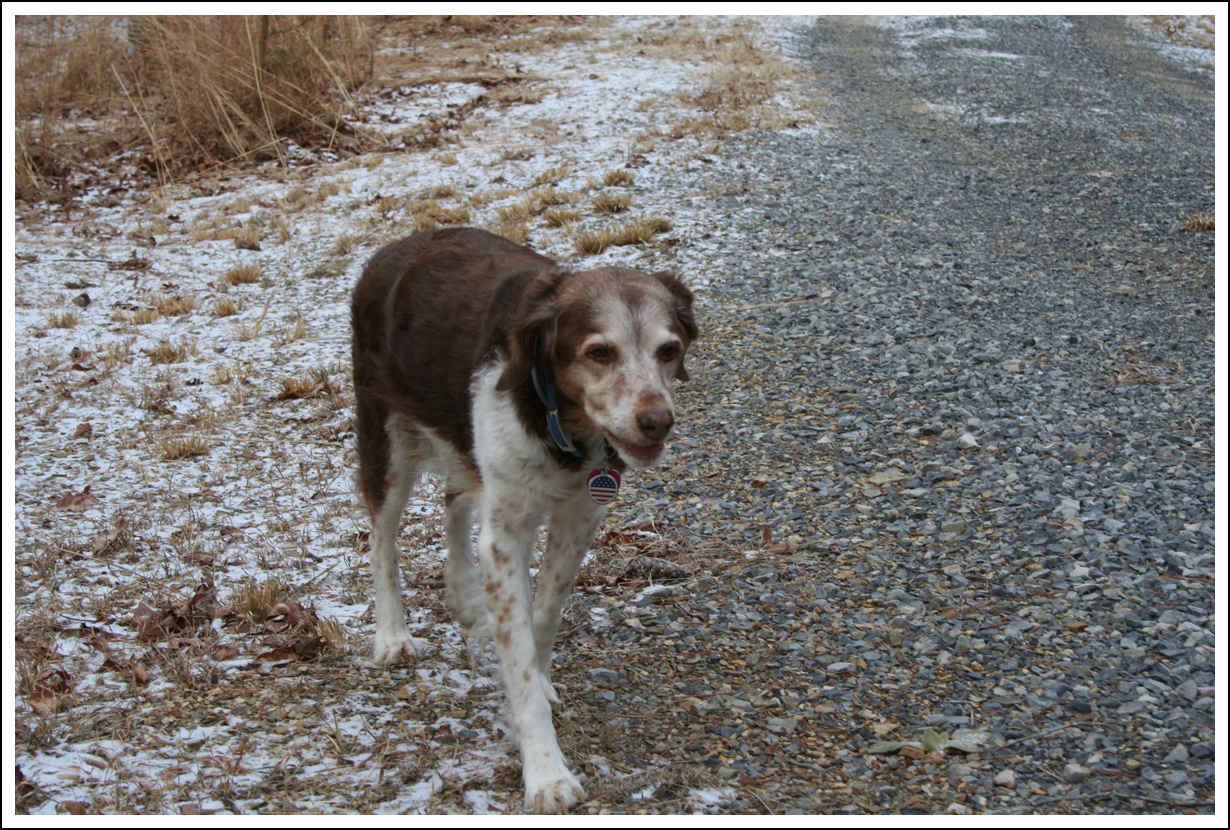
The girls were thrilled to go on our regular morning stroll.
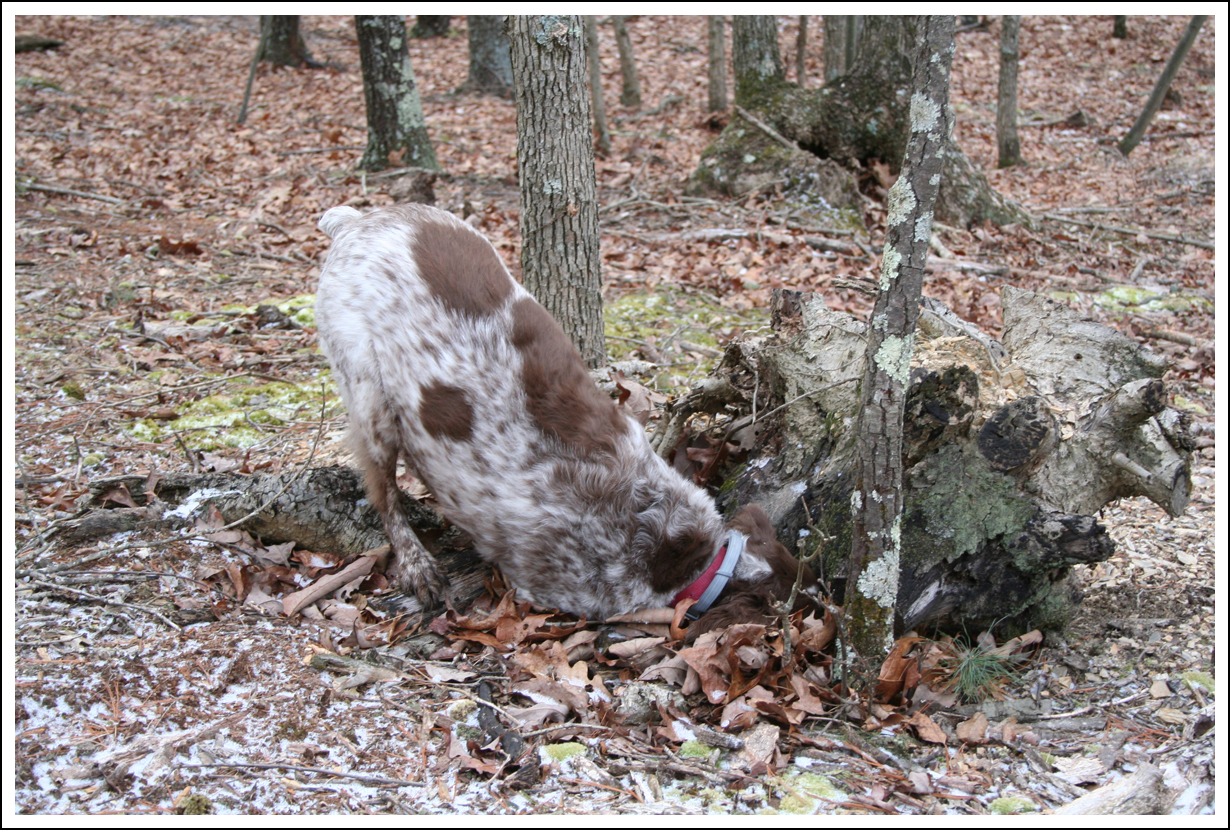
K, Hunting
Meg, Smiling
Debris from another angle.
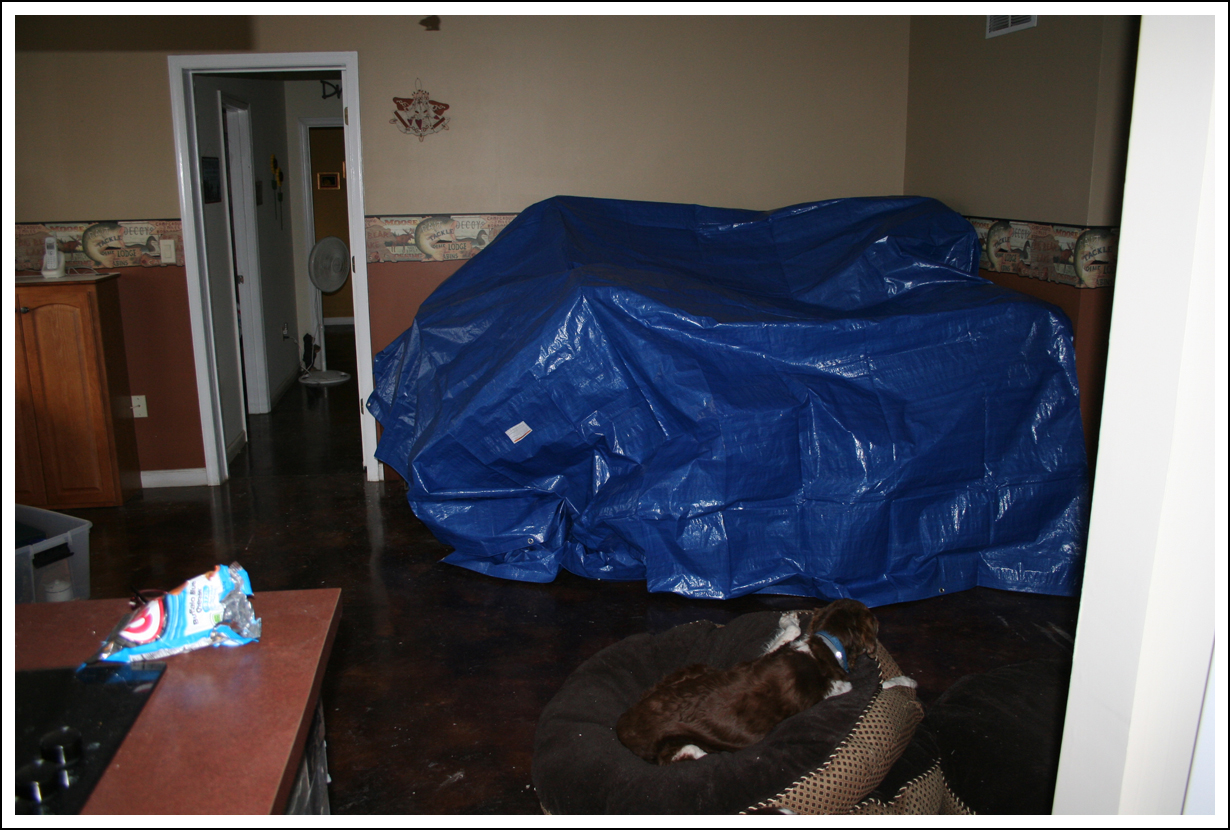
We also had to get the place ready for the repair crew, which just meant moving and covering stuff. Lots of drywall dust to come…
Covered Up
Damaged ceiling.
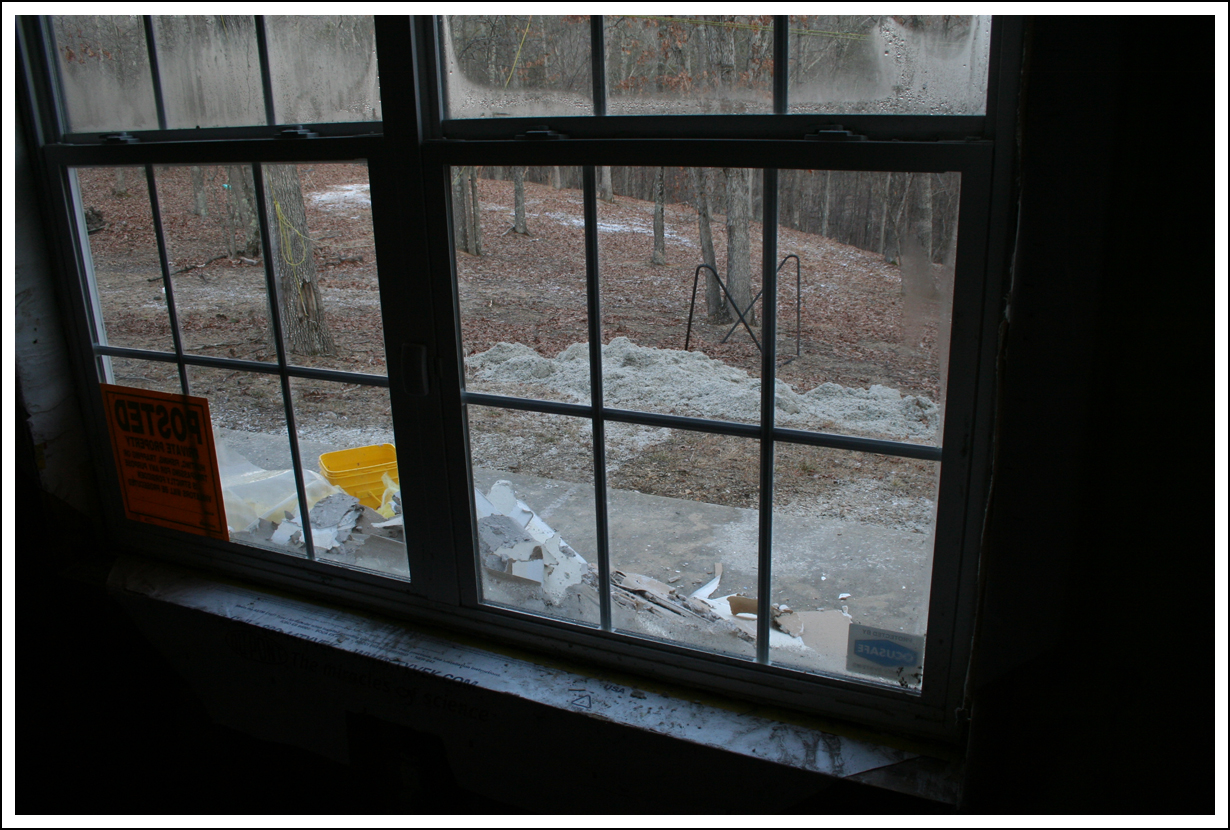
Current view from our bedroom.
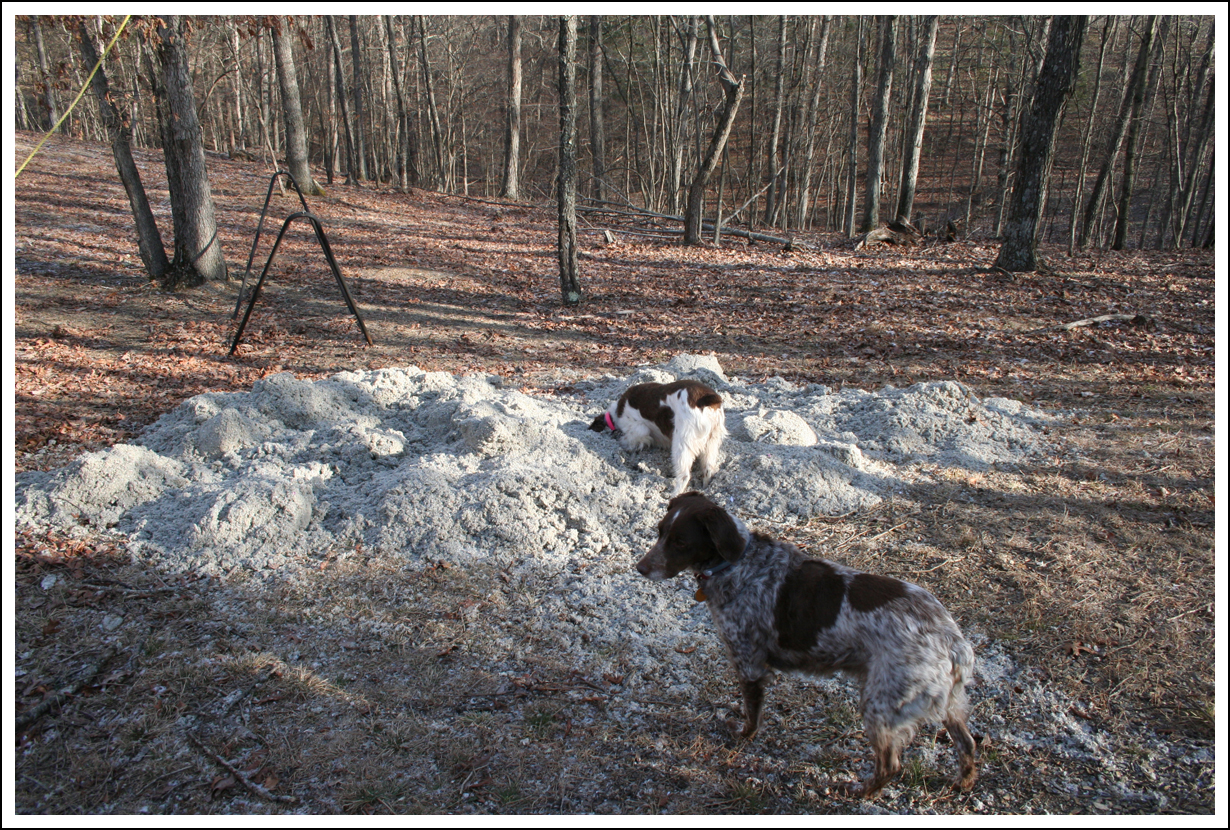
See that pile of insulation? Over time, it’ll be dispersed by the wind.
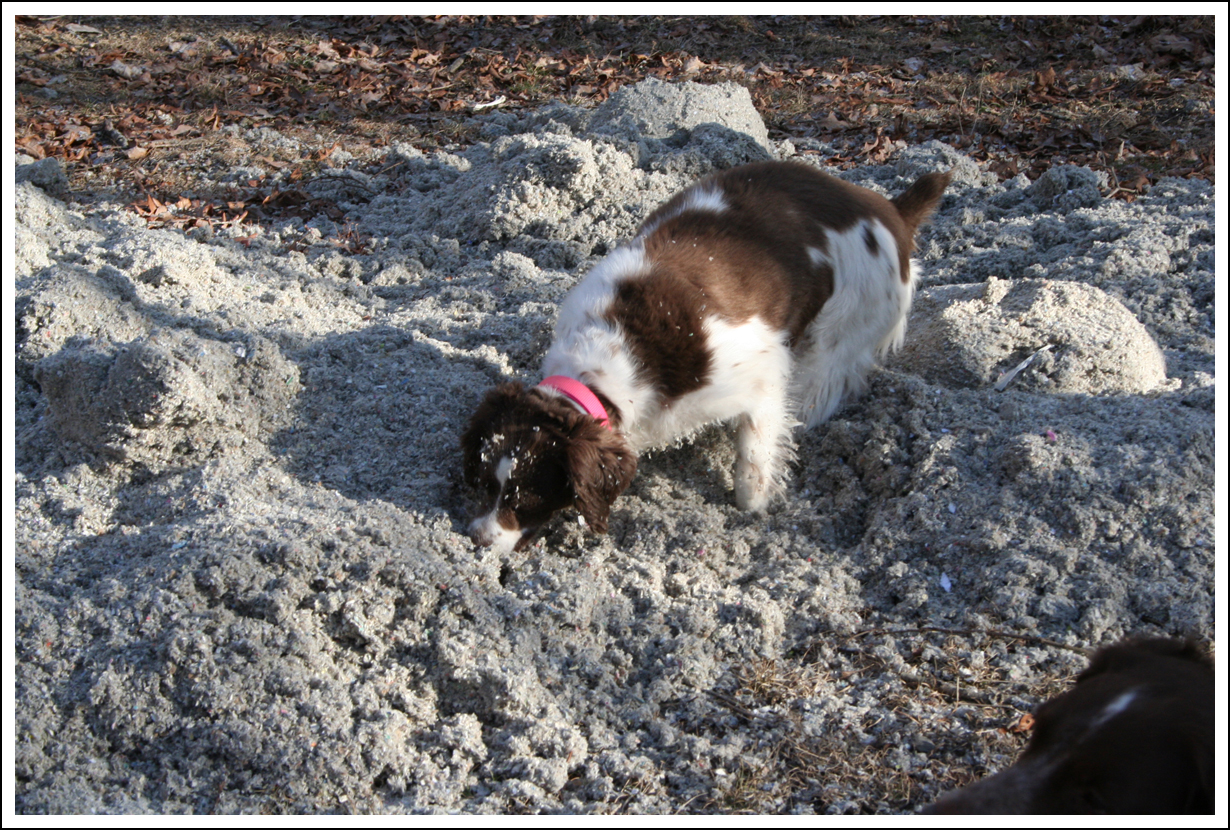
I asked Belle, nicely, to sit by the pile to give y’all a sense of scale. Apparently, she misinterpreted my request to mean…
Go DIG in the pile.
…which made for a very dusty dog.
Dusty Belle
Sigh.
It actually brushed off pretty easily.
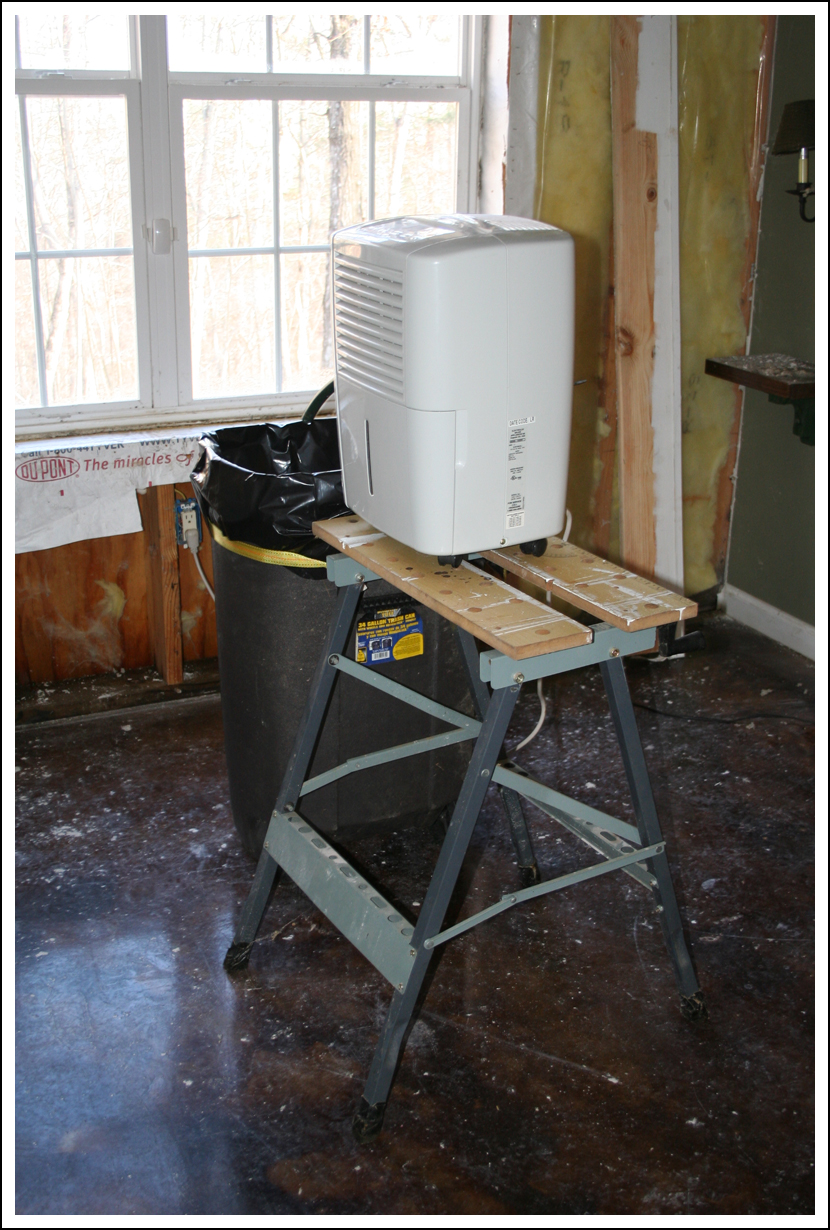
Dehumidifier
We left the dehumidifier running. It’s draining into a big trash can. We are both curious to see how much water it pulls out of the air.
And that was our WV adventure for the weekend. Poor Hubby was pooped.